
Stream 3D Video Across Your Network
Use Stream to convert video on the Windows PC and send the stereoscopic output across the local network to a compatible media player. The receiving device does not run Stream to 3D; it only needs a suitable player and support for the selected stream and 3D layout.
Choose the correct workflow: use Play when a headset application such as Virtual Desktop or Bigscreen is showing the converted Windows desktop. Use Stream when a compatible media player on another device will open the network stream. Use Convert to create a reusable file.
Tested glasses route: see Using Stream to 3D with Nreal Air / XREAL Air Glasses for a complete route from a Windows PC through VLC for Android to the original Nreal/XREAL Air, including the SBS-mode reconnection step.
Temporal or Depth Guided in Stream
Stream must sustain 2D-to-3D conversion and video encoding while the source is running. When Compare and recommend is selected, the Wizard therefore measures Stream separately from Play. It can recommend a different method, output rate or resolution for the same video because encoding adds work. A direct Temporal or Depth Guided choice skips proving and applies that method.
A successful recommendation proves the measured PC-side workload with a safety margin. It does not prove Wi-Fi, firewall access, the receiving player's decoder or the final display route. Start with HTTP and AVC, then diagnose sender, network and receiver separately. See Choosing Temporal or Depth Guided conversion.
Quick start with a video file
- Connect the Windows PC and receiving device to the same local network. Temporarily exclude VPN routing while proving the first connection.
- Choose a short, familiar 2D video file without black borders for the first test and click Stream.
- Use Compare and recommend when you want the Configuration Wizard to assess the complete Stream workload. Choose a direct method only when you intentionally want to skip proving. Keep HTTP with AVC as the simplest first receiver combination.
- Start the stream and note the URL shown by Stream to 3D.
- If you connect or disconnect Ethernet, Wi-Fi or a VPN, use the newly displayed URL because the PC address can change.
- Open that URL in a compatible media player on the receiving device.
- Select the same Side-by-Side or Top-and-Bottom layout in the receiving player that Stream to 3D is producing.
Testing the URL in VLC on the source PC confirms that the stream is being produced, but it does not prove that Windows Firewall permits another LAN device to connect. If local playback works but the receiving device cannot connect, follow the firewall and network checks.
If the 3D views do not align: select the matching layout manually in the receiving player and use its default or best-fit aspect ratio. For top-and-bottom source borders, try a supported SBS output; for left-and-right borders or padded 4:3 material, try TB/OU. Also check the streaming device's display calibration and the TV or projector's overscan or 1:1 pixel setting. Establish a clean stereo image before changing depth settings. See Player, streaming-device and display scaling.
Need help? Start with User FAQ & Troubleshooting. See Logs & Diagnostics, Error Codes (LVE0xx), and Licensing & Activation.
If the stream does not play: start with Streaming first checks to verify local playback, the Wi-Fi or LAN connection, VPN routing and firewall access.
Release 6.1 optional NVIDIA acceleration
On a compatible PC, optional NVIDIA acceleration can improve Depth Guided Stream performance. The Stream comparison still measures the complete PC-side workload, but it cannot prove the network or receiving player. Video encoding acceleration remains a separate setting. See the NVIDIA acceleration guide.
Stream a 2D video in 3D
Stream to 3D must run on a Windows PC, but the receiving device only needs a compatible network media player. The receiver can be a headset, phone, tablet, television, SteamOS device or another computer.
This mode is accessed via the "Stream" menu button. Stream to 3D includes first-class support for video streaming, which means that you can stream your real-time converted 2D to 3D videos to a host of devices including your phone, tablet, laptop, Smart TV or Projector (both 3D and 2D devices are supported), as well as stream directly to your VR headset.
To stream a video and convert it to 3D as it is sent, choose Stream and select the file. With the Wizard On, choose Compare and recommend, Use Temporal, or Use Depth Guided. Auto reuses the saved Stream policy independently from Play: Compare runs the performance comparison, while a saved direct method skips proving. Off uses the current manual settings from Settings directly without proving.
The video below provides a comprehensive set of streaming examples to a range of devices and media players using the various supported protocols. Note that streaming with subtitles is only supported over the HTTP Streaming protocol:
Settings → Streaming
HTTP is the recommended default. RTSP, RTP and UDP are also available through Settings > Streaming for receiving players or local-network workflows that require them.
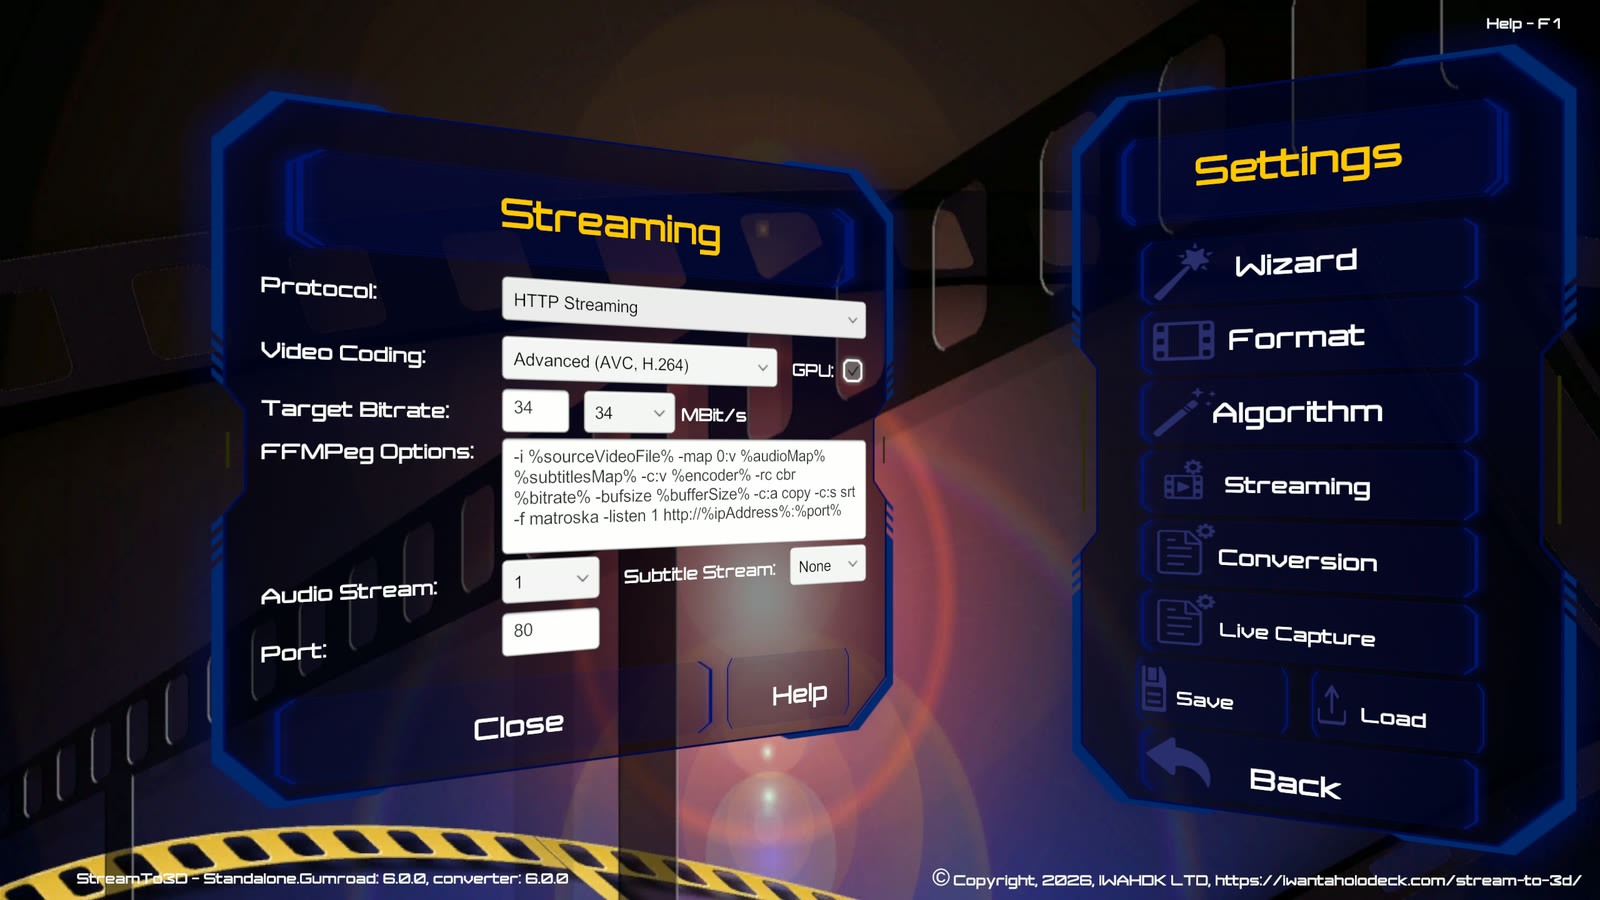
Choose a streaming protocol
| Protocol | Best for | Main consideration |
|---|---|---|
| HTTP | The broadest player compatibility and the simplest first setup. | Recommended default. The stream waits for the receiving player to connect, and subtitle selection is available. |
| RTSP | Players or established workflows that specifically require RTSP. | Requires MediaMTX to be running while Stream to 3D streams. |
| RTP or UDP | Specialist local-network receivers with known protocol support. | Player and network support varies. Streaming starts immediately rather than waiting for a client. |
Start with HTTP unless the receiving player requires another protocol. See the detailed protocol comparison when choosing an alternative.
RTSP requires MediaMTX. Download the current Windows release and run mediamtx.exe while Stream to 3D is streaming. The default MediaMTX configuration is sufficient for the standard Stream to 3D RTSP settings.
Audio-stream selection is available for every protocol by choosing the required stream index. Subtitle streaming is available only with HTTP, again using the required stream index.
Advanced video-coding, hardware-acceleration and FFmpeg options are covered in Streaming and Conversion Options. Settings > Streaming also controls the port for each protocol. The standard HTTP firewall setup covers port 80. A custom HTTP port requires a matching local-subnet inbound rule.
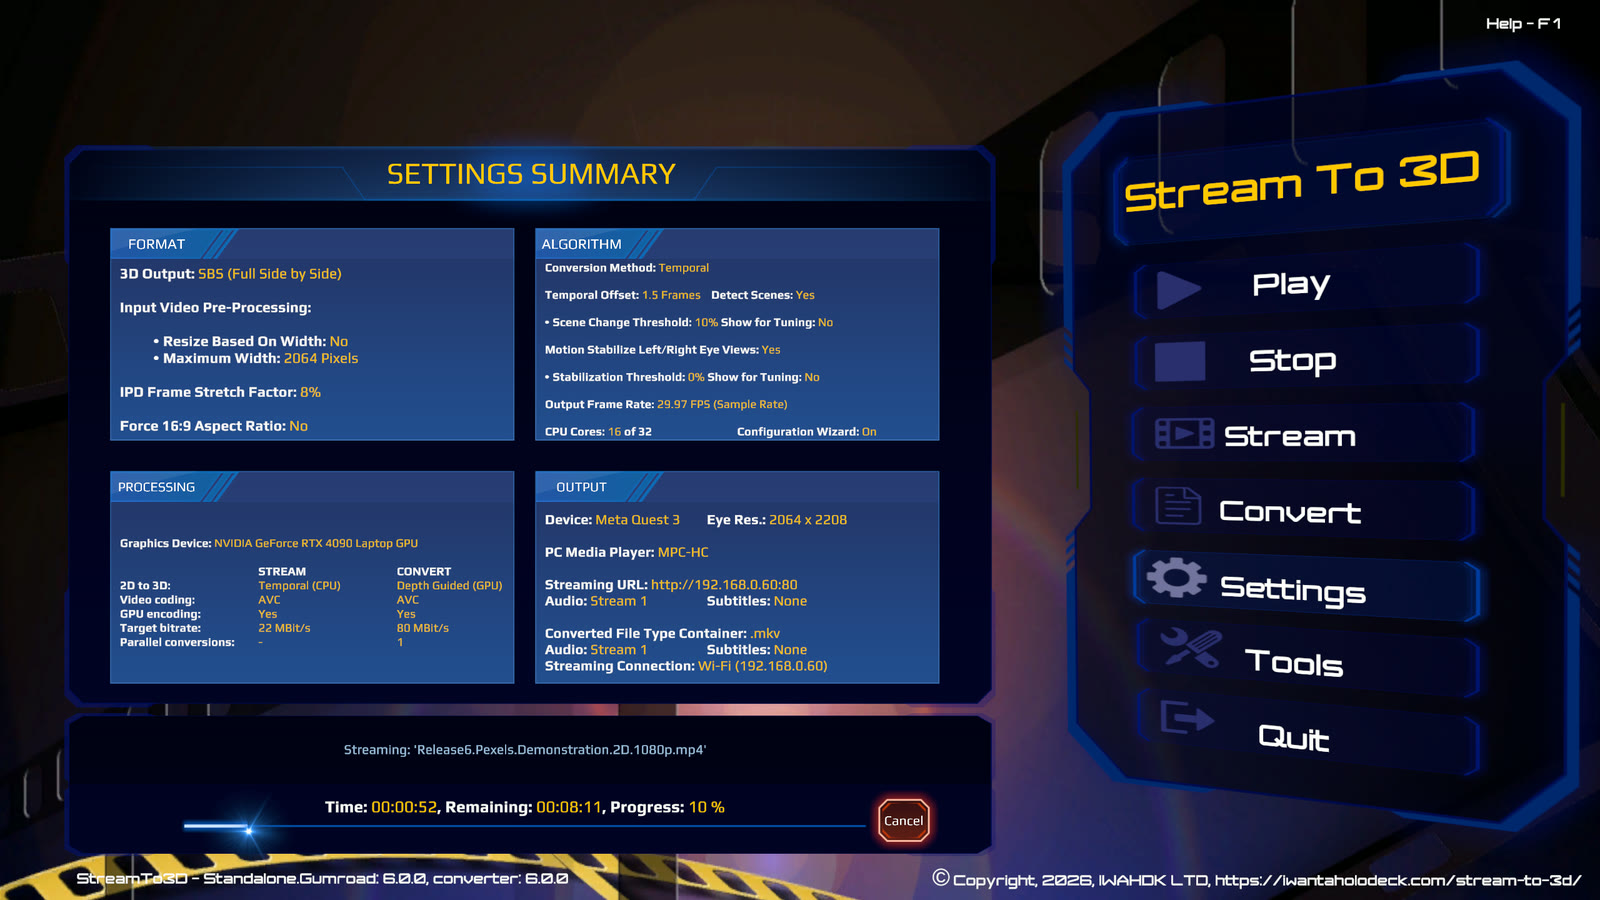
The Output section of the Settings Summary page shows the full URL for the selected protocol, including the Windows PC address. Open this URL in the receiving media player:
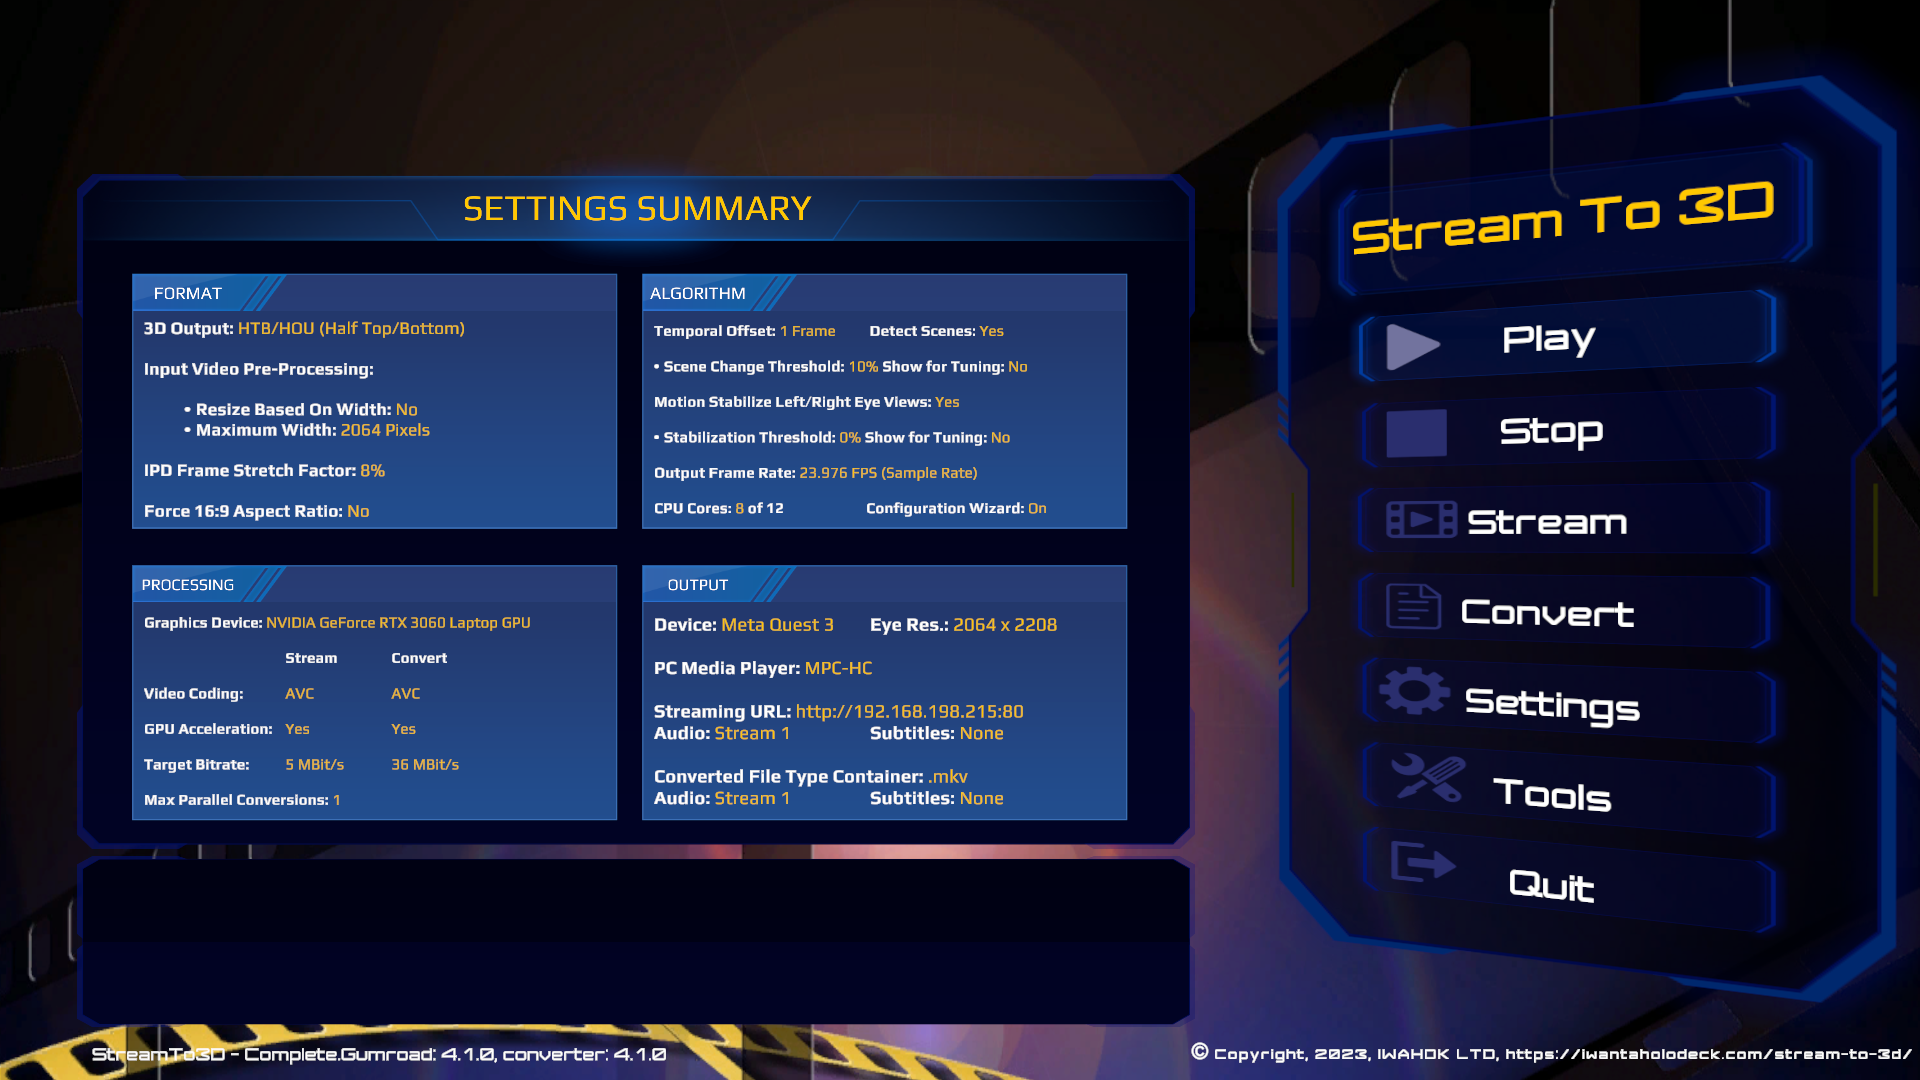
Example media players that support streaming include; VLC for Desktop and PotPlayer on the PC, the Pigasus VR Media player (on an Oculus Quest 2 or later headset) and VLC for Fire (for a Fire TV Stick) as well as Kodi. Examples for these media players are provided below, for more comprehensive coverage, see the video above.
Start the stream and connect a player
To initiate streaming, click the Stream button. You will be prompted to select either a 2D video to convert to 3D and stream, or if the video is already in 3D format, as determined by the same file name pattern check as used for playback and conversion, then the video will be streamed only. You can also provide a .txt file containing one full video path per line. Stream to 3D processes the list in order for every supported streaming protocol, including HTTP:
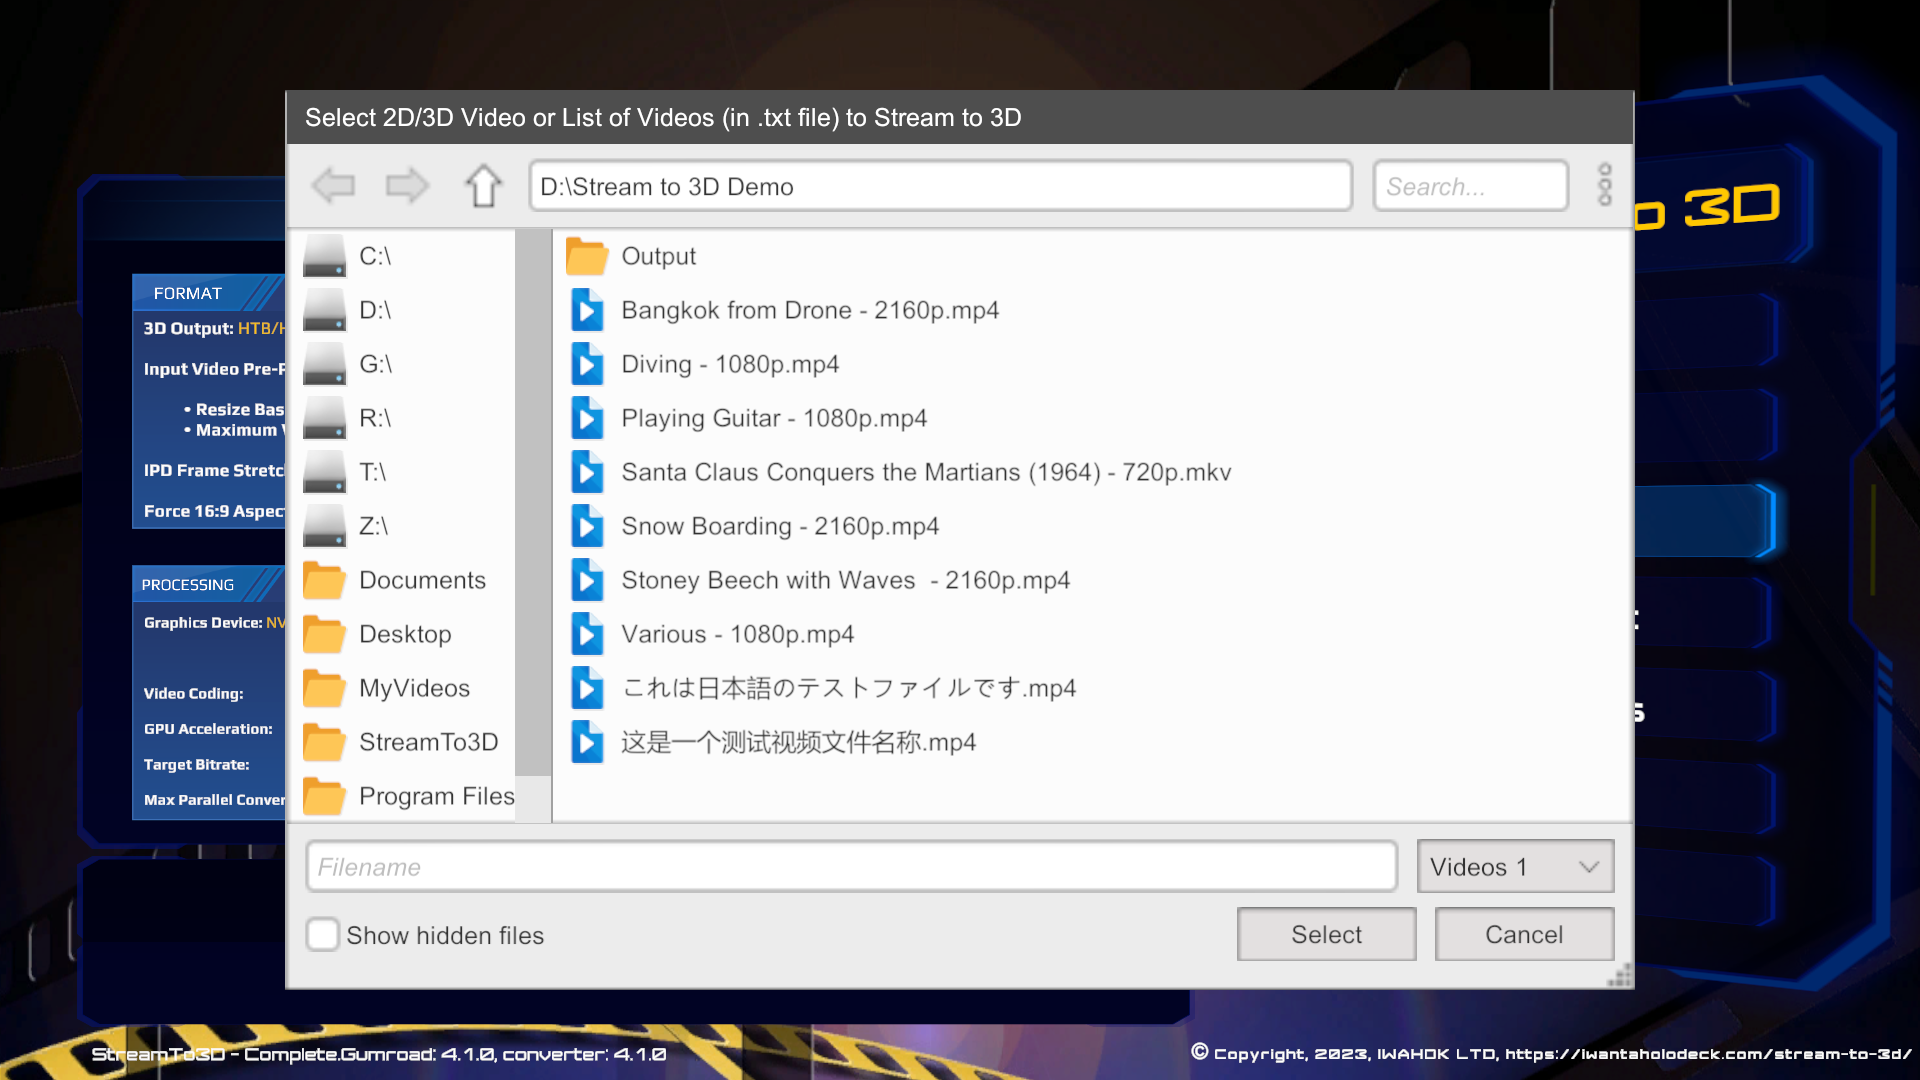
For HTTP Streaming, Stream to 3D will wait until the client opens the stream before streaming the video, for the other protocols Stream to 3D will start streaming the video(s) immediately and the media player will pick up the video stream from the point it has reached when opened by the player, rather than the start:
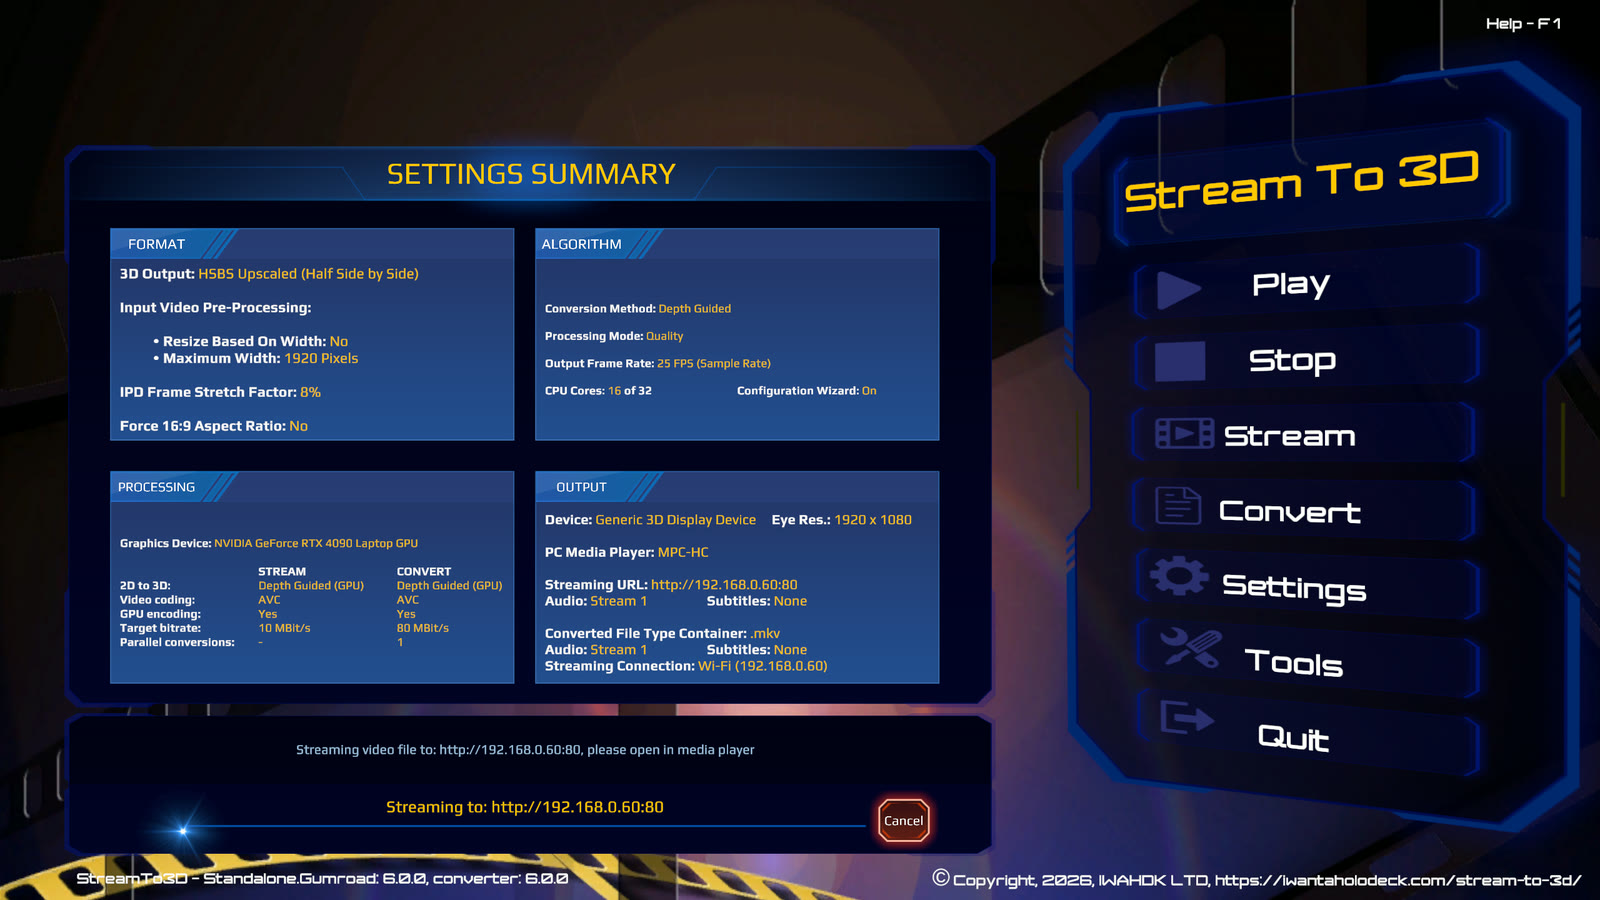
As the video is streamed, you will be shown a progress bar detailing the time taken to convert and stream the video, with an estimate of the time remaining to complete, the percentage progress and the name of the file being streamed. The streaming process attempts to stream the video at the frame rate of the converted source, not faster. If your system cannot handle converting and streaming the video at the required frame rate, then playback may be interrupted or intermittent. The Cancel button presented will allow you to cancel a video that is in the process of being streamed:
VLC for Desktop
In VLC, choose Media > Open Network Stream. On the Network tab, enter the complete URL shown by Stream to 3D, including the protocol and port, then select Play.
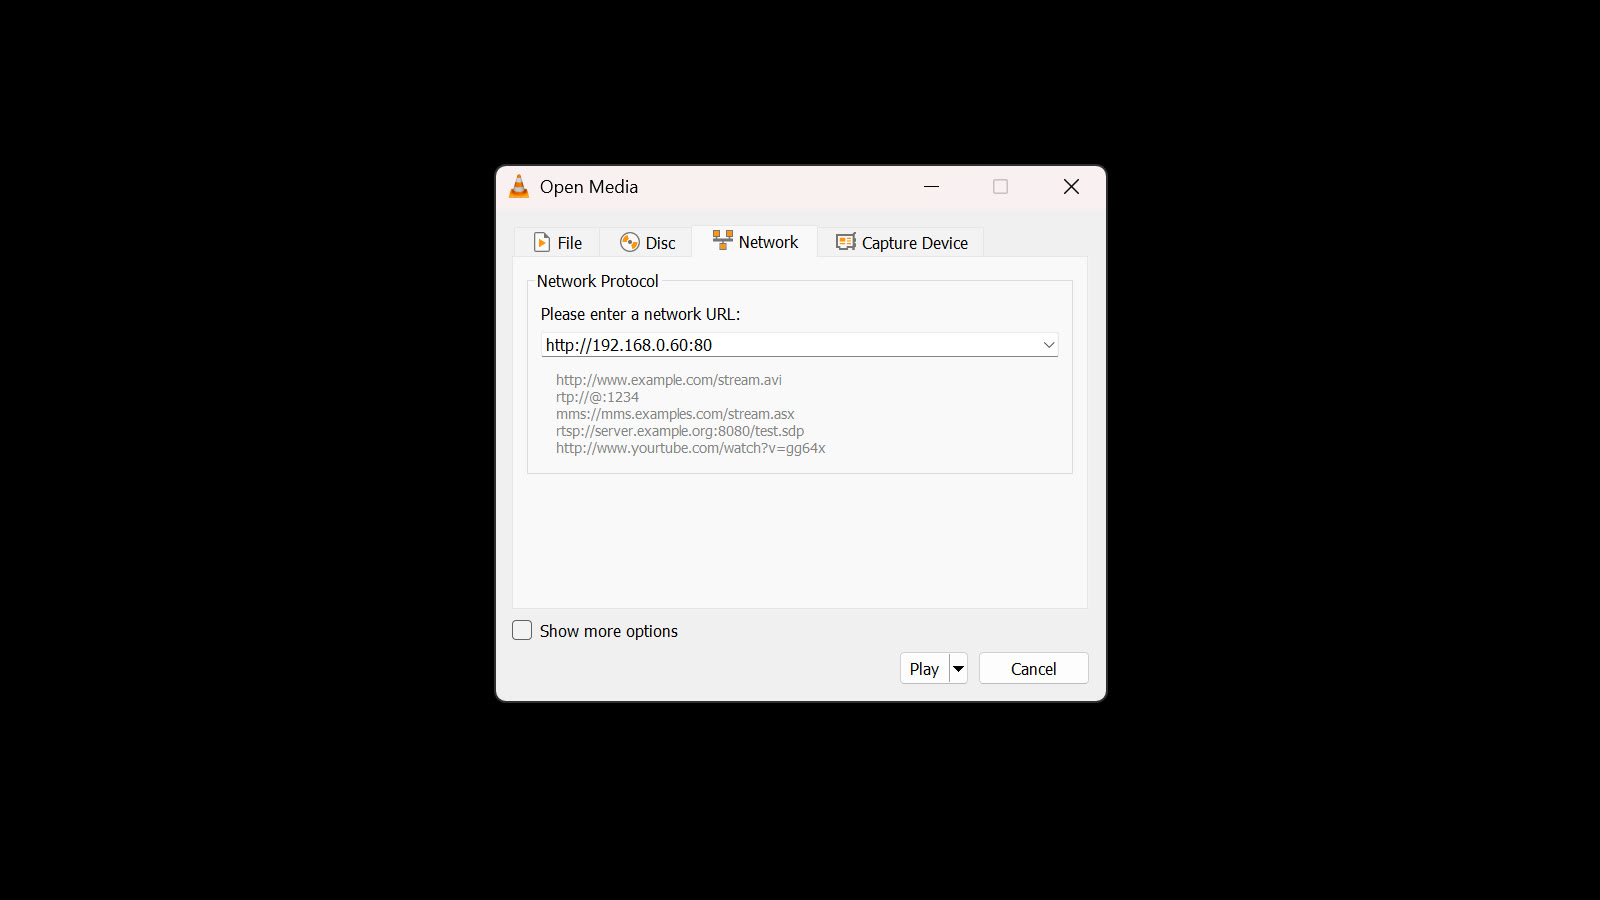
VLC remembers previously used URLs. If the PC changes network connection or address, select or enter the current URL shown by Stream to 3D. Start with HTTP and AVC unless the receiving player has a proved reason to use another combination.
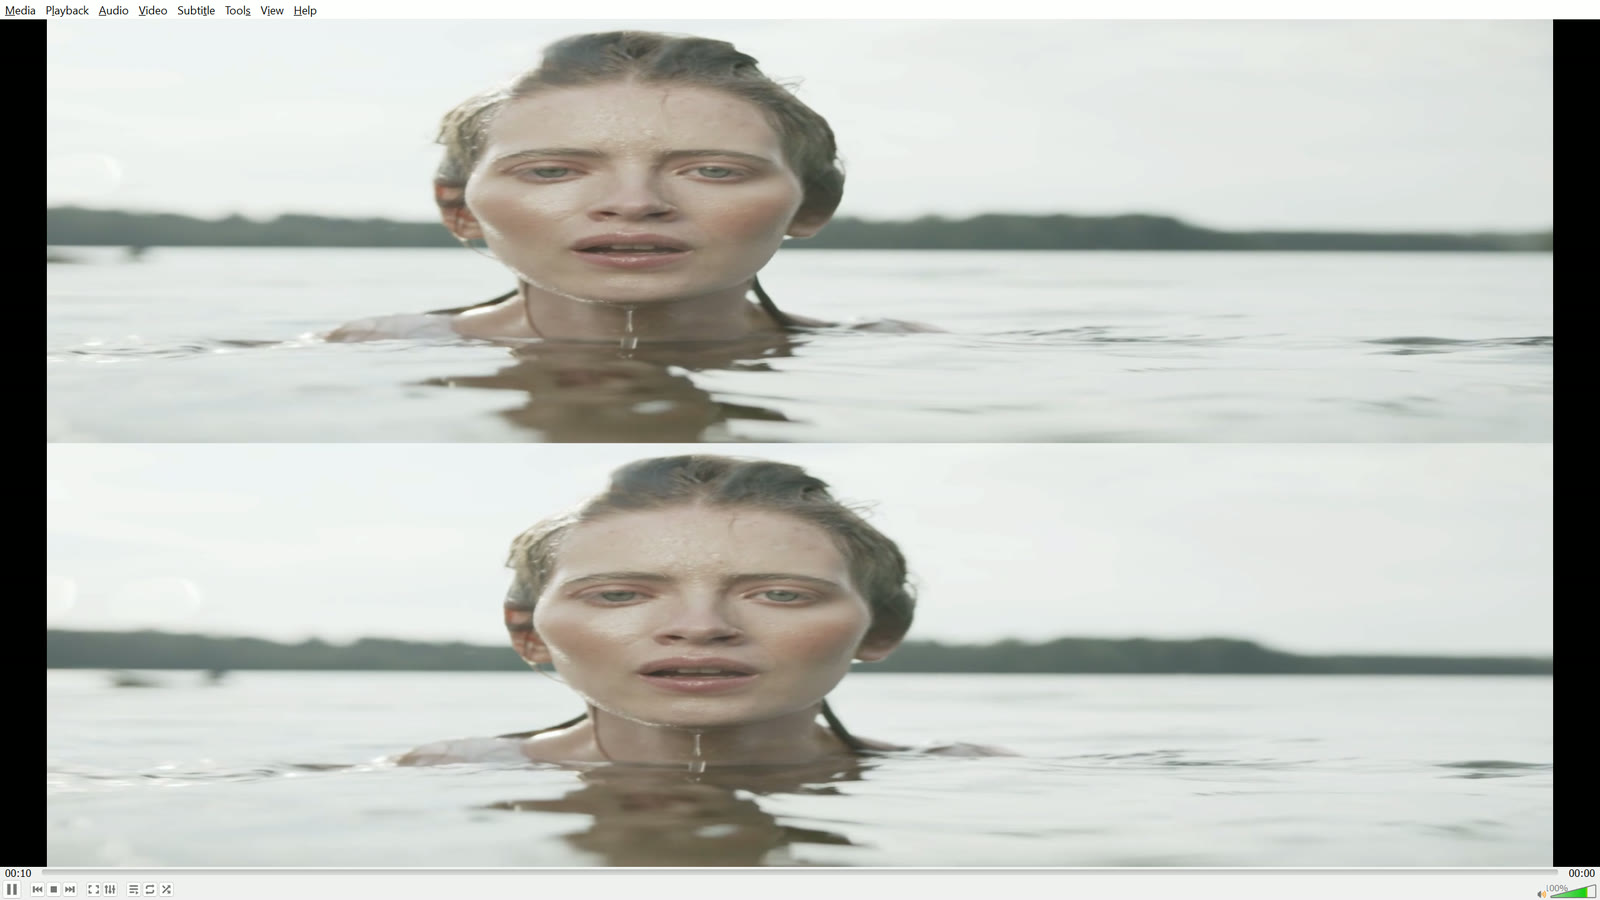
The screen shot below shows the streamed video being played in VLC:
Pigasus VR Media Player on Meta Quest 3
This Release 6 example streams the licensed Pexels demonstration reel over HTTP to Pigasus on a Meta Quest 3. The Windows PC and headset are connected to the same local network.
1. Use the method that meets the Stream target
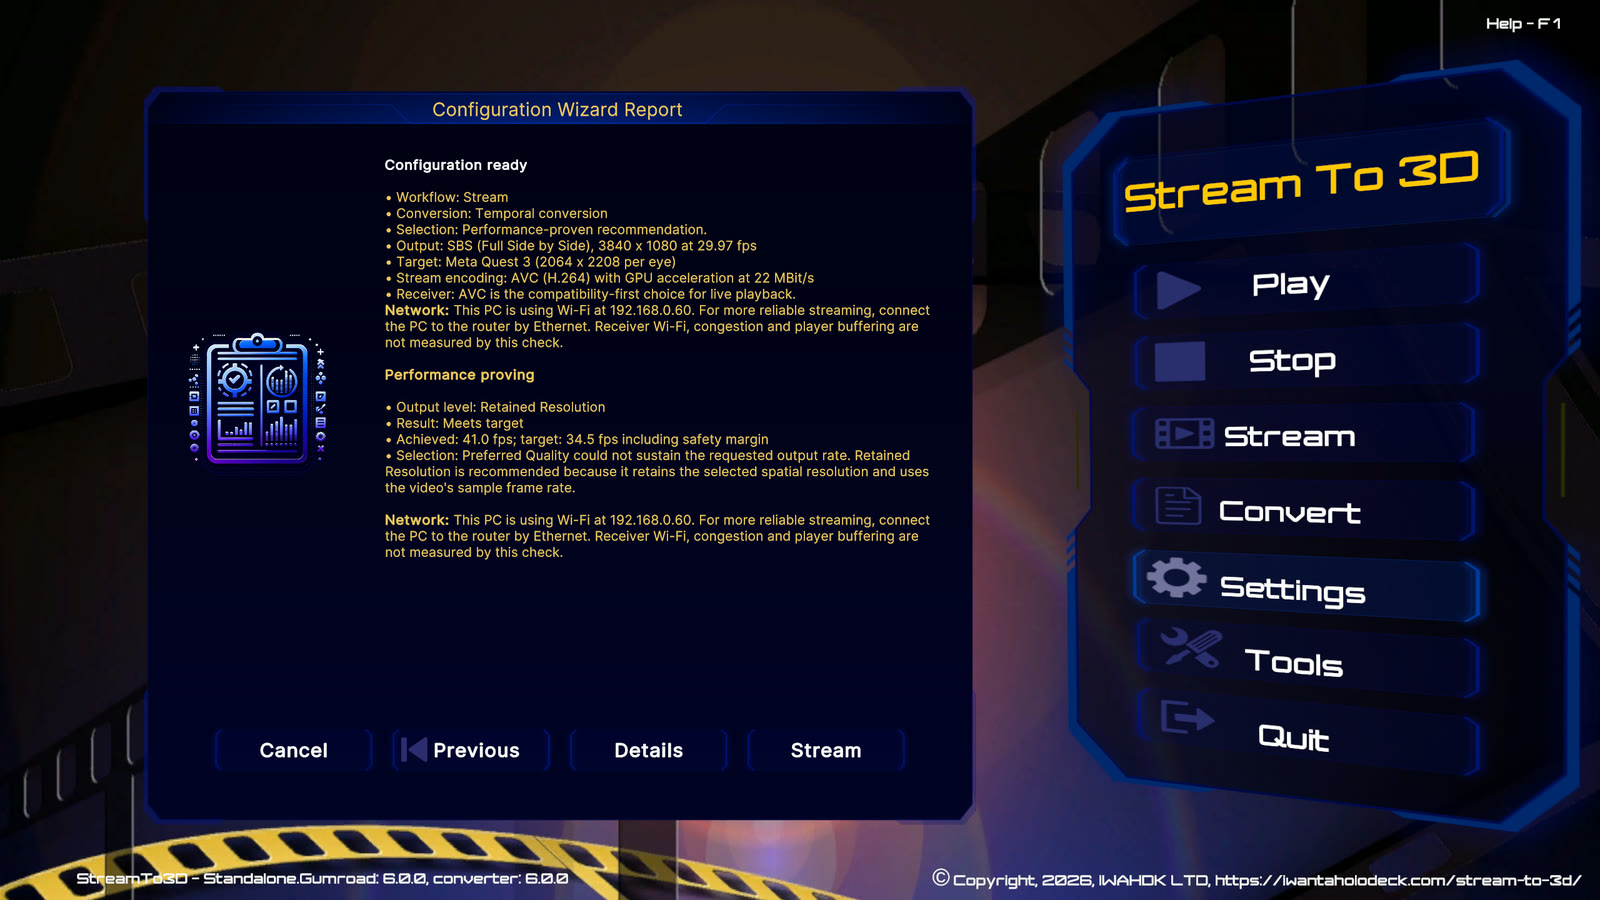
For this source, the Wizard measured Temporal at 41.0 fps against a 34.5 fps target including its safety margin. Depth Guided Performance reached 17.3 fps and was below the real-time target, so Temporal was the correct recommendation. This is intended behavior: Temporal and Depth Guided are complementary methods, and the best real-time choice can differ by source, workflow and PC.
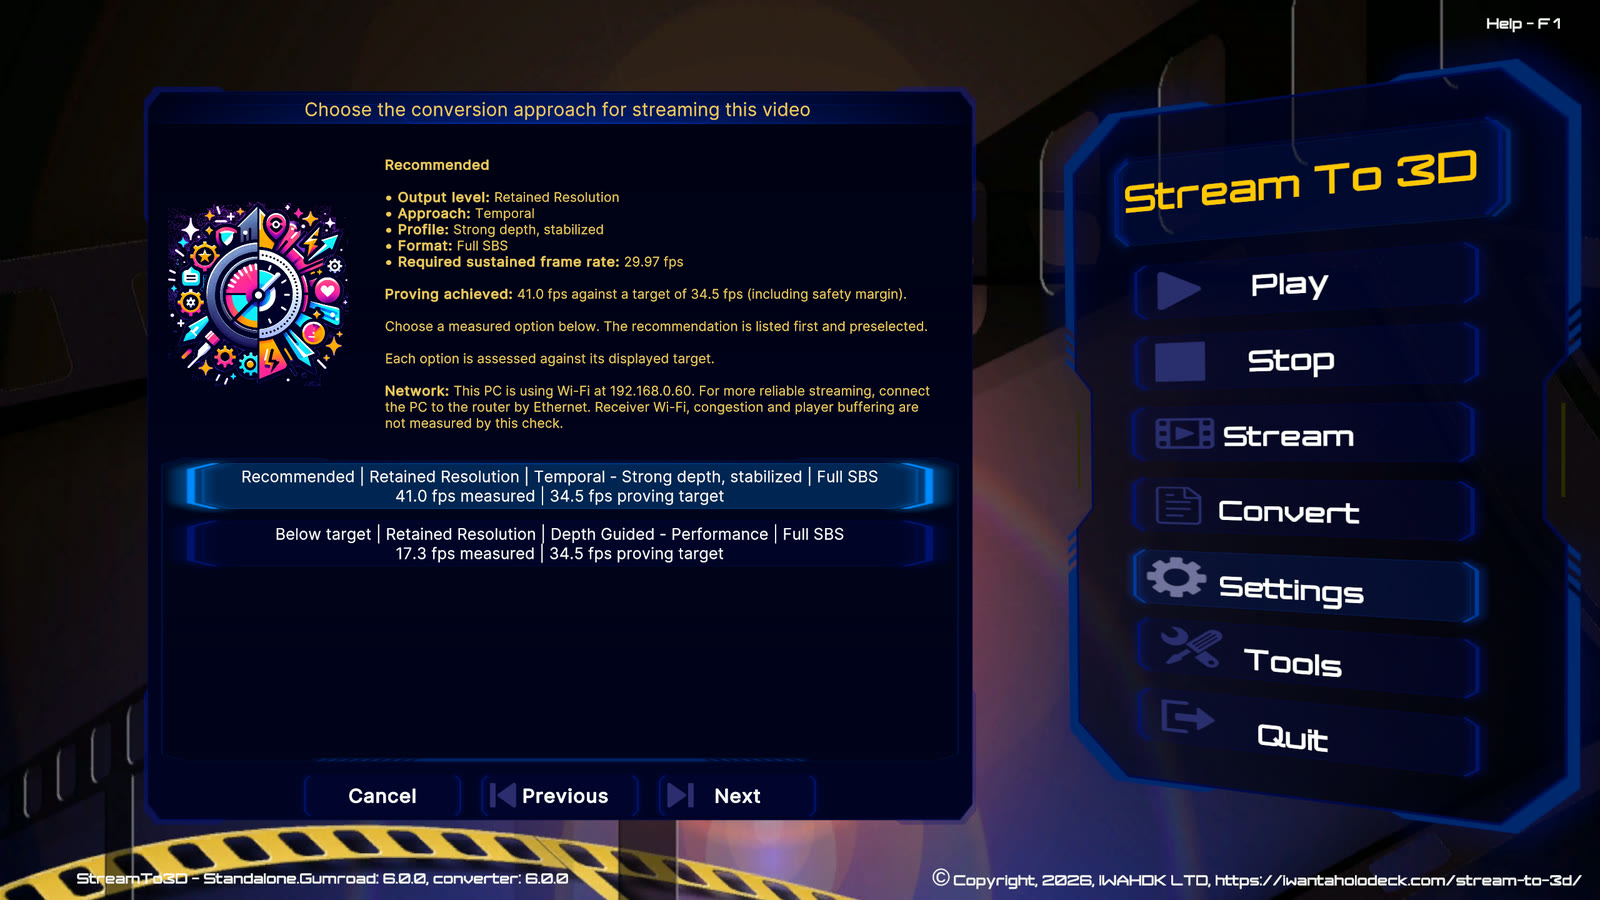
The resulting report records the selected method, output layout, resolution, frame rate and encoding settings:
2. Start the HTTP stream
Start Stream to 3D and keep the displayed URL available. The active Stream state shown earlier on this page records Temporal conversion, Full SBS output, AVC encoding and the private-LAN HTTP URL used for this example.
3. Open the URL in Pigasus
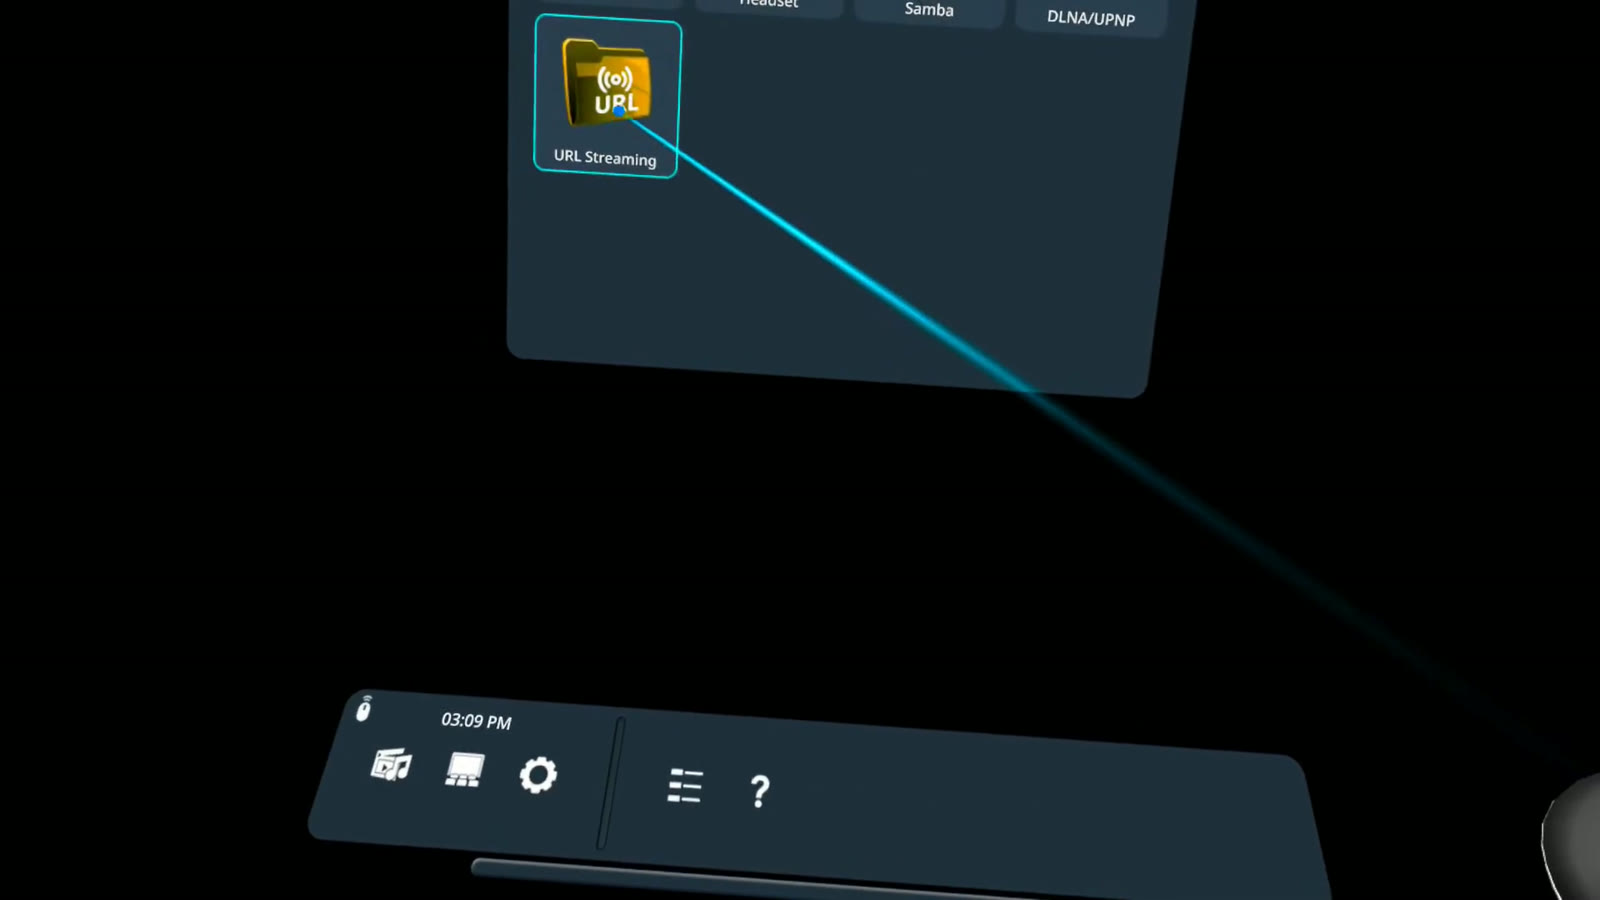
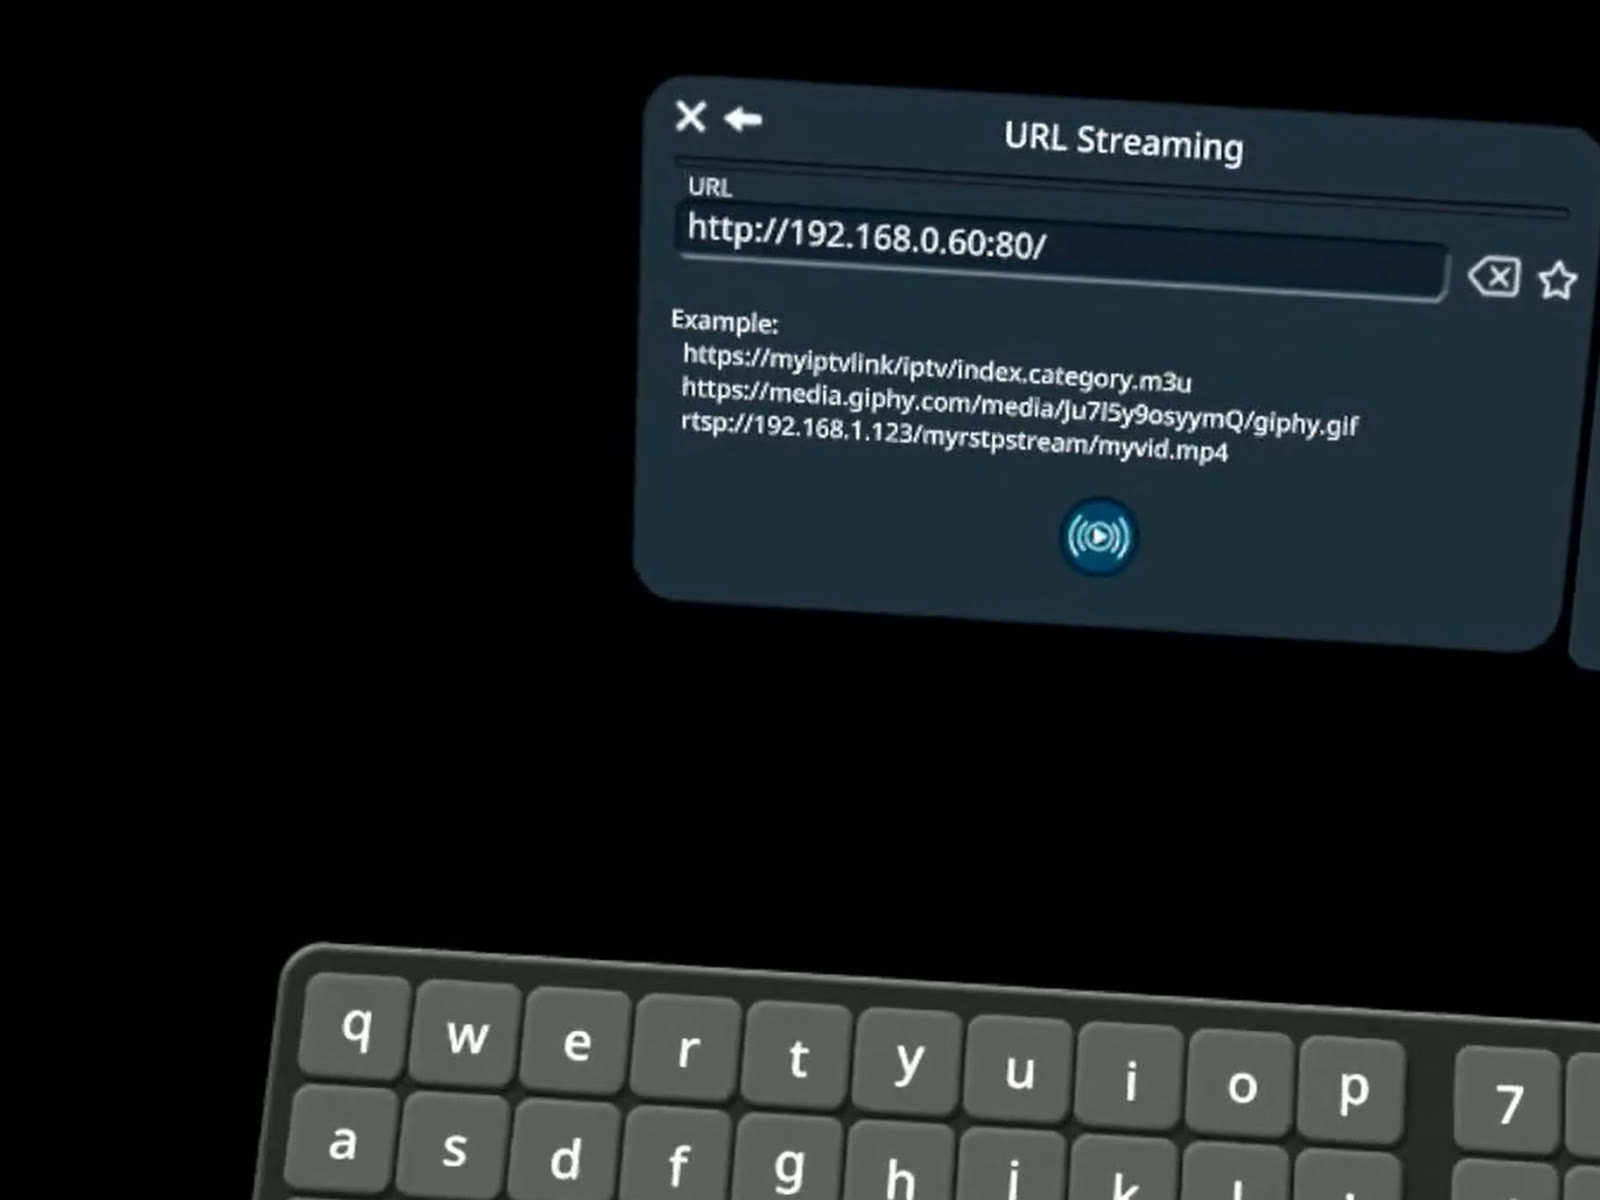
In Pigasus, choose URL Streaming, enter the complete URL shown by Stream to 3D and open it. If the PC changes between Wi-Fi and Ethernet, use the newly displayed URL.
4. Match the stereo layout
When playback starts, select Stereo: Full Side by Side in Pigasus because that is the layout recorded in the Wizard report. Use the corresponding Half SBS or Over Under option when Stream to 3D reports a different layout.
The headset recording demonstrates the complete sender, network-player and stereo-mode workflow. Like any flat recording, it cannot reproduce the depth perceived separately by the viewer's left and right eyes inside the headset.
Kodi Media Player
Kodi essentially requires the creation of a ".strm" file containing the Stream to 3D streaming URL. Opening the ".strm" file with Kodi will then cause Kodi to initiate streaming from Stream to 3D, provided Stream to 3D is up and running and ready to stream. For more details, see Kodi setup for Stream to 3D here. The use of Kodi for playback, via streaming or indeed from a converted file, on a 3D Projector or TV (via installation on a Fire TV Stick for example), is a very effective solution for 3D Playback.
VLC for Fire (with 3D TV)
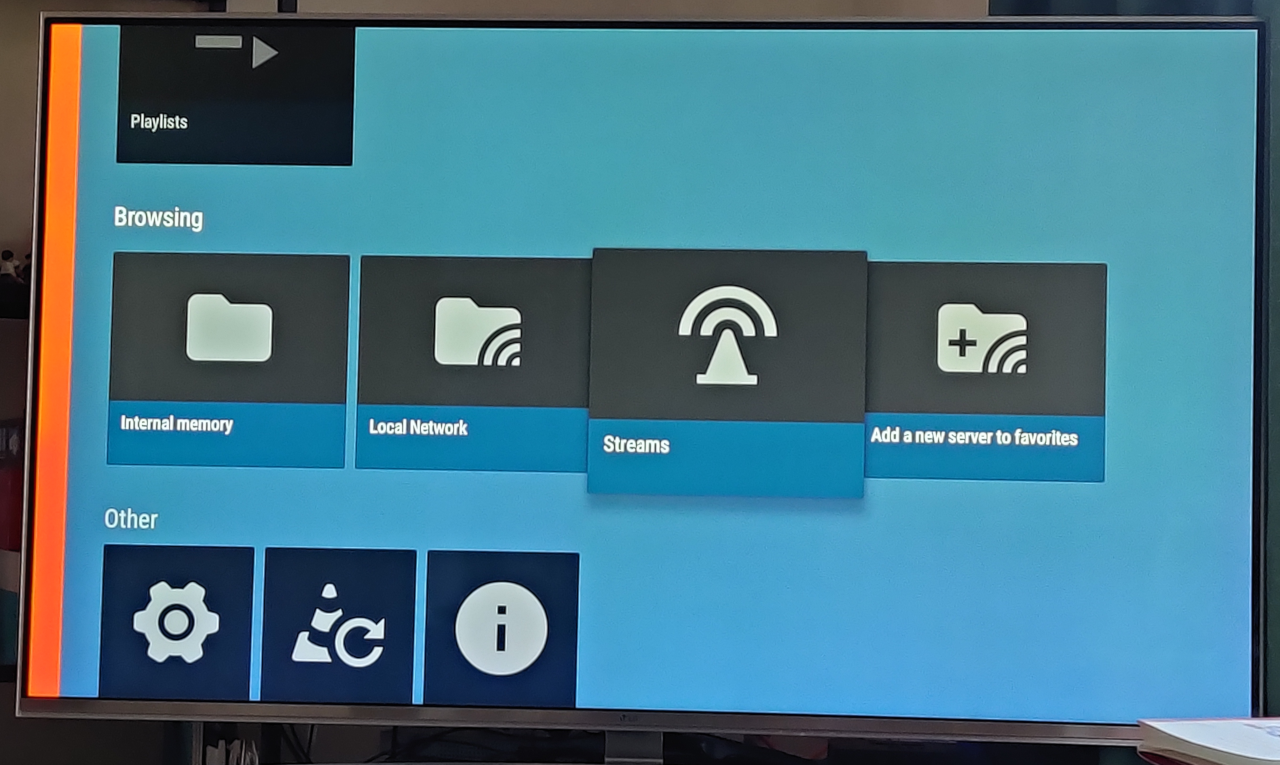
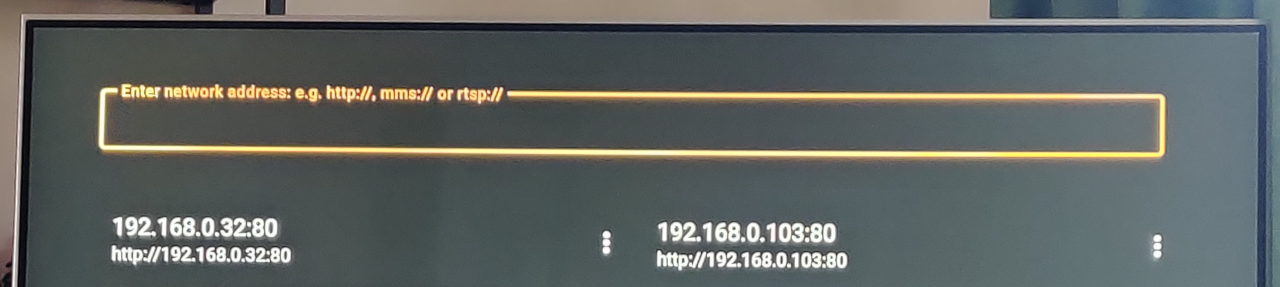
The example below uses the VLC for Fire app, on a 4K Fire TV stick plugged into a 4K LG passive 3D TV. Begin with the Streams option in the VLC for Fire app. The VLC for Fire app supports both HTTP and RTSP streaming:
On the next screen either enter the HTTP (or RTSP) streaming URL or select from a previously used URL:
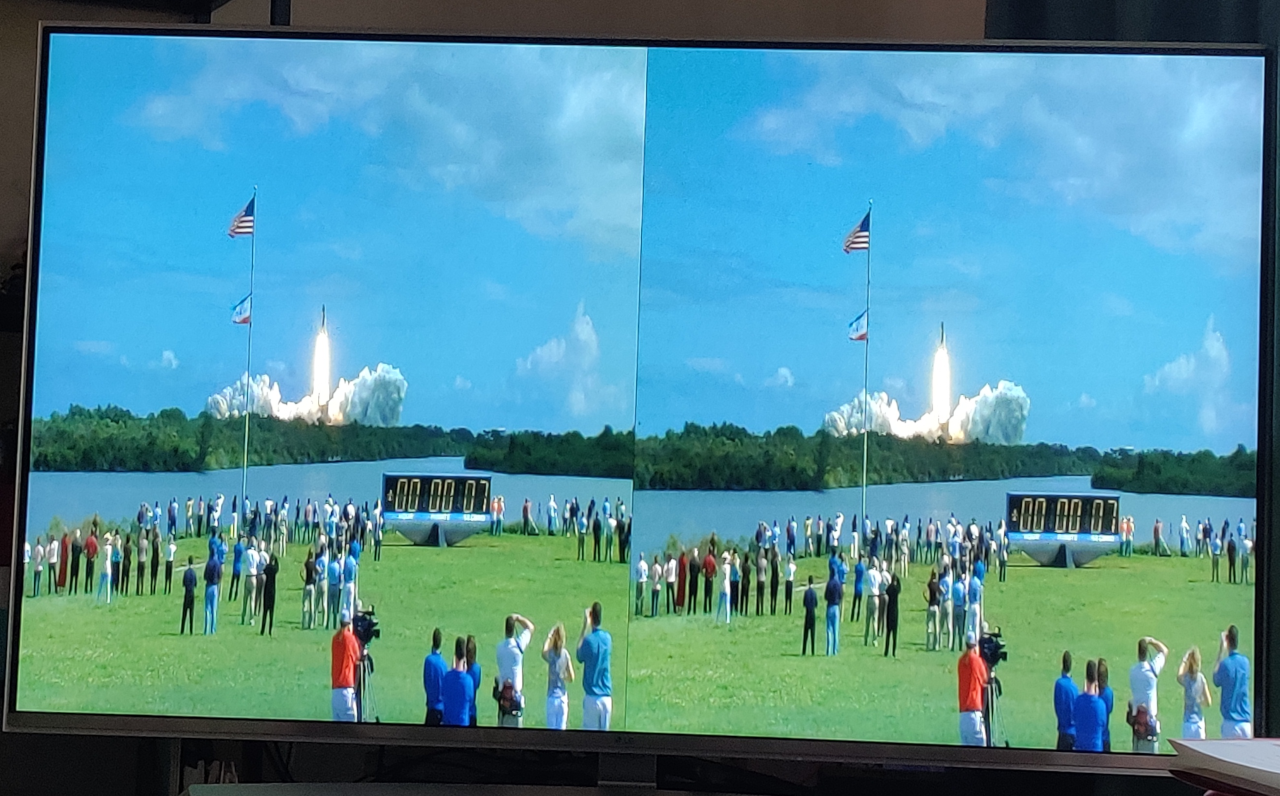
The video will then play back in a 3D format on the TV (in this example). If you have a 2D rather than a 3D TV, you can experiment with the Anaglyph 3D output format, as this is viewable with Red/Cyan glasses on a 2D device:
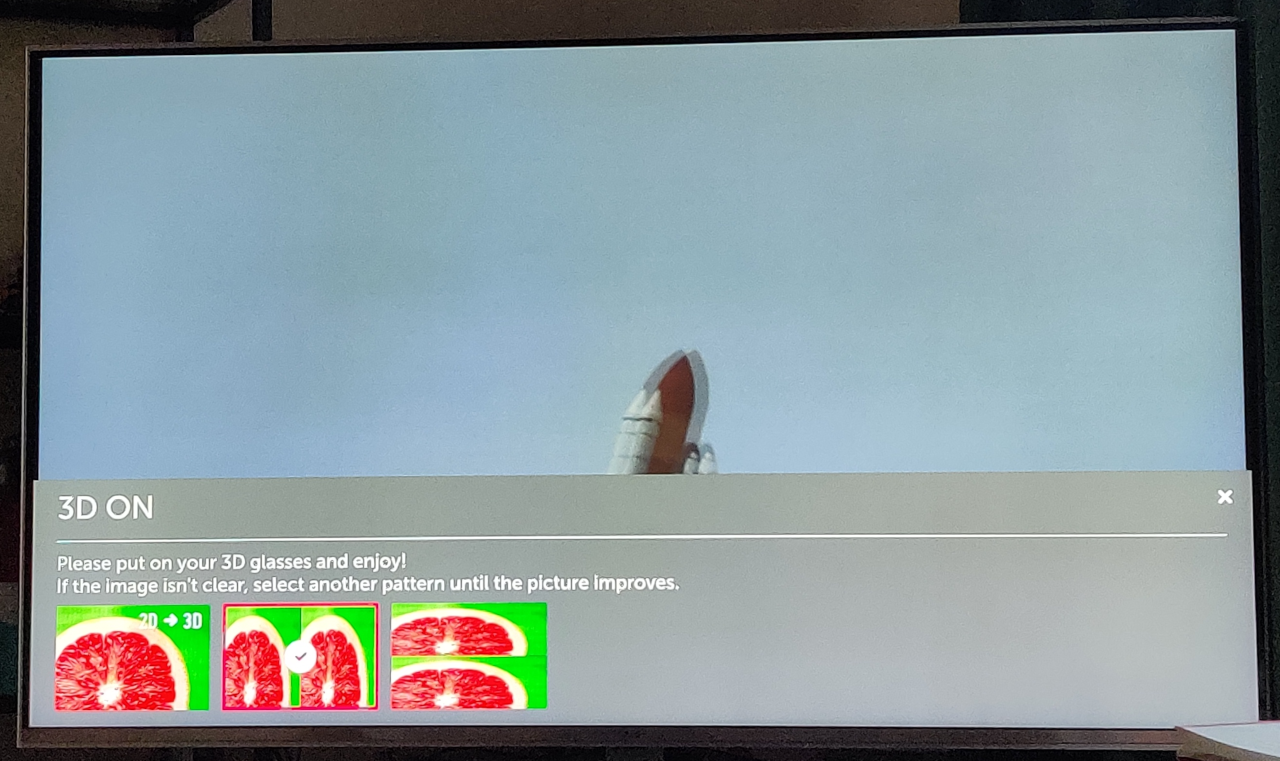
This particular LG TV supports 3D HSBS and HTB formats, the next screen shows selection of the HSBS format:
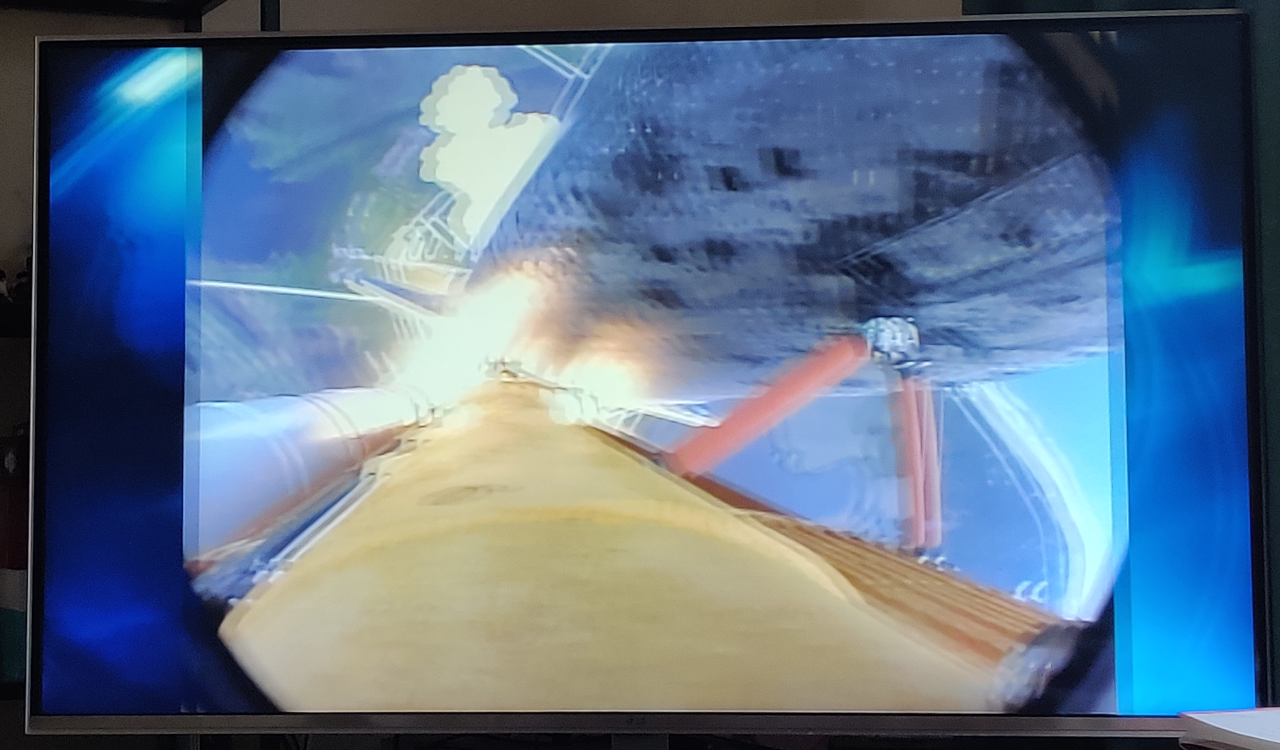
The video then plays back in 3D and is viewable with passive 3D polarised glasses on this particular TV:
Stream a Live Source
Streaming an existing 2D video file is the primary Stream workflow described above. As an additional option, editions that include Stream can send a PC screen, camera or capture-device Live Source over the network to a compatible media player. The Real-Time edition does not include network Stream for either video files or Live Sources.
For Virtual Desktop or Bigscreen showing the converted Windows desktop, use Play instead.
- Choose Stream and select the Live Sources shortcut in the source browser.
- Create the default sources if prompted, then select the required screen, camera or capture-device source.
- Confirm Live Capture Details and, for screen capture, the display or region.
- Complete the normal streaming settings for the receiving player and start the stream.
See Live Sources quick start for source creation and Streaming first checks for the receiving-player and network route.
Return to Stream to 3D Documentation.