Stream to 3D Settings
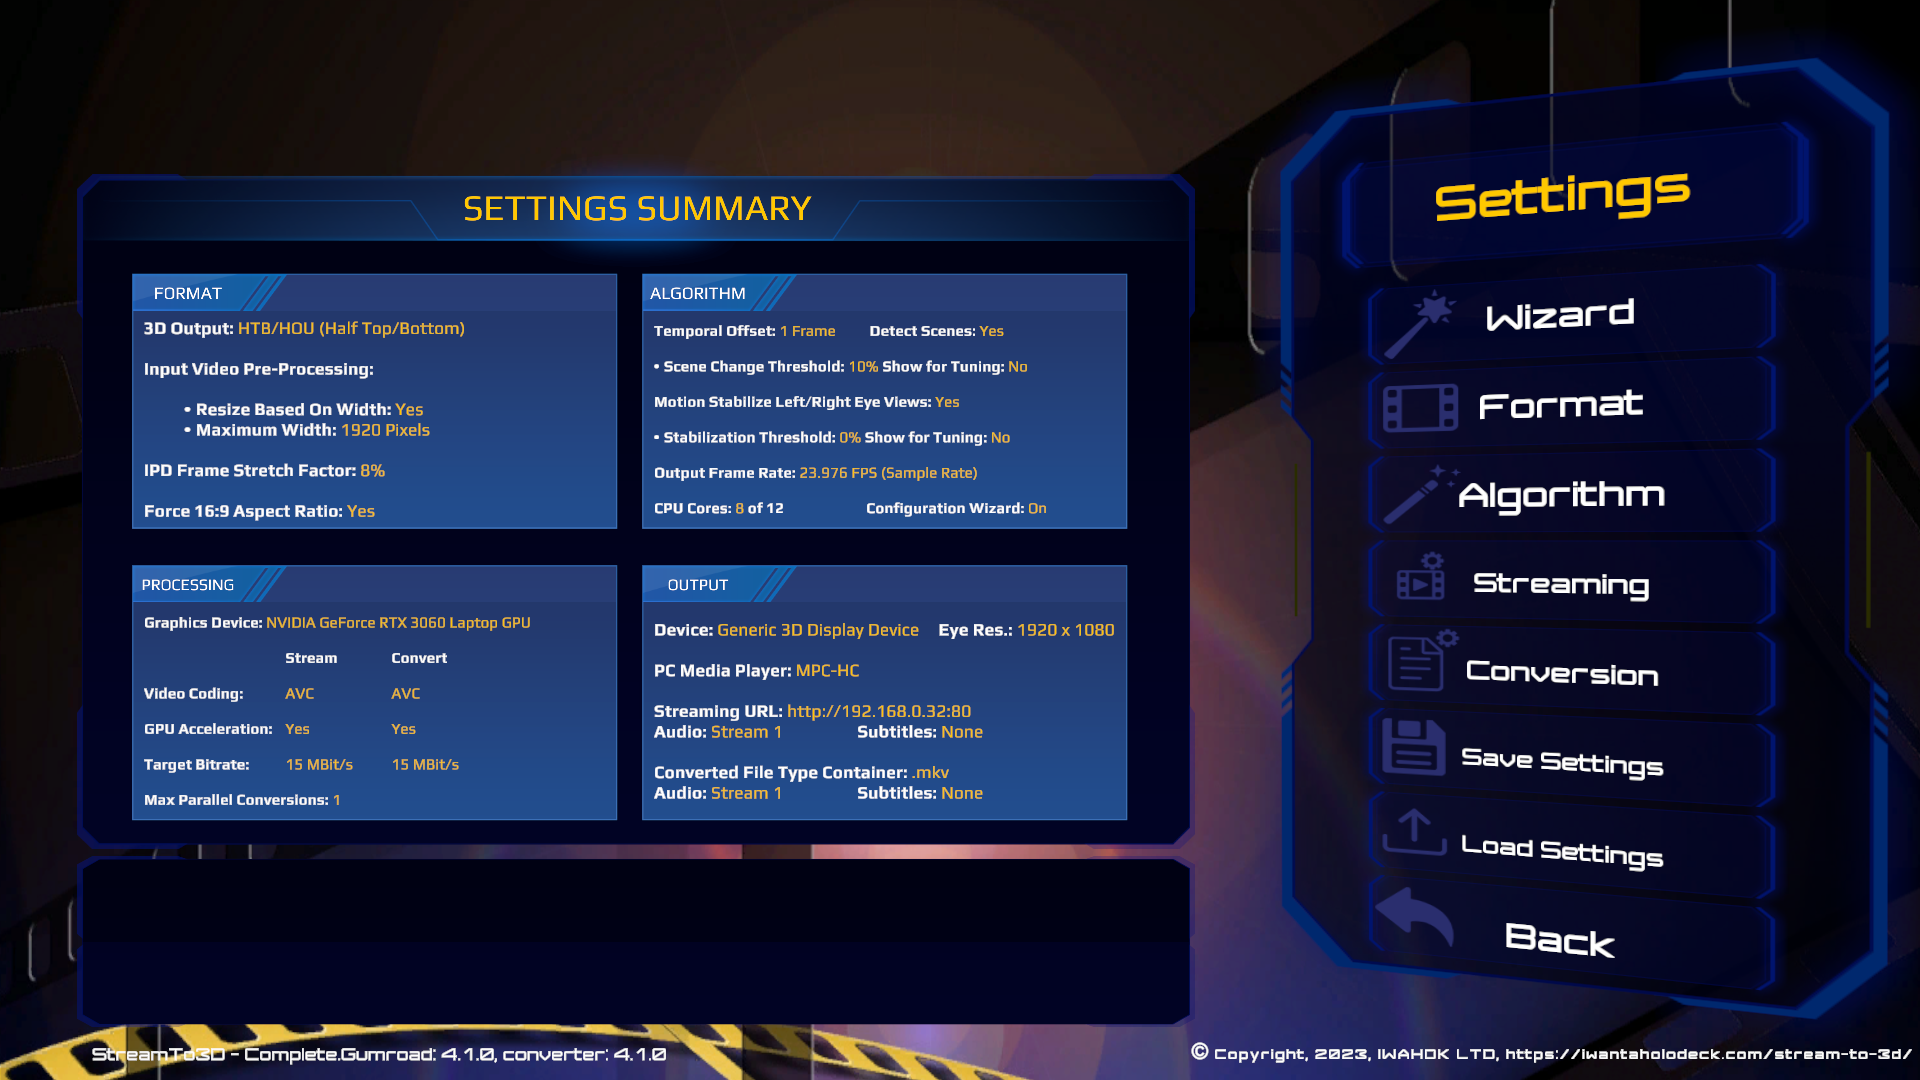
Settings
Need help quickly? Start with User FAQ & Troubleshooting and the Documentation home.
Activation / licensing issues (LVE0xx): see Licensing, Error Codes, and Logs & Diagnostics.
Billing, cancellation & refunds: Billing, Cancellation & Refunds.
Open Settings from the main menu to review or change the current configuration. For an ordinary video-file workflow, start with Wizard, Format and Algorithm. Live Sources are optional; use the exact menu path Settings > Live Capture only when creating a camera, capture-device or PC-screen source.
Choose the settings area
- Wizard - choose whether guided responses are shown, applied automatically or bypassed.
- Format - select the stereoscopic layout, target resolution and file-recognition options.
- Algorithm - adjust depth, comfort, scene detection, frame rate and processing workload.
- Live Sources - create or refresh camera, capture-device and PC-screen sources through Settings > Live Capture.
- Save, load or reset settings - keep named configurations or return to the supplied defaults.
- Tools - confirm the supporting applications and media player used by the selected workflow.
- Streaming settings - choose the network protocol and receiving-player options.
- Conversion settings - choose file, audio, subtitle and batch-conversion behaviour.
Most users can leave advanced tuning at its default. Change one setting at a time and test with a short, familiar video.
Settings - Wizard
The Configuration Wizard can apply guided settings to Play, Stream and Convert. Control when it appears through Settings > Wizard.
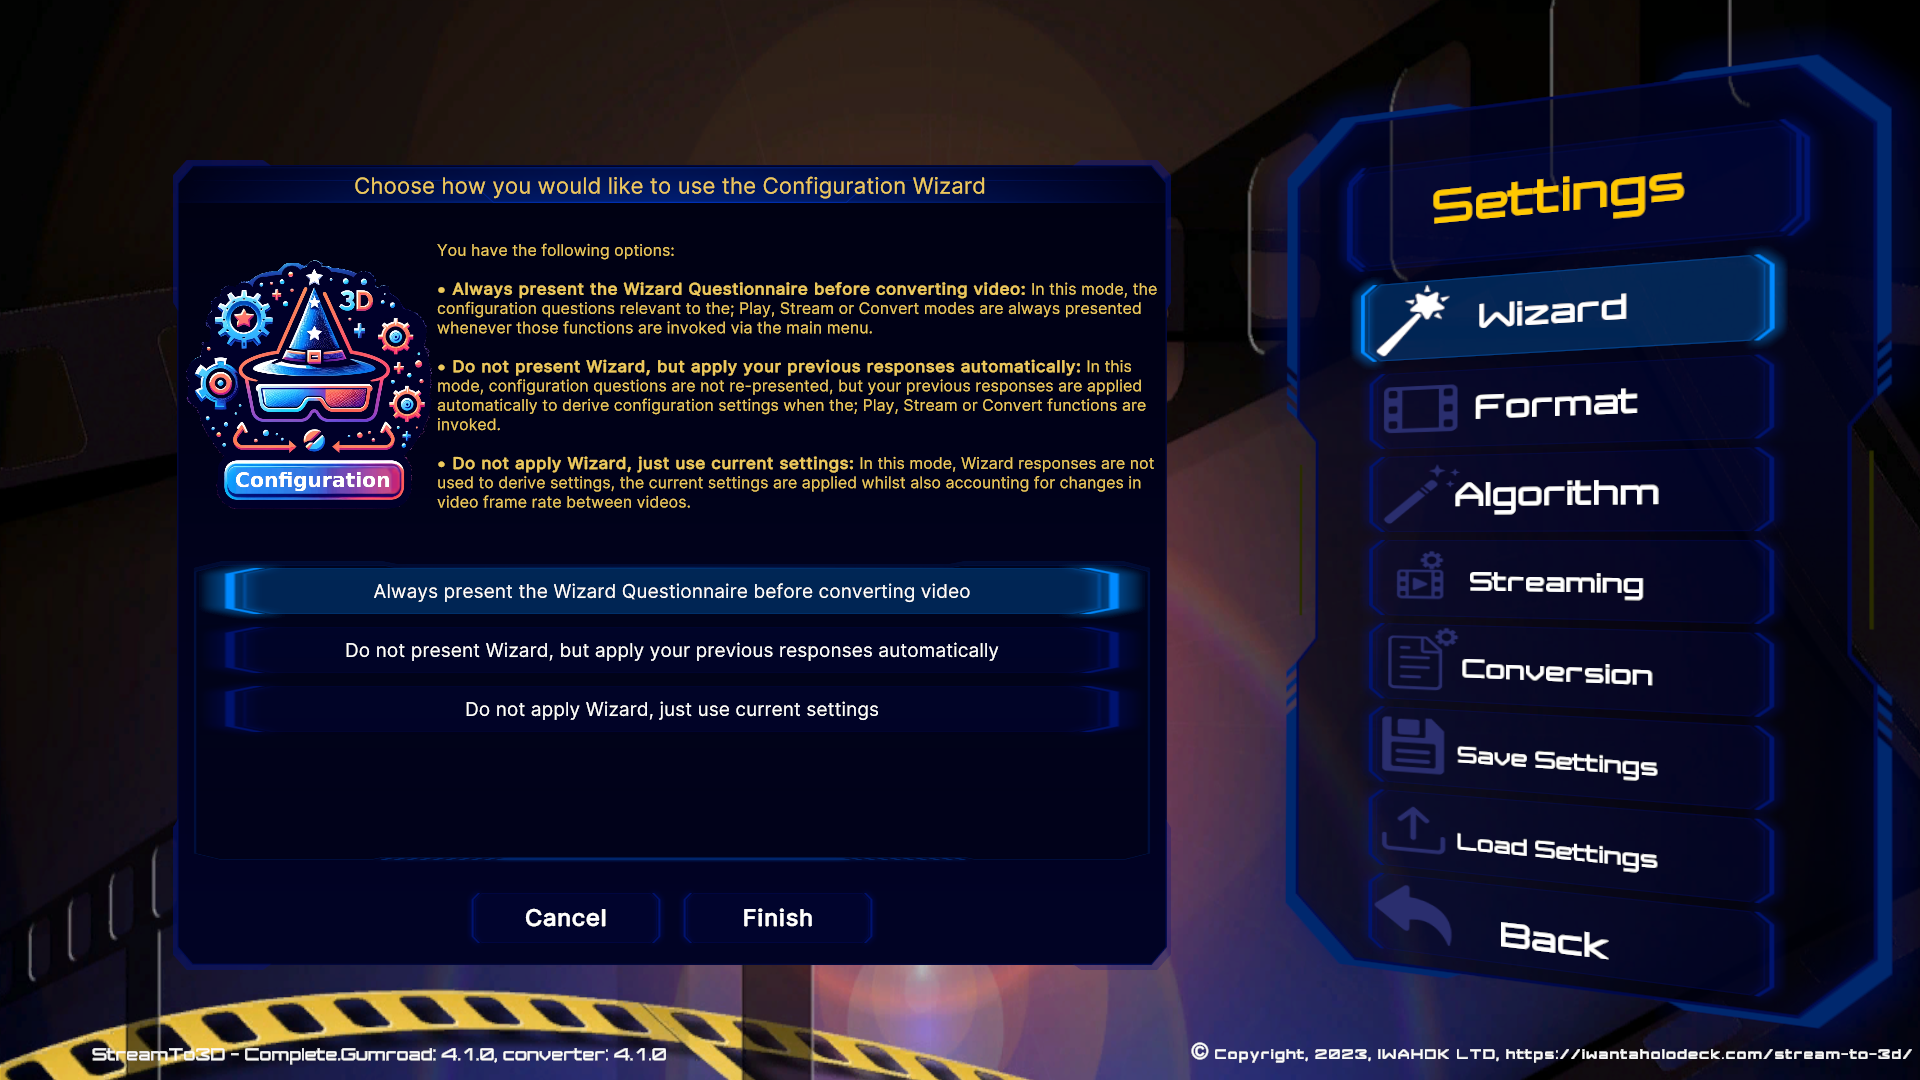
As indicated, you have the following options:
• Always present the Wizard Questionnaire before converting video: In this mode, the configuration questions relevant to Play, Stream or Convert are always presented whenever those functions are invoked via the main menu.
• Do not present Wizard, but apply your previous responses automatically: In this mode, configuration questions are not re-presented, but your previous responses are applied automatically to derive configuration settings when Play, Stream or Convert functions are invoked.
• Do not apply Wizard, just use current settings: In this mode, Wizard responses are not used to derive settings, the current settings are applied whilst also accounting for changes in video frame rate between videos.
The behaviour of the Wizard, when Play, Stream or Convert is selected from the Main Menu is described at the links below:
Important: Auto mode still derives and applies settings from the saved Wizard responses, even though the questions are hidden. If you want to edit settings manually and use those values directly, select Do not apply Wizard, just use current settings before making the changes.
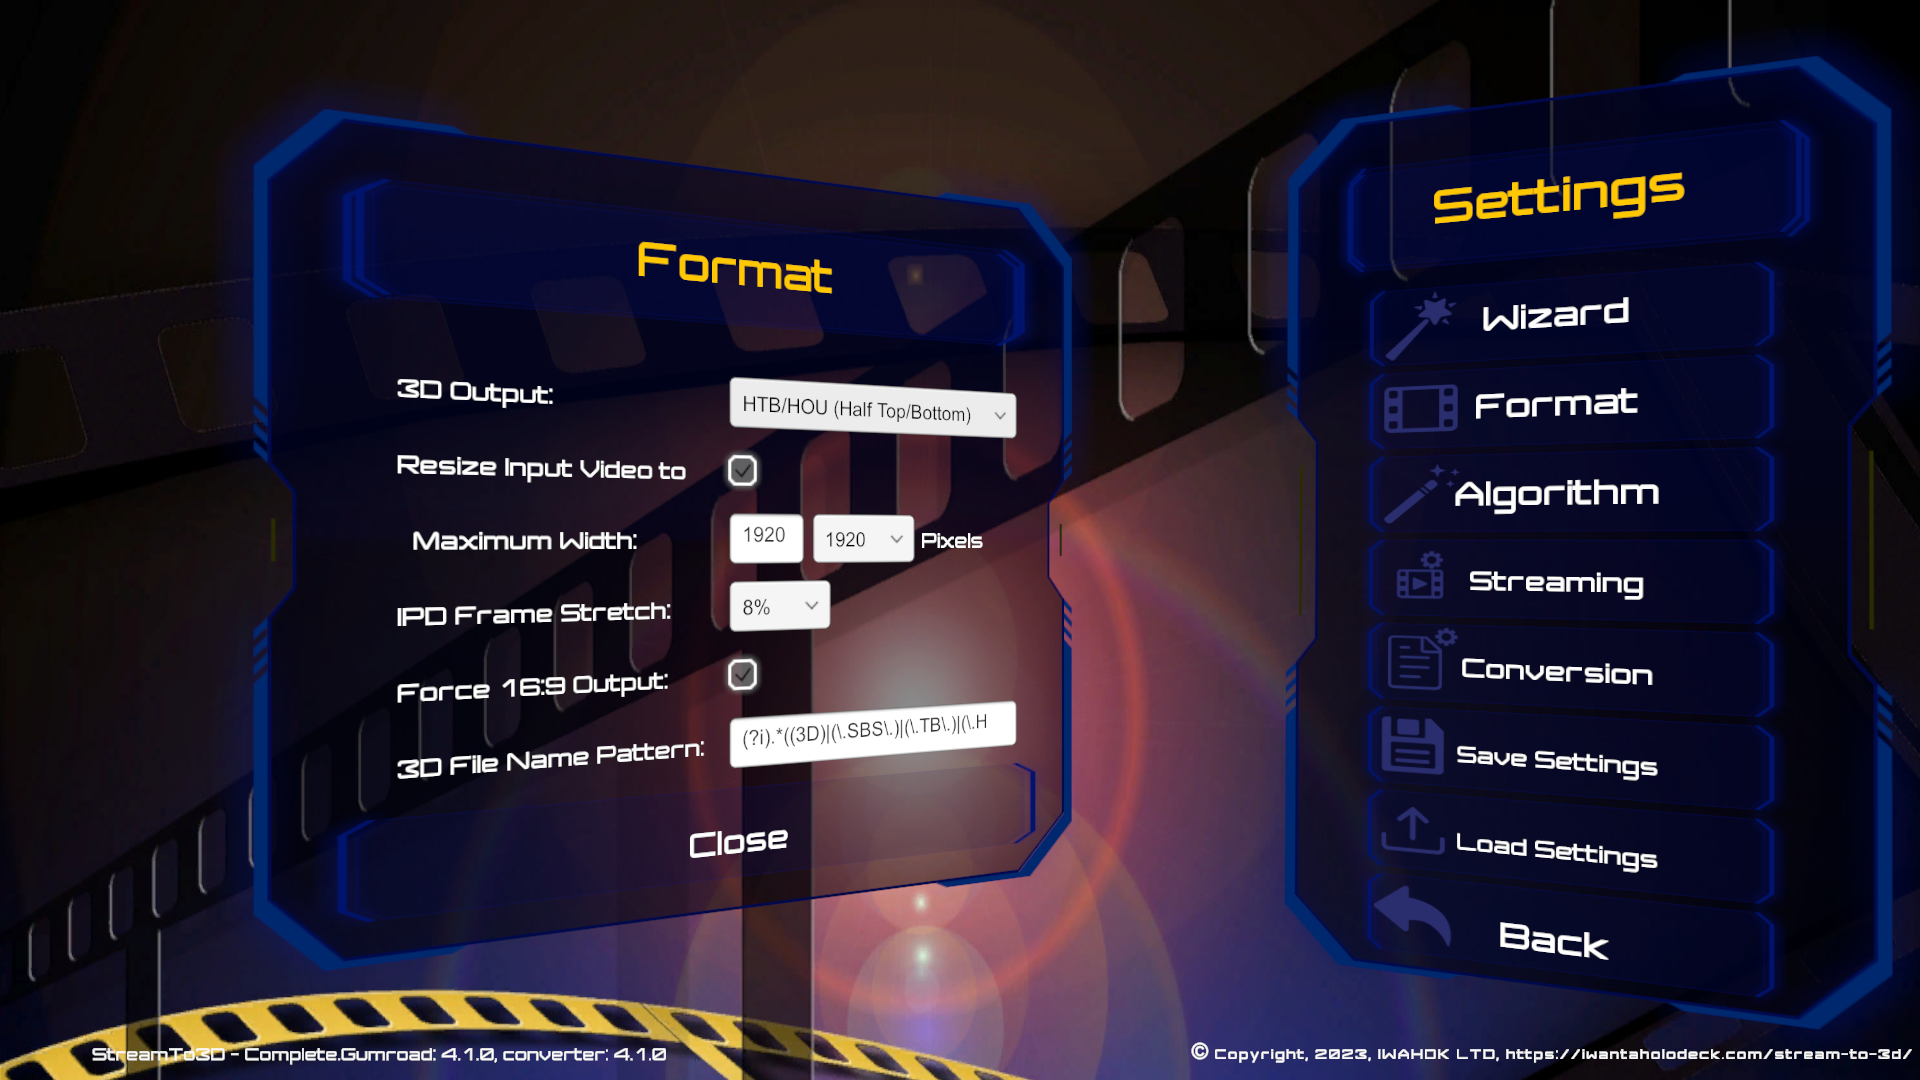
Settings - Format
The Format settings page controls the stereoscopic output layout used by Play, Stream and Convert. It also contains file-specific options used when recognising or creating 3D video files.
The 3D output drop-down list allows selection of a number of different 3D output formats:
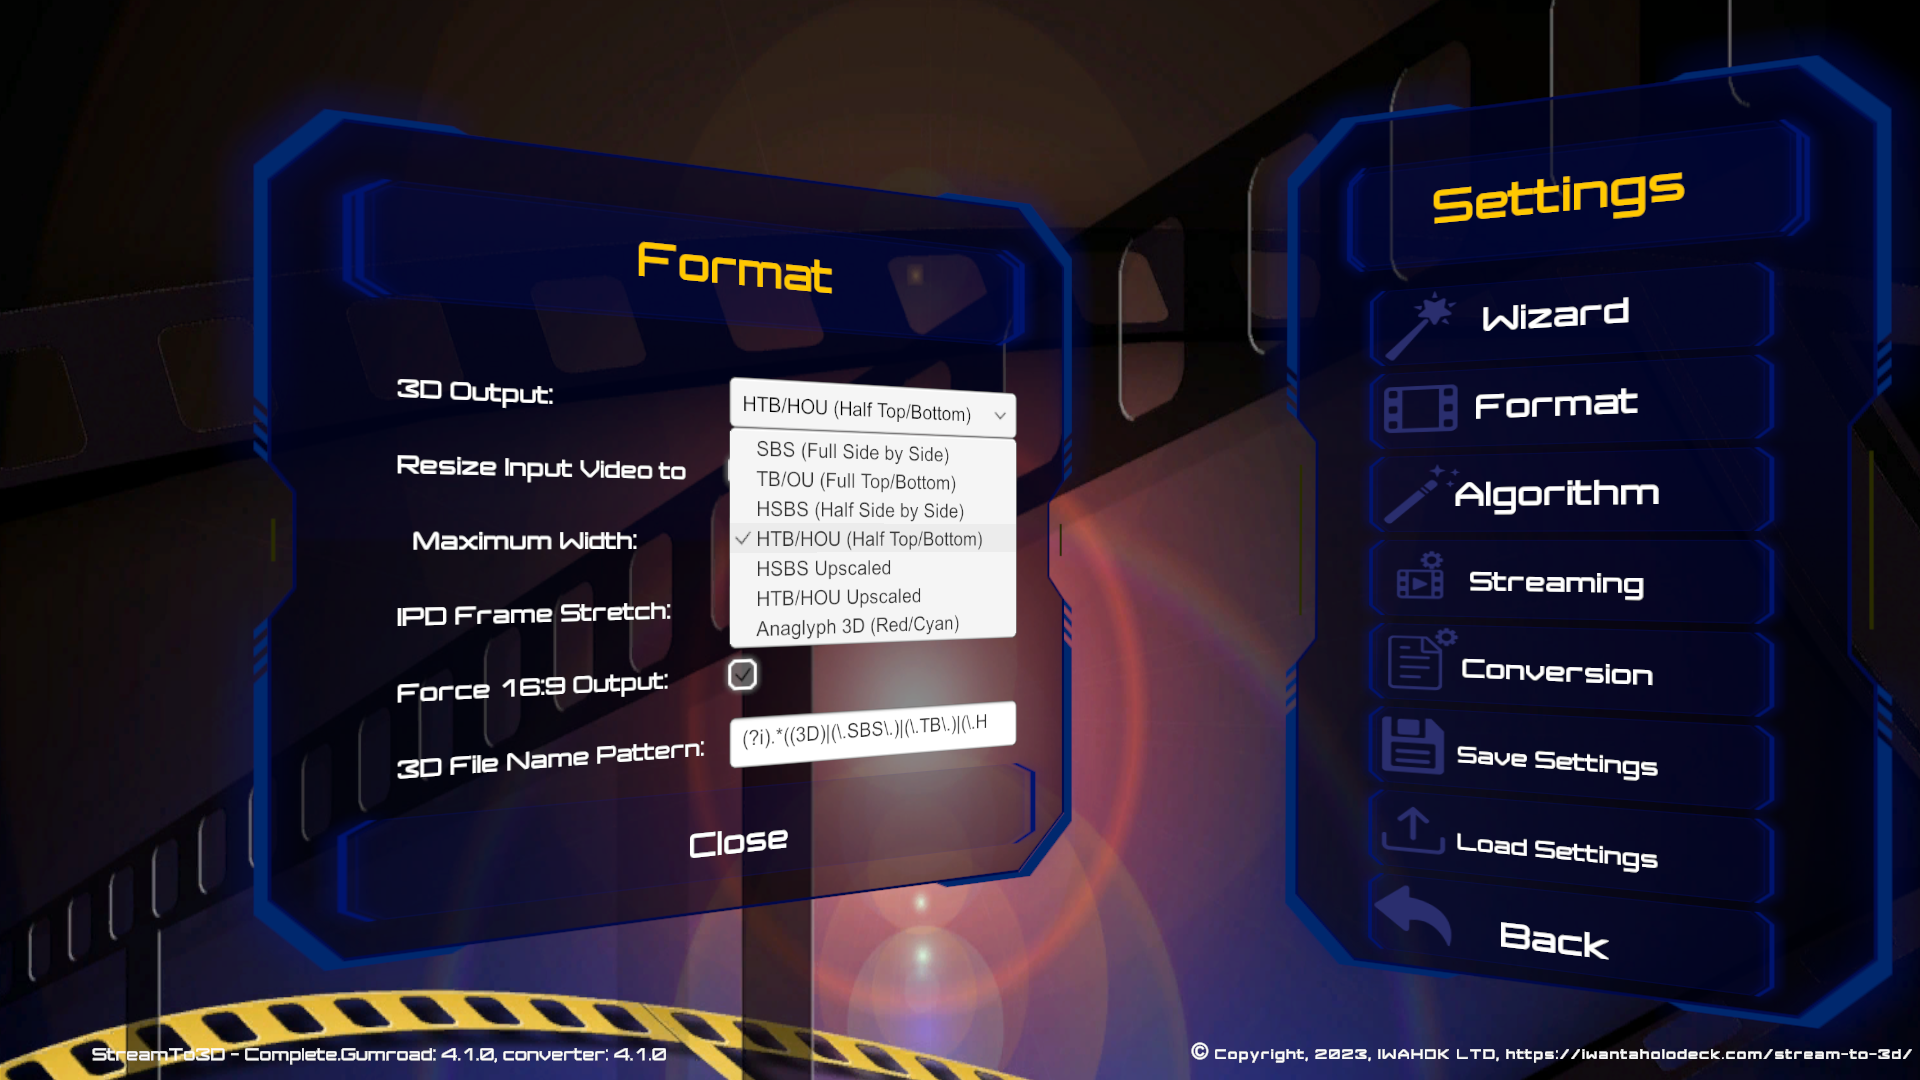
- SBS (Full Side by Side)
- TB/OU (Full Top/Bottom)
- HSBS (Half Side by Side)
- HTB/HOU (Half Top/Bottom)
- HSBS Upscaled
- HTB/HOU Upscaled
- Anaglyph 3D (Red/Cyan)
The "HSBS Upscaled" and "HTB/HOU Upscaled" formats require a little more explanation. HSBS Upscaled outputs the video in HSBS format, but upscales the video so that it has the same resultant resolution as Full SBS, by retaining the horizontal resolution of the original video and doubling the vertical resolution. Similarly, HTB/HOU Upscaled retains the original vertical resolution of the video, but doubles the horizontal resolution. This is for compatibility with devices/media players that only support Half SBS/TB formats. However, the trade off in increased quality is an increased demand in terms of machine resources.
Anaglyph 3D (Red/Cyan) provides the 3D output in a format that can be displayed on a 2D device and viewed with Red/Cyan glasses.
Use the Configuration Wizard as the starting point because it considers the selected device family and the available Windows display resolution. Override the format manually only for a known player limitation or a tested quality/performance trade-off. Use Full only when the complete output path can accept the larger combined frame. Use Half for compatibility or when the Full frame does not fit. Use Upscaled Half when the player requires a Half-labelled layout but the output path can retain the larger frame; otherwise the extra processing provides no visible benefit.
The receiving player or display must use the same layout. A Full SBS frame containing two 16:9 eye views is 32:9 overall; the viewer divides that packed frame before presenting each 16:9 eye view. Forcing the complete packed frame into an ordinary 16:9 player window will squash the result.
The "Resize Input Video to..." checkbox option allows you to optionally resize the resolution of a 2D video before it is converted to 3D. This is usually to scale down very high-resolution videos (e.g. 4K) before conversion, particularly if they are higher resolution than would be supported by the target device.
The value entered or selected in the "Maximum Width" edit box or drop-down list is applied if the "Resize Input Video to" checkbox is ticked. In this case the input 2D video is resized to the width selected, before 2D to 3D video processing is applied. You can think of this as the maximum target, per eye resolution of the output 3D video. The output video may actually end up with a lower horizontal per eye resolution than this if the "Force 16:9 Output" option is selected, as aspect ratio correction may in some cases crop the video further after the initial resize pre-processing is complete. As a guide, note that the maximum per eye resolution of the Meta Quest 2 VR headset, for example, is 1,832 × 1,920 pixels and for the Meta Quest 3 it is 2064 × 2208 pixels per eye. VR headsets have a variety of resolutions, see here for details.
The "IPD Frame Stretch" factor allows tweaking of the depth effect. You can increase the value to heighten the depth effect, but setting it too high will cause the effect to break down and introduce distortion. It is also related to Interpupillary Distance, so if the 3D view is not comfortable for you, try adjusting this stretch factor.
When the "Force 16:9 Output" check box is used, Stream to 3D changes the source picture to 16:9 by cropping vertically or horizontally where necessary, so some picture area can be lost. This setting is different from player-side scaling and does not guarantee removal of black pixels already encoded inside a 16:9 source frame.
For a source with black borders at the top and bottom, first try a supported SBS layout so the eye division is away from those borders. For a source with borders at the left and right, including padded 4:3 material, first try a supported TB/OU layout. Select the matching mode manually in the receiving player or display and keep its aspect ratio at default or best fit while testing. See Black borders and the eye division and Player, streaming-device and display scaling.
The 3D File Name Pattern helps Stream to 3D recognise existing stereoscopic video files from their names. It is relevant when working with video files; the Real-Time edition does not create converted 3D files. See 3D file-name patterns for details.
No 3D Conversion
No 3D Conversion passes the source through without creating a stereoscopic layout. For editions with Convert, this can be used to record a demanding Live Source as a 2D file first and convert the recorded file to 3D afterwards, reducing the amount of work that must happen at the same time.
Settings - Algorithm
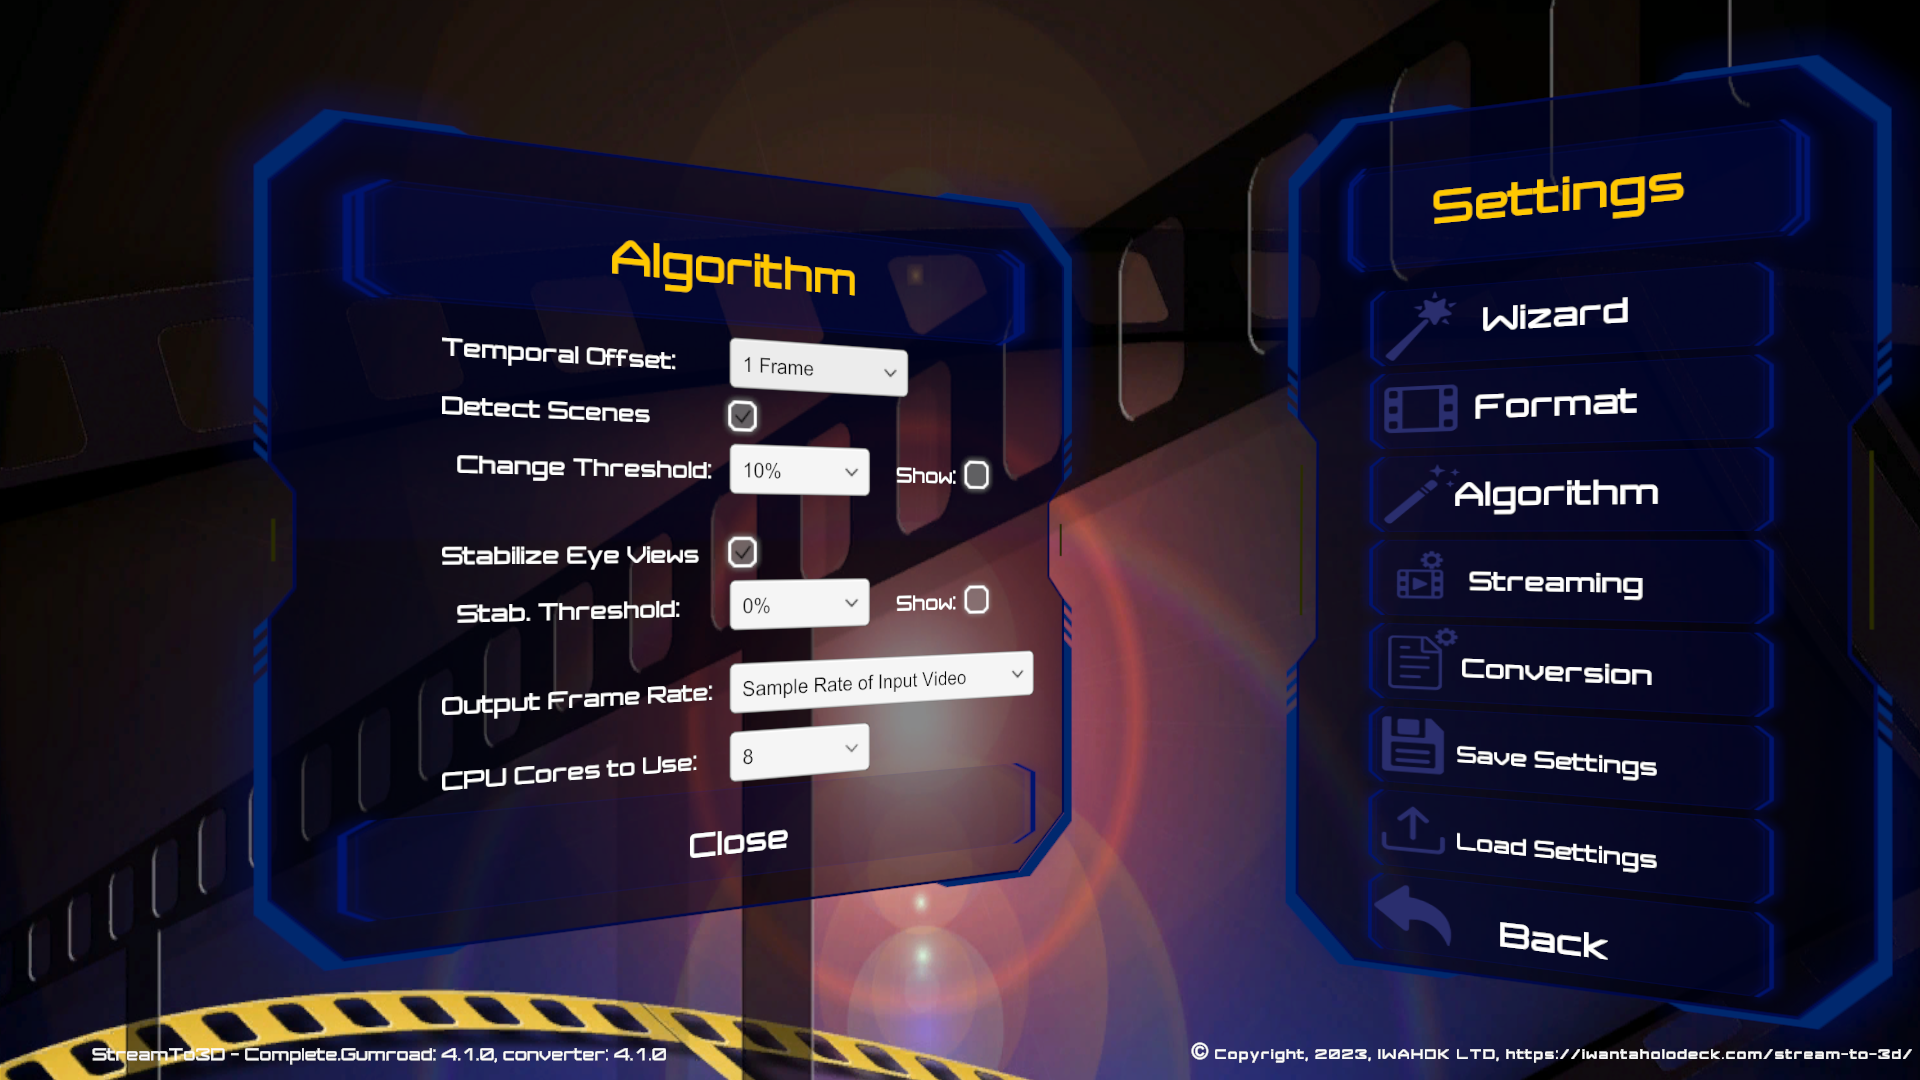
For background and further reading on the algorithm used by Stream to 3D, see here. Several significant enhancements to the base algorithm are implemented in Stream to 3D to enhance the effect and eliminate discomfort. These are described here and here. The Algorithm settings in Stream to 3D allow fine tuning of the algorithm.
The Temporal Offset and Stabilize Eye Views (together with the Stab. Threshold) settings are key to controlling the 3D Effect. A set of example videos with different illustrative settings are provided here.
The "Temporal Offset" is fundamental to controlling the depth of the 3D effect produced by Stream to 3D, relying on the Pulfrich Effect, a phenomenon that manipulates visual perception through the introduction of temporal disparity.
The default temporal offset is 1 video frame. However, this can be tweaked to increase or decrease the effect to best suit your viewing preferences.
The default temporal offset produces a subtle and gentle 3D depth effect (corresponding to the Subtle option in the Configuration Wizard) that adds a touch of 3D dimensionality without overwhelming the visual senses.
A temporal offset of 1.25 Frames produces a balanced 3D depth effect (corresponding to the Balanced option in the Configuration Wizard) with a noticeable depth that enhances the visuals with more pronounced 3D dimensionality.
A temporal offset of 1.5 Frames produces a more intense and striking 3D depth effect (corresponding to the Intense option in the Configuration Wizard) for a more immersive viewing experience.
Note that temporal offsets other than whole numbers, e.g. 1.25, are significantly more CPU demanding (as they rely on frame rate interpolation). Depending on the capabilities of your system, you may not achieve real-time conversion for fractional values.
The Detect Scenes option reduces uncomfortable results at scene changes. Keep it enabled unless you are deliberately testing or tuning the detection behaviour. See the scene-change background for further context.
The Threshold controls how much of the picture must change before Stream to 3D treats it as a scene change or large-scale rapid motion. The 10% default works well for most videos; change it only when the detection markers show that a particular video needs different tuning.
Scene detection and stabilization tuning
The "Show Detected" checkbox is provided to assist tuning of the scene detection "Threshold" value. When the "Show Detected" checkbox is checked, the 2D to 3D conversion process will turn the right eye view pink at detected scene transitions and when large scale rapid motion is detected. Viewing the video with this enabled will allow you to increase of decrease the threshold to your tastes. However, the default value works well for the vast majority of cases.
The "Stabilize Eye Views" checkbox, enables or disables the algorithmic enhancement described here, in terms of Motion and Alignment. Enabling this item has a very significant effect in reducing discomfort, but also dampens the 3D effect somewhat. You can adjust this setting to your taste via the Stabilization Threshold setting. A threshold of zero percent is the maximum comfort level, to enjoy the 3D experience with maximum stabilization, minimizing eye strain and motion discomfort. A threshold of 0.5% supports an immersive experience with enhanced depth and moderate stabilization for a more engaging visual experience that maintains comfort. Disabling stabilization provides a more wild and intense experience with the added risk of some discomfort.
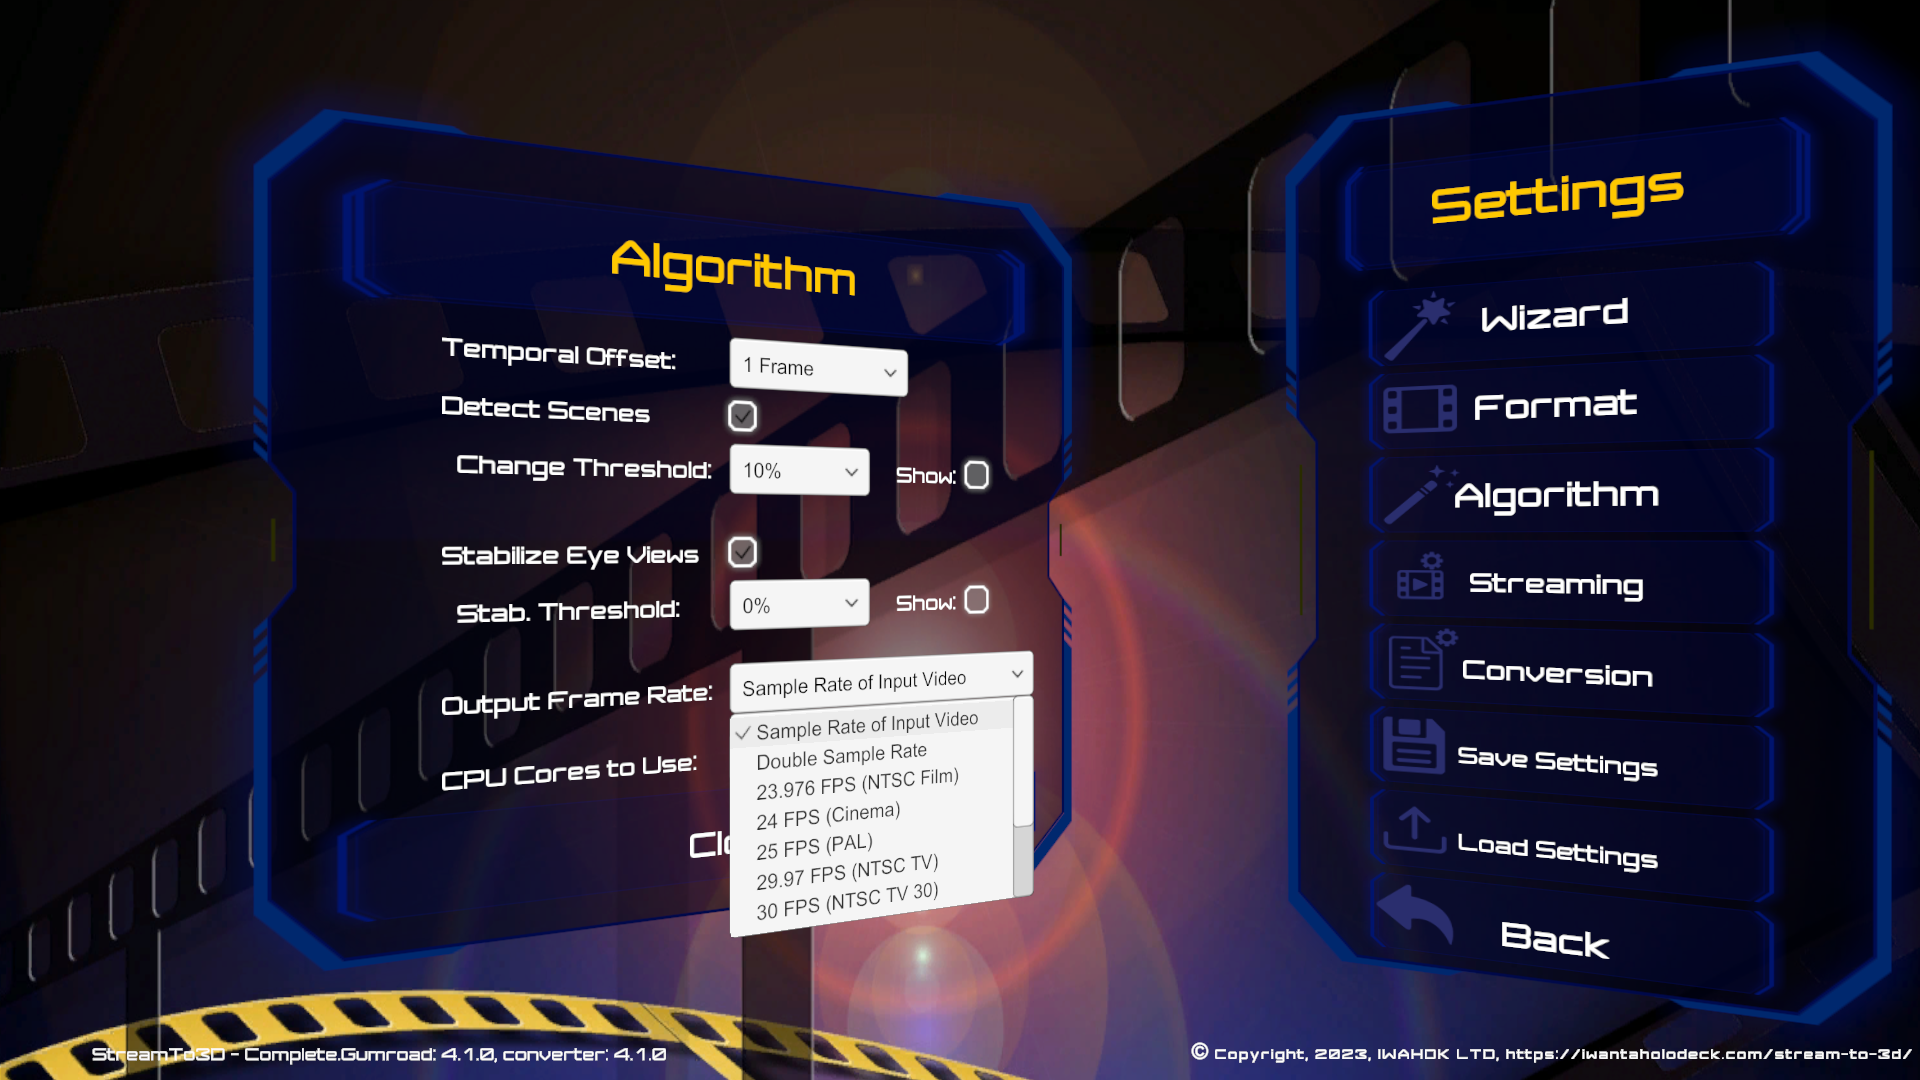
The "Output Frame Rate" setting allows you to set the output frame rate following 2D to 3D conversion. The default output frame rate is sourced from the rate at which the input video is sampled for 3D conversion (called the Sample Rate). For a movie/film, this is typically 23.976 Frames Per Second, but will vary based on the standard used to produce the original video (e.g. 25 FPS for the European PAL TV Video Standard). Stream to 3D will, by default, automatically apply an output frame rate based on the Sample Frame Rate of the input video. Alternatively, you can set Stream to 3D to double the frame rate of the video, via frame rate interpolation or set a specific frame rate from the values available in the drop down list. Note that the Configuration Wizard will automatically double the frame rate of the input video for you, when the Maximum Quality option is selected.
Frame rate interpolation is used to generate intermediate frames for all but the default of "Sample Rate of Input Video". Frame rate interpolation is a very resource intensive process and it is unlikely that you will be able to achieve real-time conversion for the higher frame rates, particularly for full frame 3D output on high-resolution videos. However, these rates can be successfully applied for off-line conversion.
The default frame rate is obtained by sampling the source video at the determined "Sample Rate" rather than performing interpolation, so there is no frame rate interpolation overhead at the sample rate.
Note the "CPU Cores to Use" item. Stream to 3D automatically detects the number of CPU cores on your machine. By default it will set the number of "CPU Cores to Use" for conversion, streaming and playback to half the number of CPU cores available. This is to reduce the risk of Stream to 3D processing impacting other processes running on your machine. You can experiment with this value.
Settings - Live Capture
Use Settings > Live Capture to create a Live Source for a specific camera, capture device, screen format or audio input. The dialog is titled Live Capture: Live Sources. Use Refresh Devices after enabling or connecting hardware, select the video and audio sources, review the reported format, enter a friendly Live Source name, and choose Create Live Source.
Creating a Live Source saves the device selection for later use; it does not start capture. Choose Play, Stream or Convert and select the saved source through the Live Sources shortcut. See Create a custom Live Source for every control and camera troubleshooting.
Settings - Saving Configurations
You can save Stream to 3D configuration settings for distinct purposes in different config files, using the Settings/Save Settings menu option as shown in the screen shot below and reload them again with the Load Settings option. Note that you cannot save settings in the StreamTo3D application folder as this is protected, use a sub-folder of your Documents folder or Desktop:
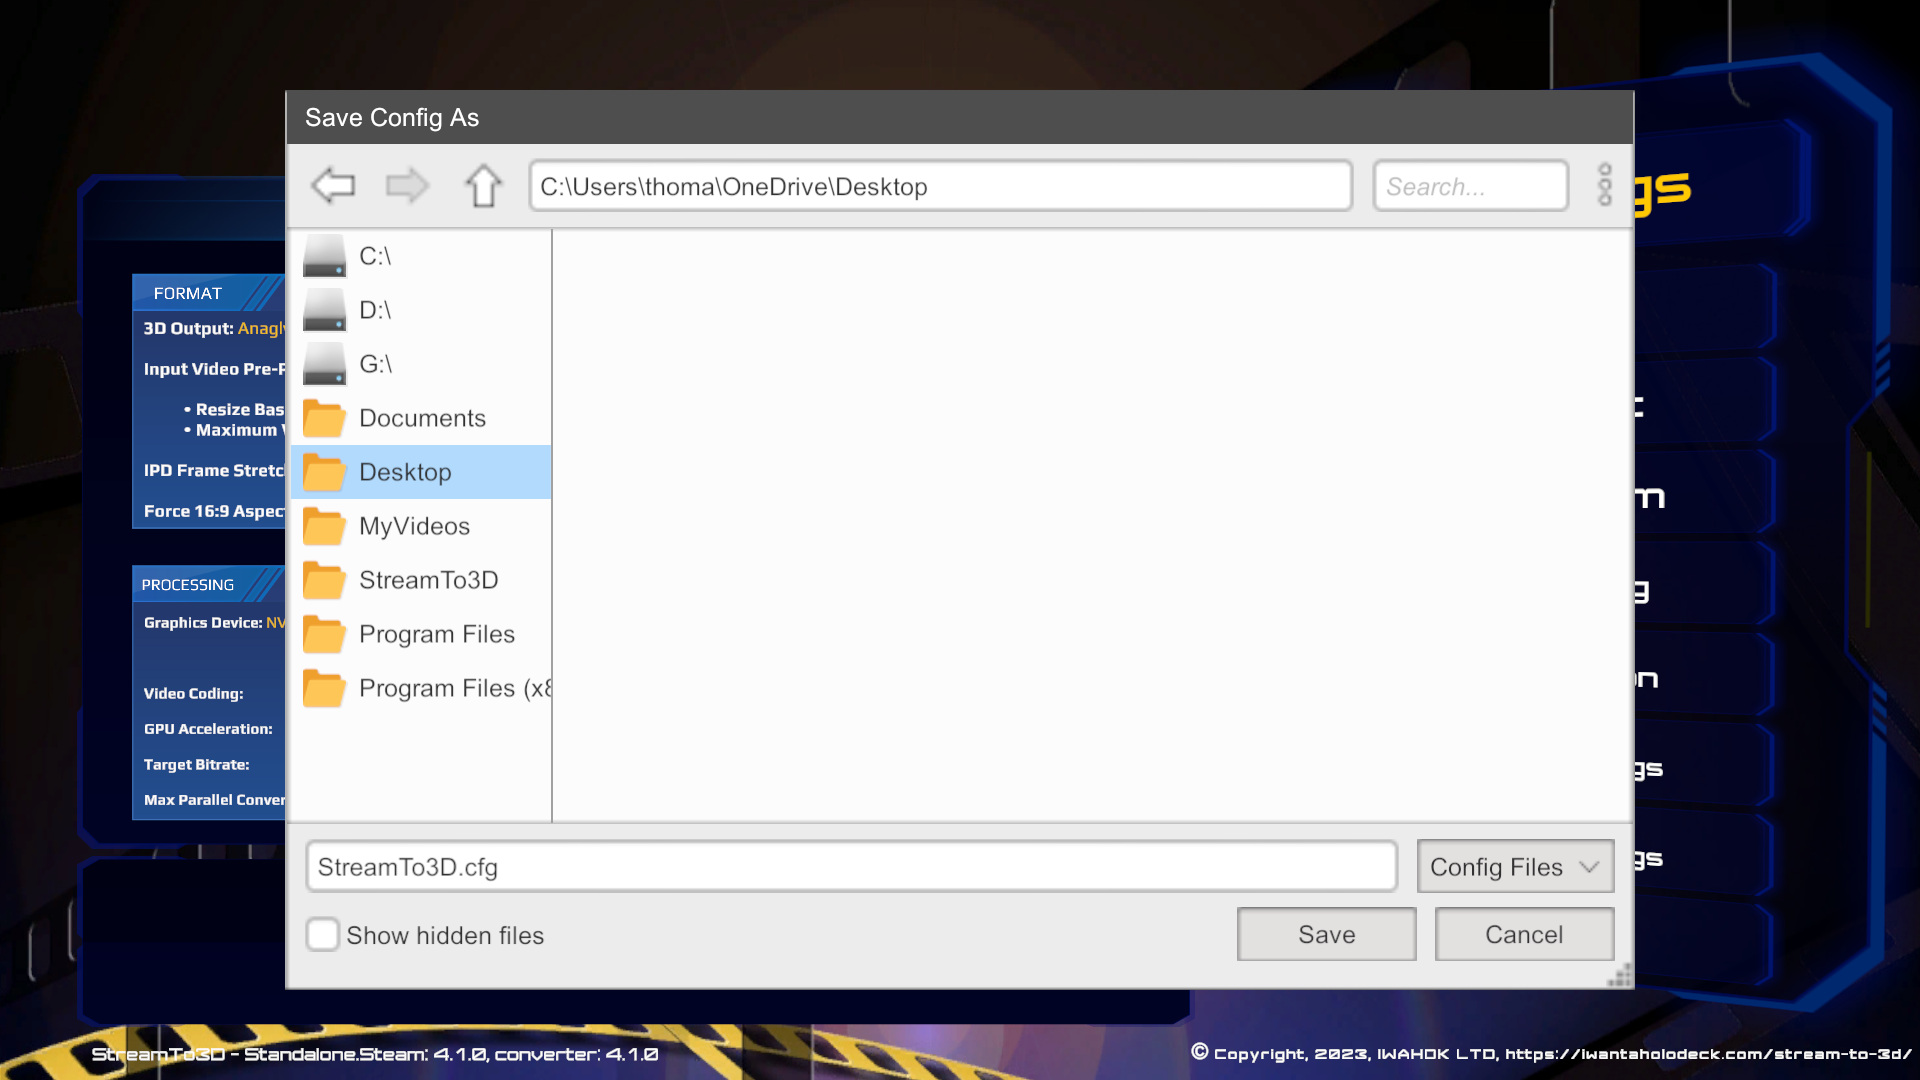
You can edit the name of the settings save file to suit your purposes.
Settings - Loading Configurations
You can load previously saved configurations via the Stream to 3D Settings > Load Settings option.
In addition, Stream to 3D is shipped with a number of pre-defined config files for different purposes. To a large extent these have been superseded by the Configuration Wizard. To find these, click on the StreamTo3D short cut in the left hand pane (as shown highlighted below):
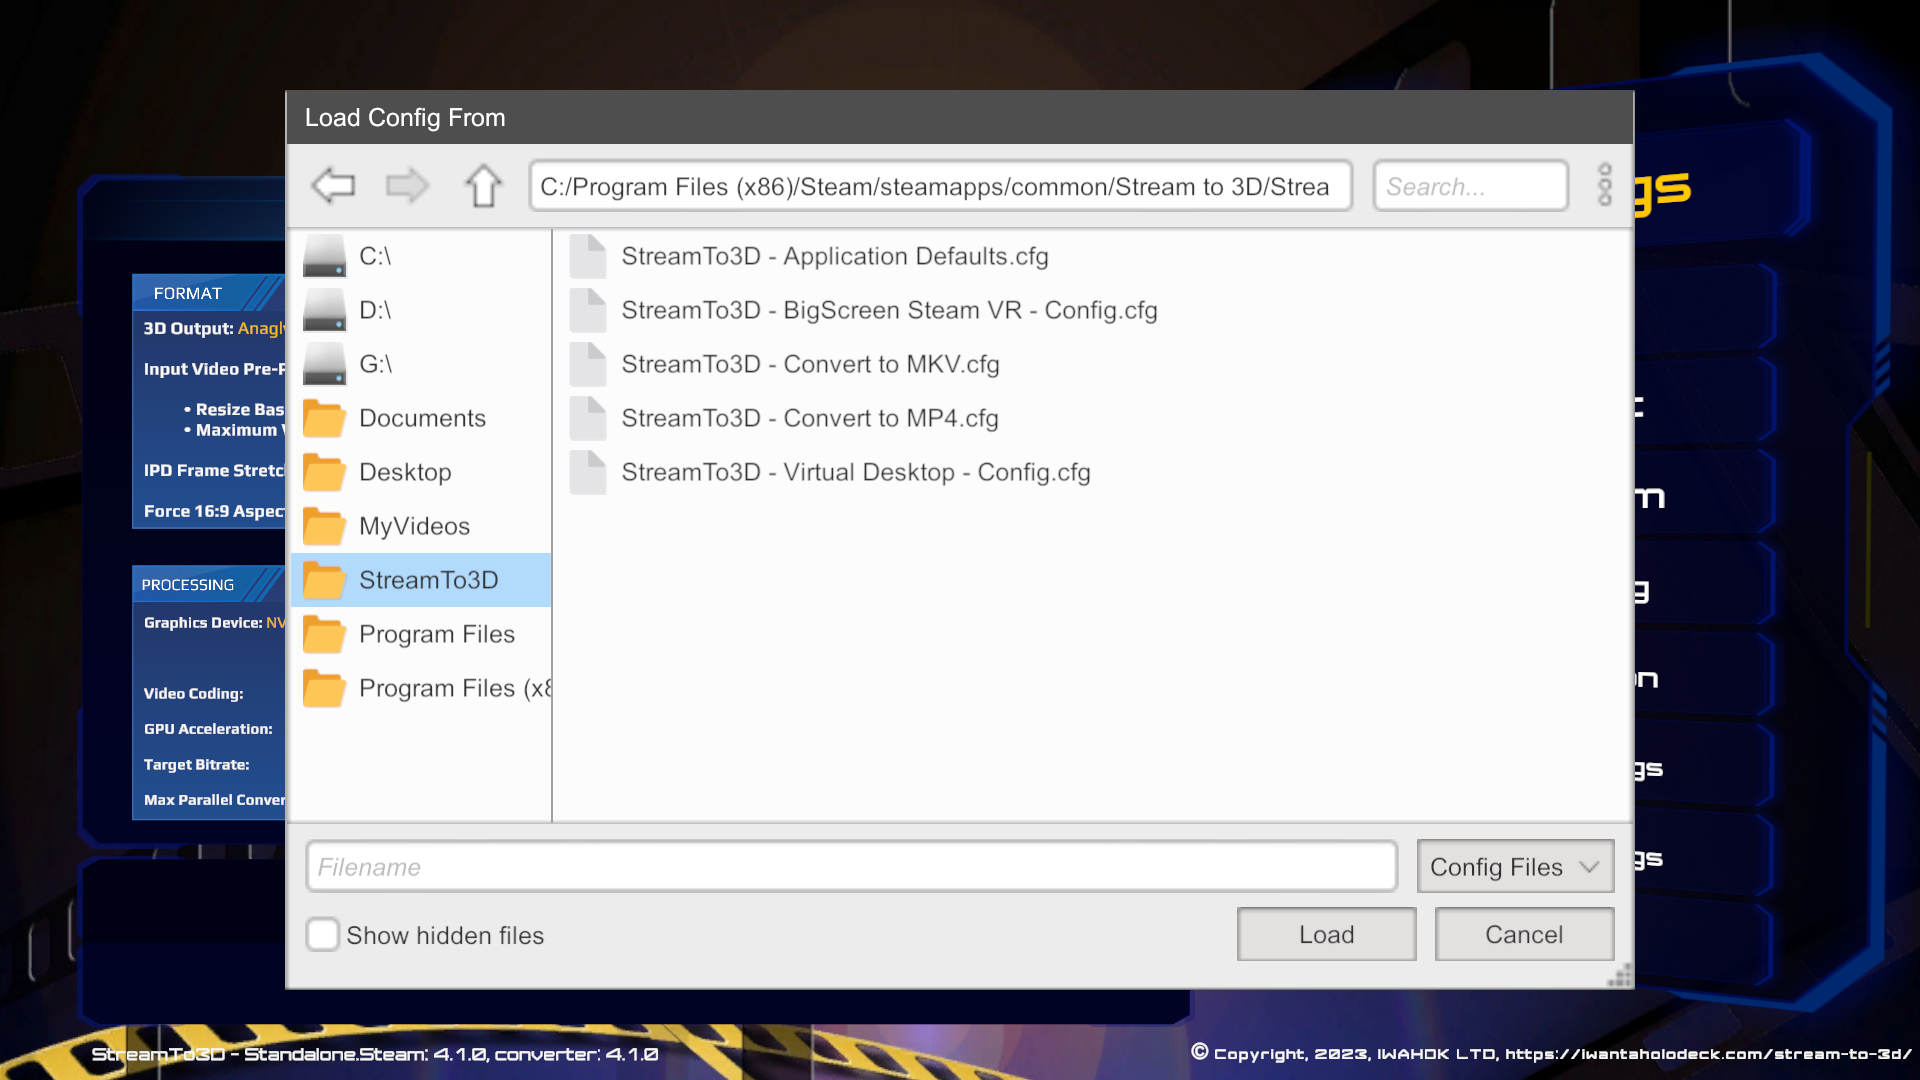
Settings - Resetting Stream to 3D to its Default Settings
The "StreamTo3D - Application Defaults.cfg" config file is very useful for resetting Stream to 3D to its defaults (see previous section "Loading Configurations" to locate this file).
Note that resetting by this method does NOT reset the established folder locations for installed tools, as these are discovered automatically on initial install. However, you can change the installed tool locations manually if you need to via the Main Menu/Tools option.
If supporting applications are missing after an uninstall, reinstall or application upgrade, use the repair guidance below.
Repair or reinstall supporting tools
Use Tools and Dependencies as the current repair guide. It covers the Steam optional-tools installer, Gumroad and Itch.io installer repair, component-specific checks and the corresponding Windows prompts.
Repair only the missing or incorrectly detected supporting application where possible. Reinstalling the main application does not necessarily rerun every separate supporting installer.
Settings - Tools
The Tools configuration settings can be accessed from the Tools option in the main menu. This short cut makes it quicker to switch media players, for example.
It is best to check that the Tools configuration is correct following first installation or upgrade to make sure that everything has been correctly discovered and configured, clicking on the Tools item in the main menu takes us to the screen below:

If you had some of these tools installed before installing Stream to 3D, make sure that the paths that appear in the path selection boxes are correct. Stream to 3D uses the registry settings of these tools to determine their installed locations, if they are incorrect then you can change them accordingly.
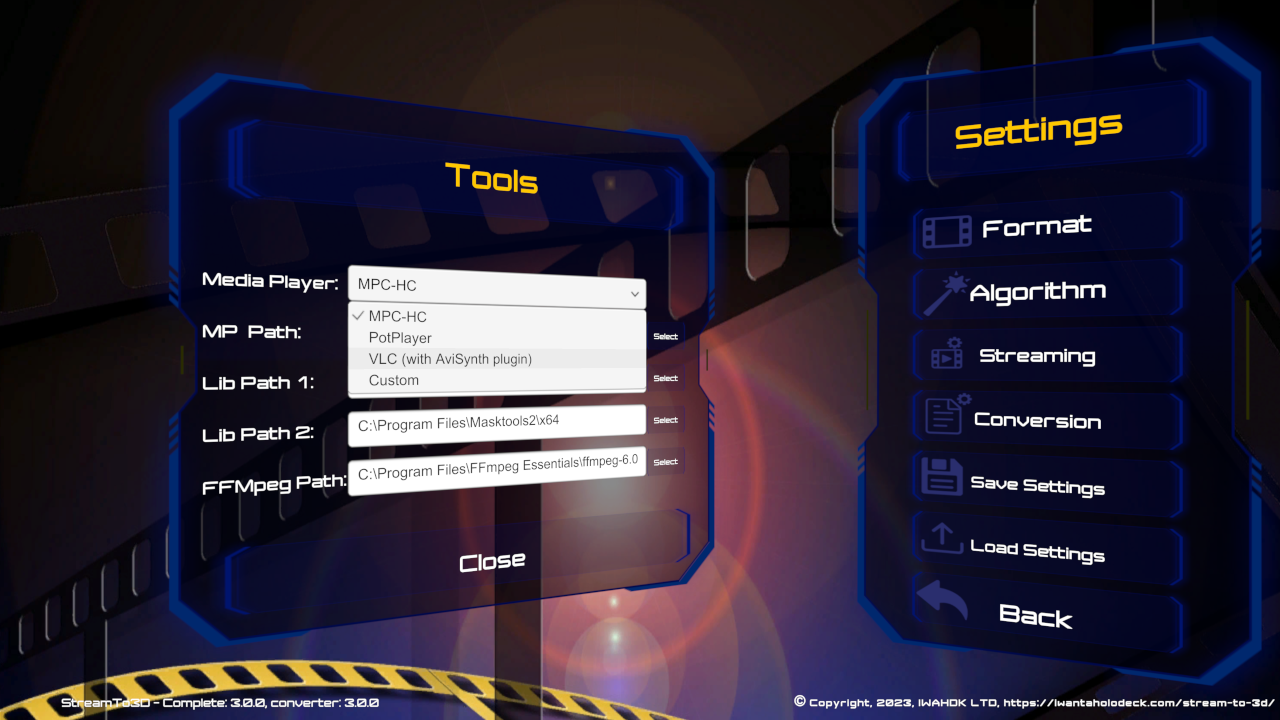
Settings - Tools - Media Players
If you have any of the supported media players installed, you can use the Media Player drop-down to change the current Media Player (and so the install path displayed - labelled as MP Path) and edit the path as necessary. The Media Player selected is also the one that will be used when you hit the "Play" main menu button to play a video through Stream to 3D, which will be automatically converted to a 3D format:
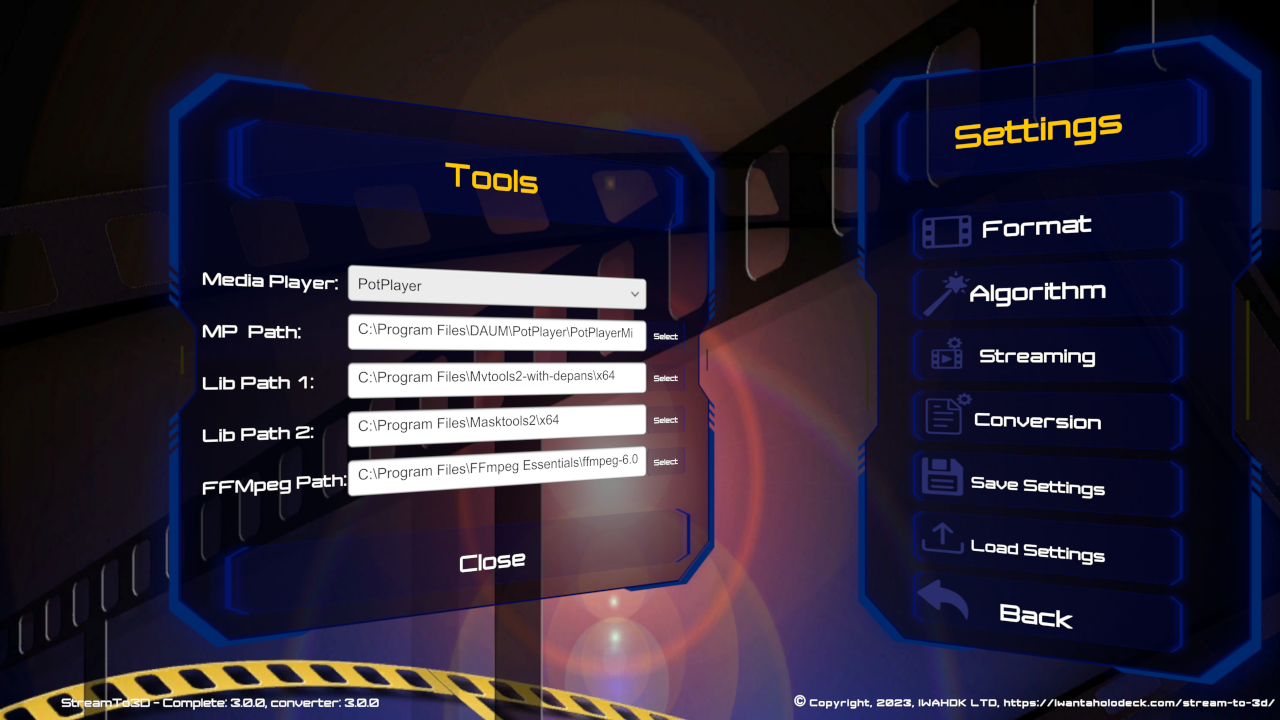
As an example of configuration of other media players, this is the view with PotPlayer installed and selected:
You can also specify a "Custom" media player and the path to its ".exe" file, but the custom media player must be able to accept ".avs" files as input.
Settings - Tools - Libraries
The libraries (shown on Lib Path 1 and Lib Path 2) assist with scene and motion detection during 2D to 3D conversion. They are not absolutely required, but the quality of the 2D to 3D conversion will be enhanced significantly when they are available.
Settings - Tools - Streaming and Conversion
Applies to editions with Stream or Convert. Check that the encoding application path shown in Settings > Tools is correct, particularly after moving an installation or choosing a custom supporting-tool location.
Stream to 3D can use supported graphics hardware to reduce encoding time. If the application reports a driver or hardware-encoding compatibility problem, update the graphics driver or use software encoding.
Use the advanced streaming and conversion options only when resolving a known compatibility issue or tuning an already working setup.
Return to Stream to 3D Documentation.