File Conversion via the Configuration Wizard
Configuration Wizard
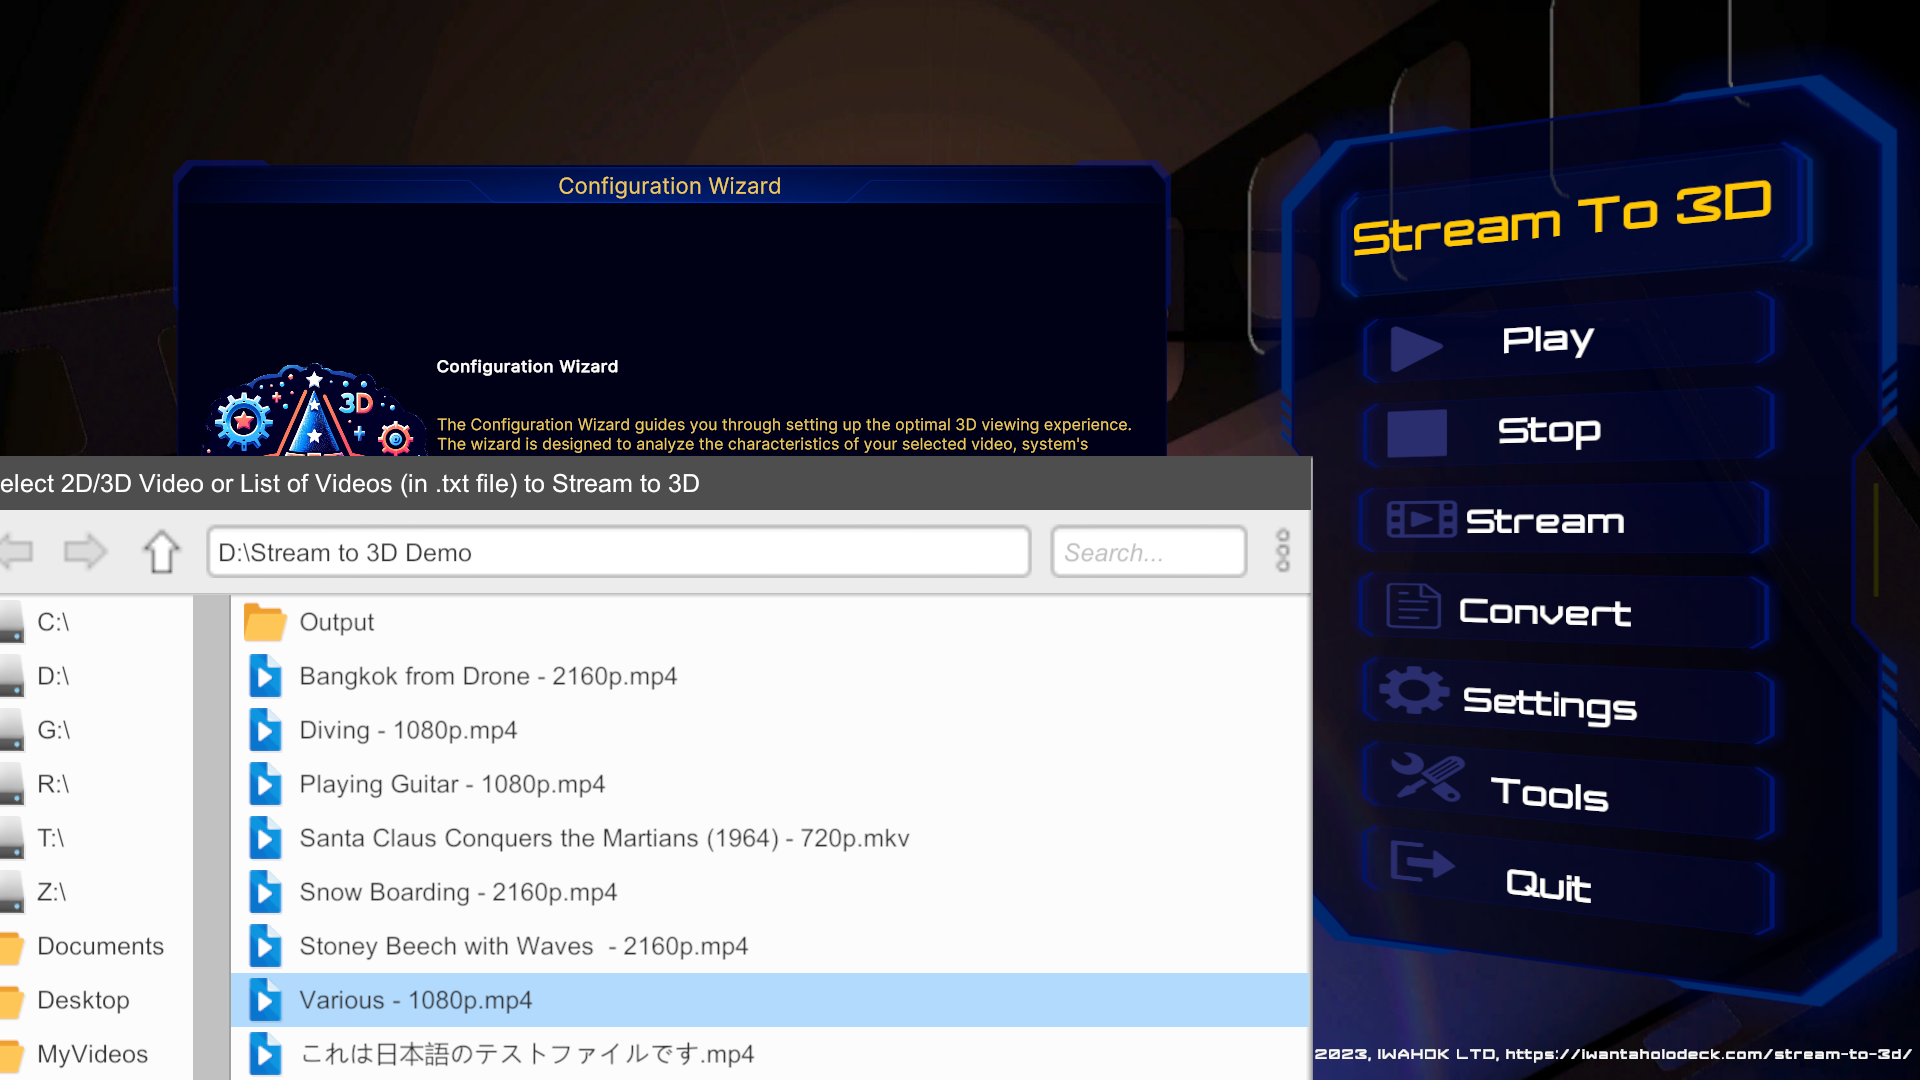
The Configuration Wizard guides you through setting up the optimal 3D viewing experience. The wizard is designed to analyse the characteristics of your selected video, system's performance, and target device, as well as taking account of your selected preferences, thus ensuring that your experience is customised to your system and requirements. Experienced users may choose to disable the Wizard completely and configure Stream to 3D manually, or use the Wizard in auto mode (which remembers your previous Wizard preference selections). You can control the Wizard behavior via the Settings/Wizard menu option.
File Conversion with Configuration Wizard Enabled
Clicking the Convert button in the Stream to 3D main menu will prompt you to select your 2D source video to convert and save as a 3D video file:
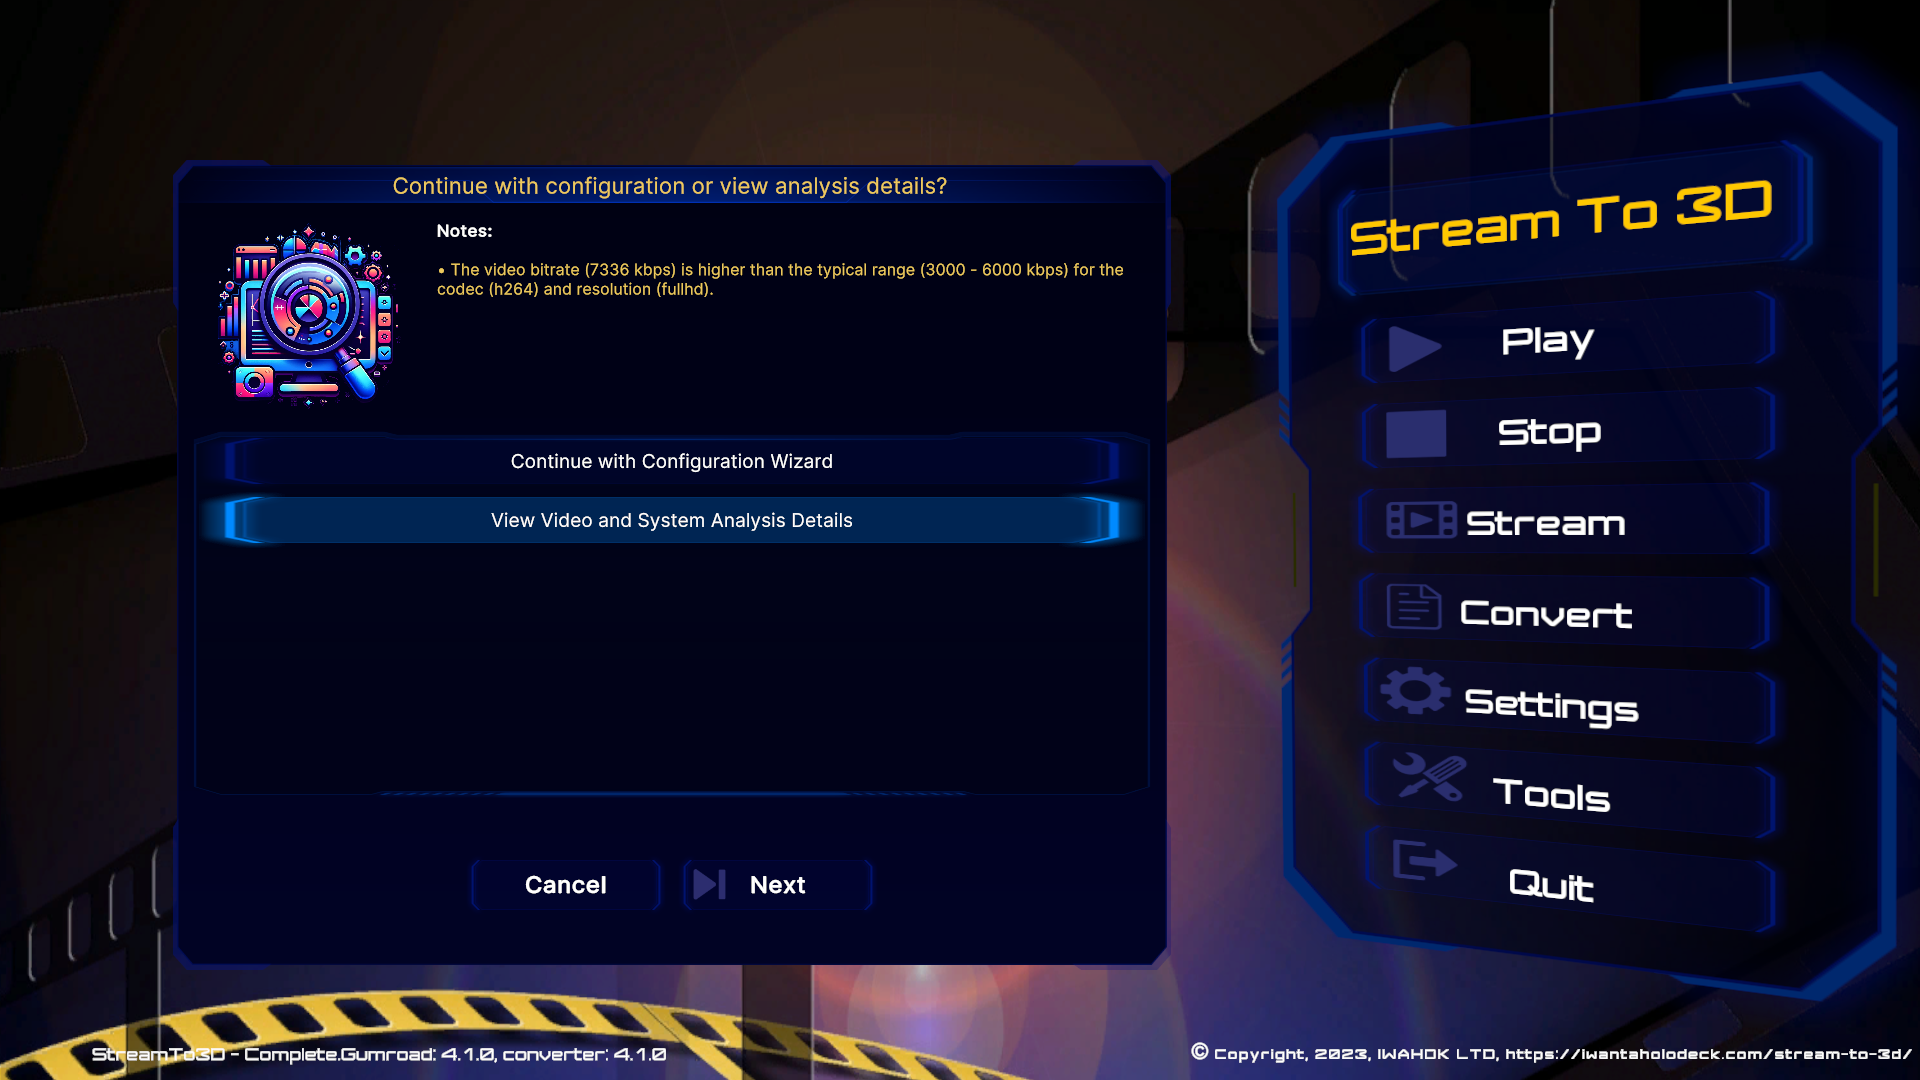
The Wizard will analyse the video and your system and provide high-level notes and warnings on anything that you should be aware of:

It will also optionally allow you to see meta data details on the video that you are about to convert and system performance metrics:
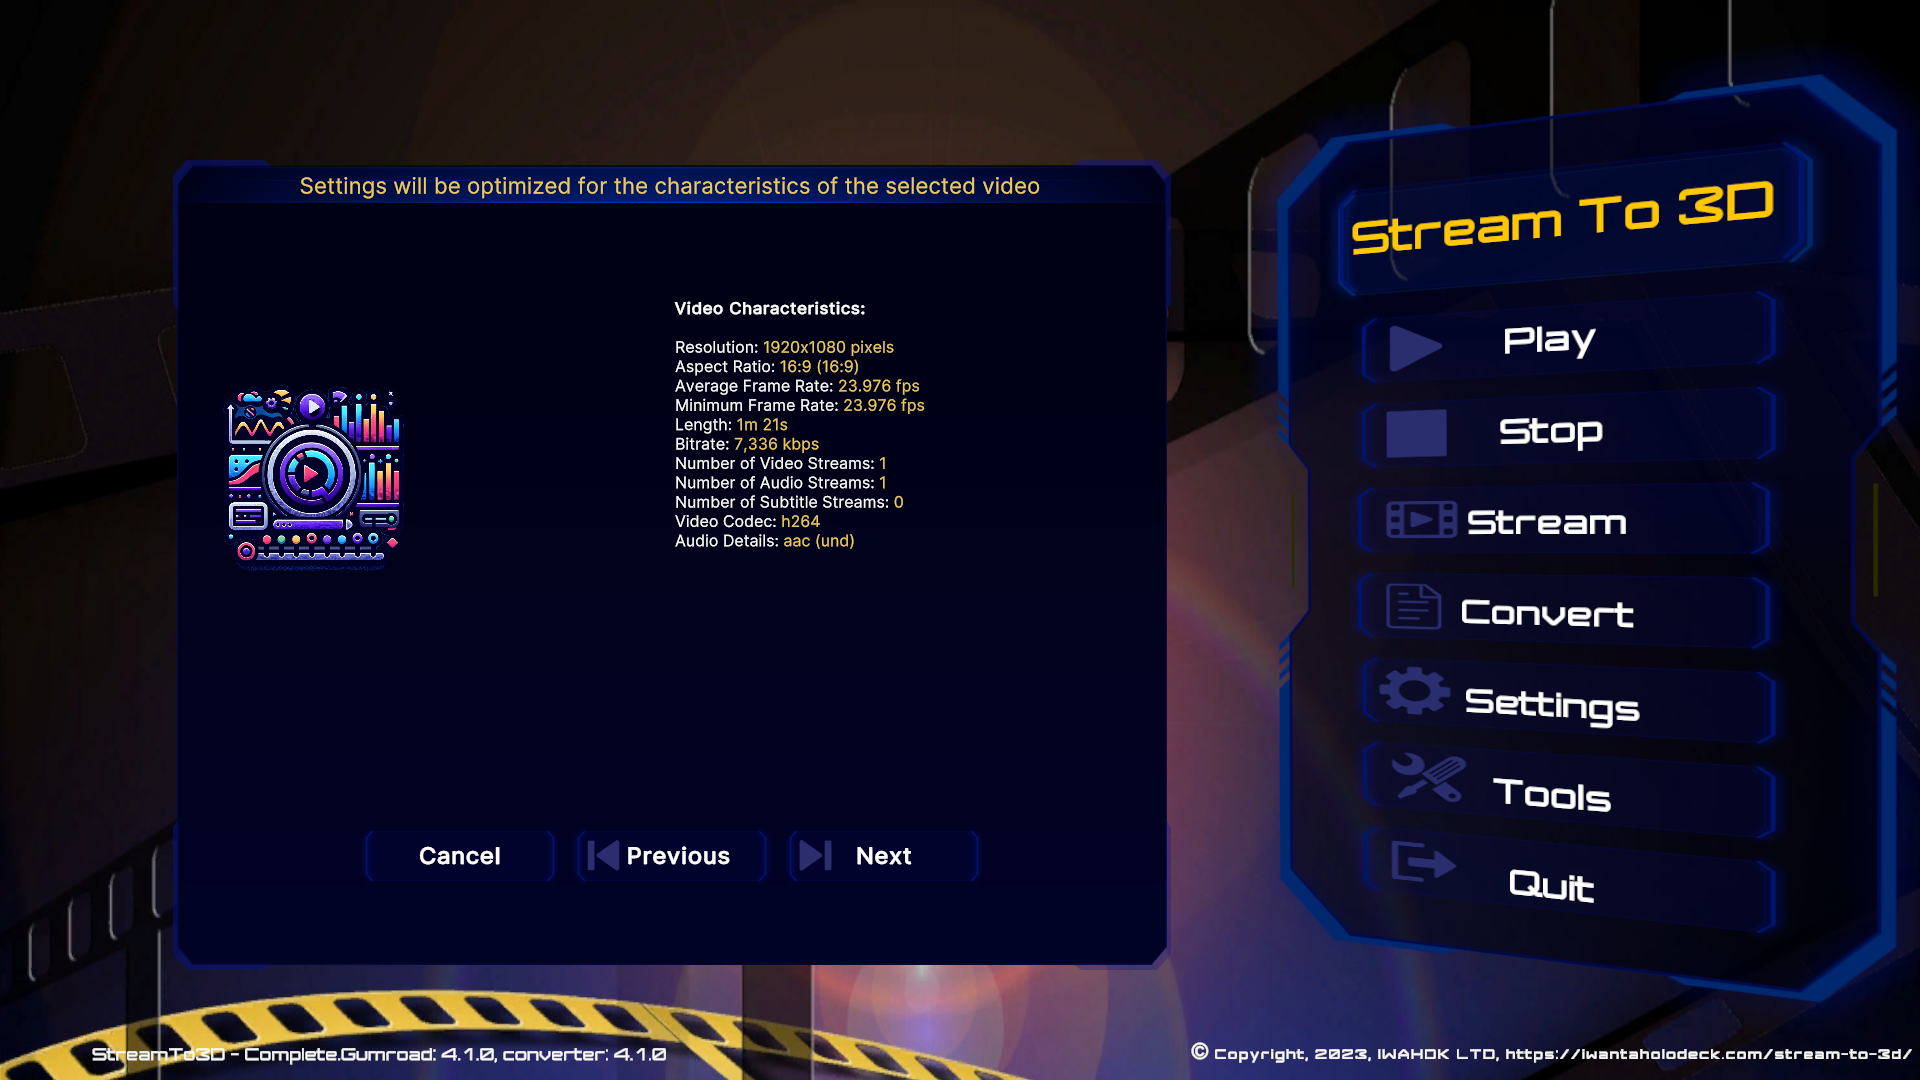
An example of the video meta data displayed is given below:
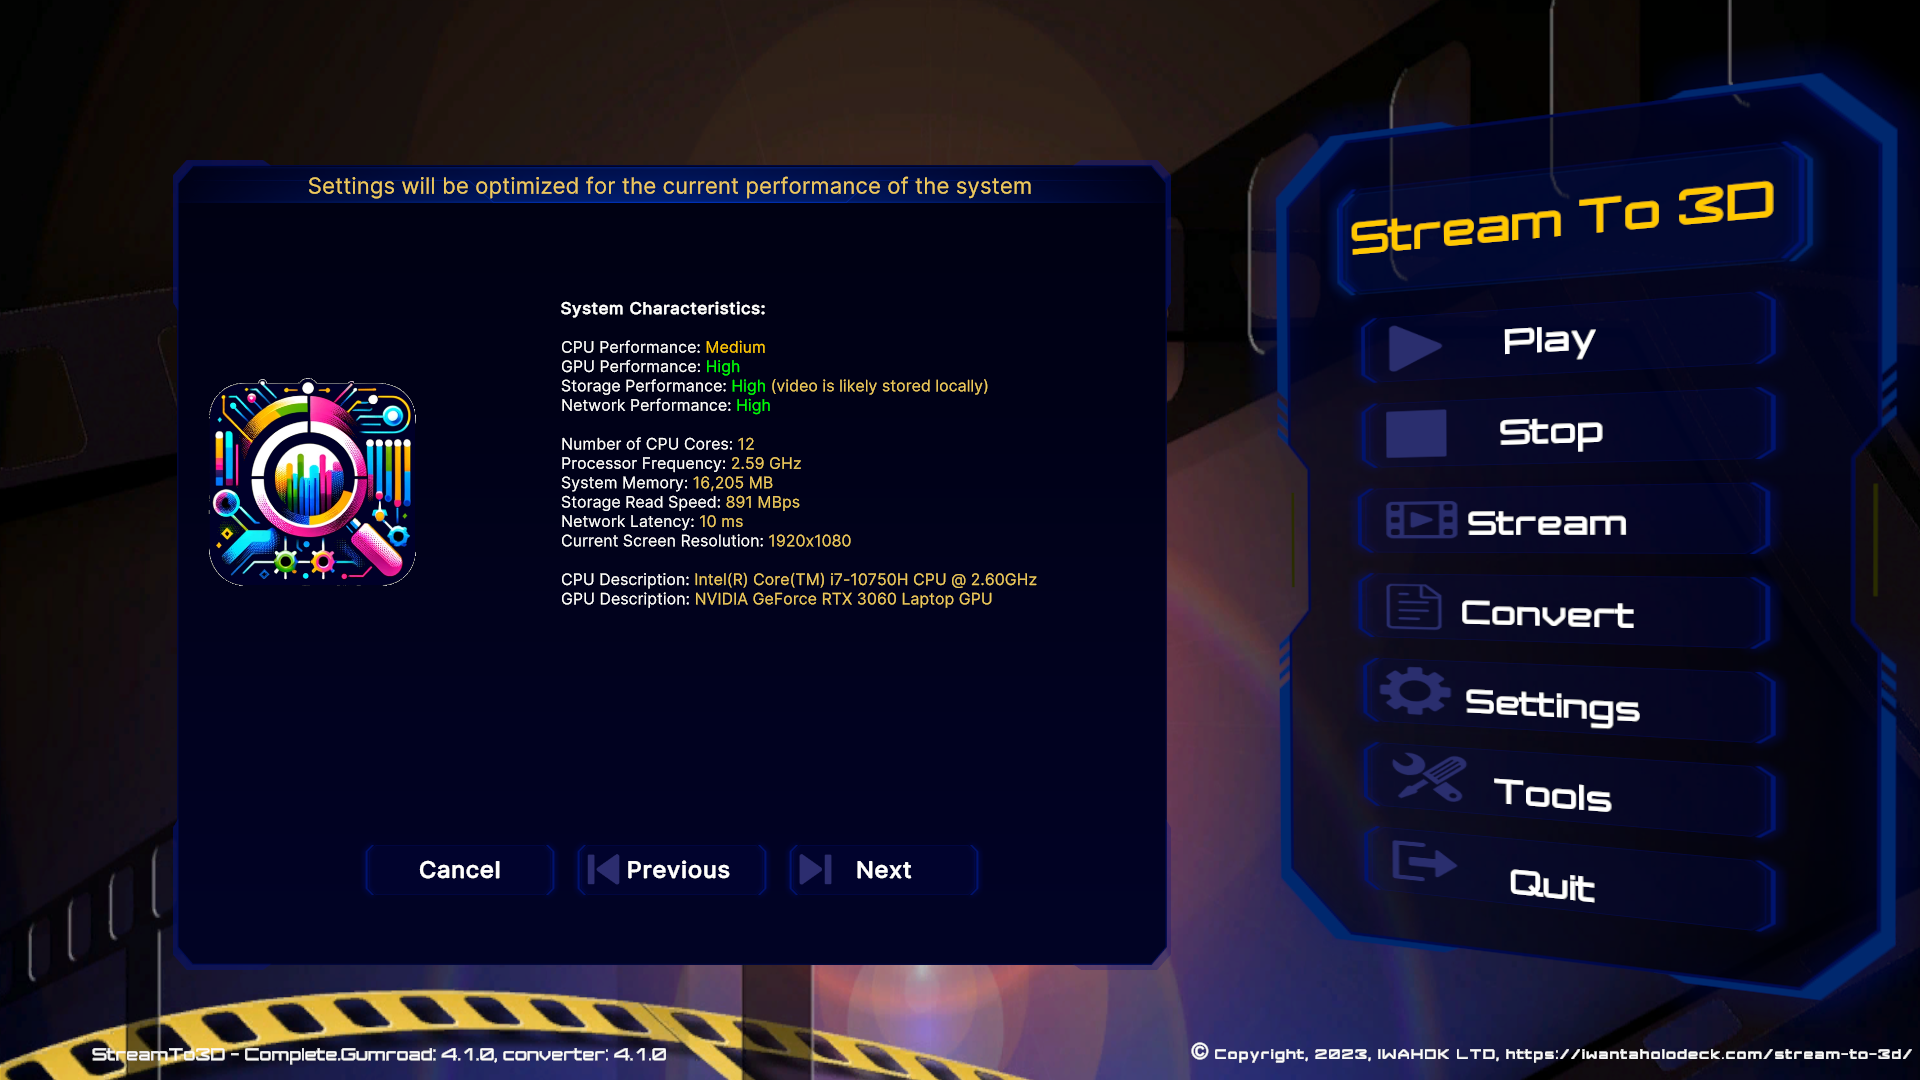
An example of the system performance metrics displayed is given below:
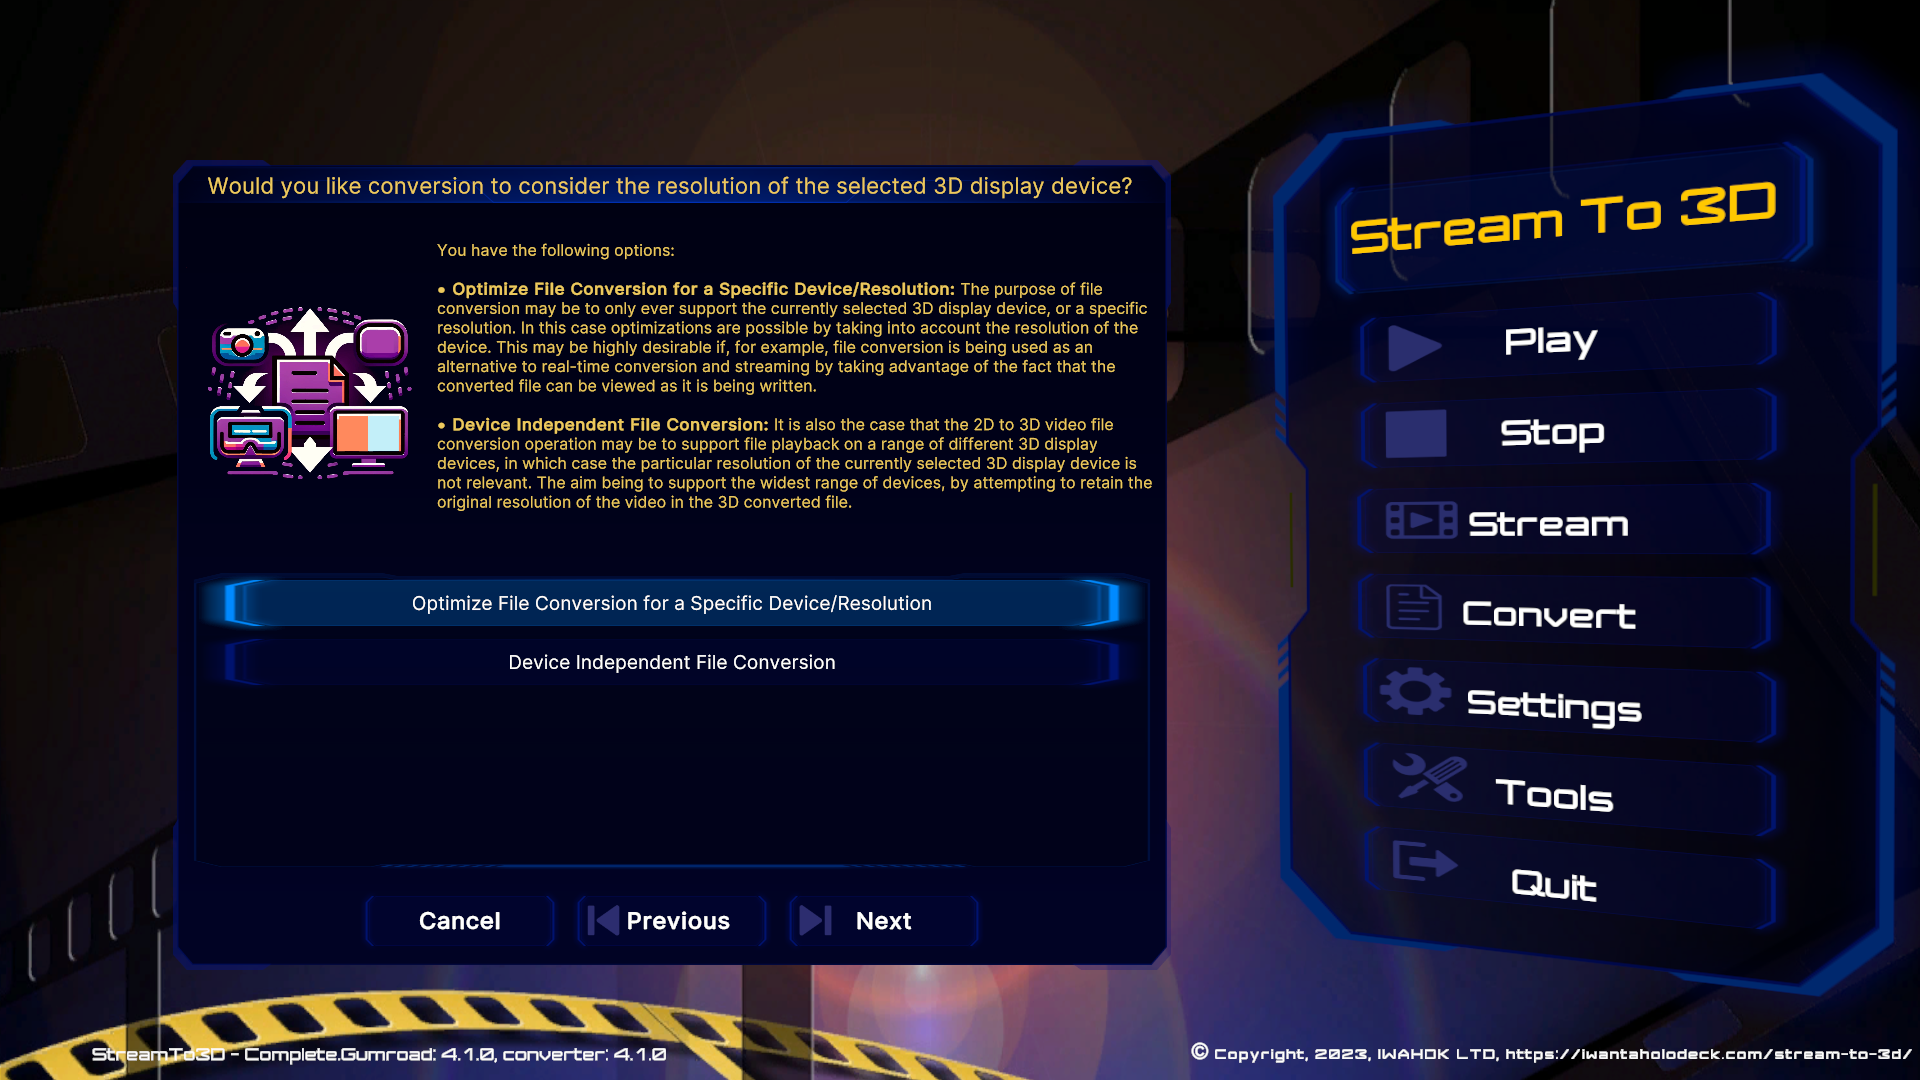
Next, you will be prompted on whether you would like conversion to consider the resolution of the selected 3D display device. You have the following options:
• Optimize File Conversion for a Specific Device/Resolution: The purpose of file conversion may be to only ever support the currently selected 3D display device, or a specific resolution. In this case optimizations are possible by taking into account the resolution of the device. This may be highly desirable if, for example, file conversion is being used as an alternative to real-time conversion and streaming by taking advantage of the fact that the converted file can be viewed as it is being written.
• Device Independent File Conversion: It is also the case that the 2D to 3D video file conversion operation may be to support file playback on a range of different 3D display devices, in which case the particular resolution of the currently selected 3D display device is not relevant. The aim being to support the widest range of devices, by attempting to retain the original resolution of the video in the 3D converted file.
Next, you will be prompted to choose your preferred balance between quality and file size for your converted video. You have the following options:
• Maximum Quality: Attempts to retain the full resolution of the original video and also doubles the output frame rate (from the sample rate) via frame rate interpolation.
• Balanced Quality and Size: Attemps to retain the full resolution of the original video, but does not increase the frame rate above the sample rate.
• Smaller File Size: Uses a 3D output format that halves the resolution of the original video and does not increase the frame rate above the sample rate.

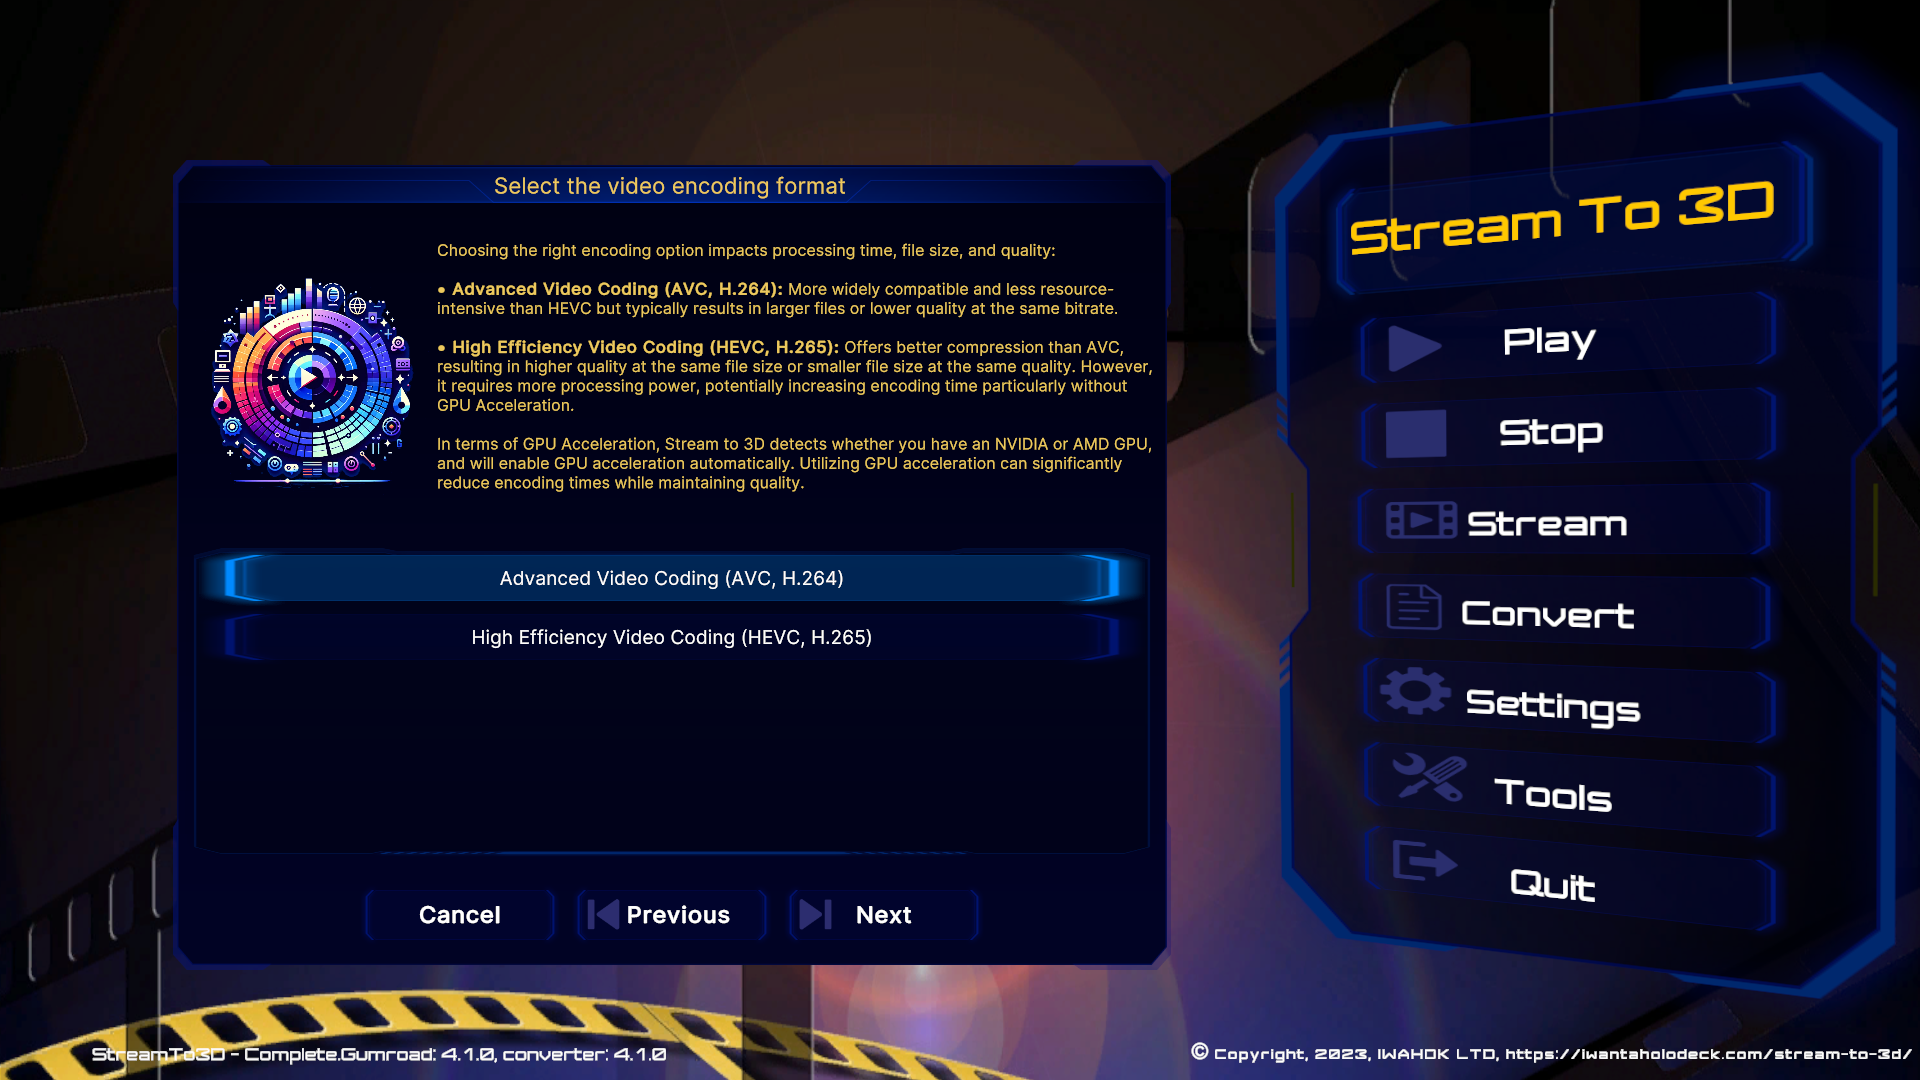
Next, you will be prompted to select the video encoding format.
Choosing the right encoding option impacts processing time, file size, and quality:
• Advanced Video Coding (AVC, H.264): More widely compatible and less resource-intensive than HEVC but typically results in larger files or lower quality at the same bitrate.
• High Efficiency Video Coding (HEVC, H.265): Offers better compression than AVC, resulting in higher quality at the same file size or smaller file size at the same quality. However, it requires more processing power, potentially increasing encoding time particularly without GPU Acceleration.
In terms of GPU Acceleration, Stream to 3D detects whether you have an NVIDIA or AMD GPU, and will enable GPU acceleration automatically. Utilizing GPU acceleration can significantly reduce encoding times while maintaining quality.
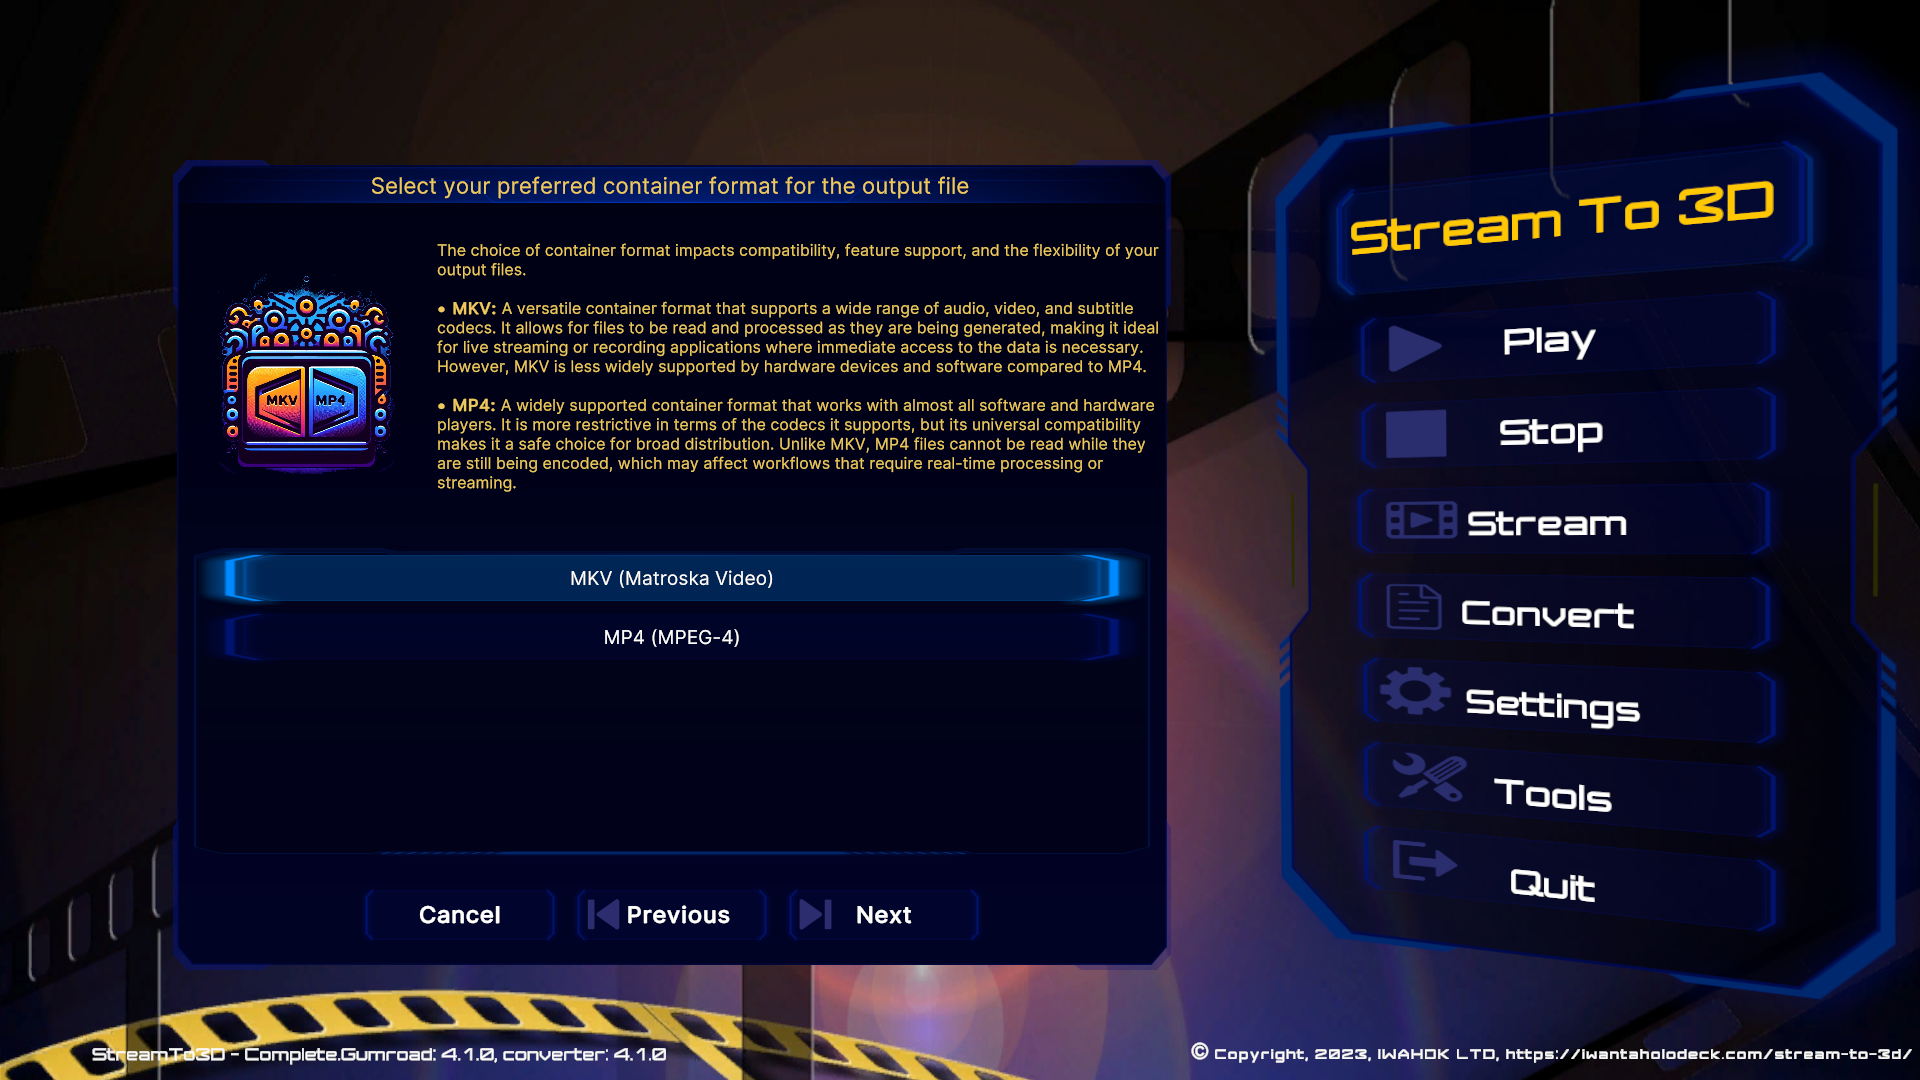
Next, you be prompted to select your container format for the output file. The choice of container format impacts compatibility, feature support, and the flexibility of your output files.
• MKV: A versatile container format that supports a wide range of audio, video, and subtitle codecs. It allows for files to be read and processed as they are being generated, making it ideal for live streaming or recording applications where immediate access to the data is necessary. However, MKV is less widely supported by hardware devices and software compared to MP4.
• MP4: A widely supported container format that works with almost all software and hardware players. It is more restrictive in terms of the codecs it supports, but its universal compatibility makes it a safe choice for broad distribution. Unlike MKV, MP4 files cannot be read while they are still being encoded, which may affect workflows that require real-time processing or streaming.
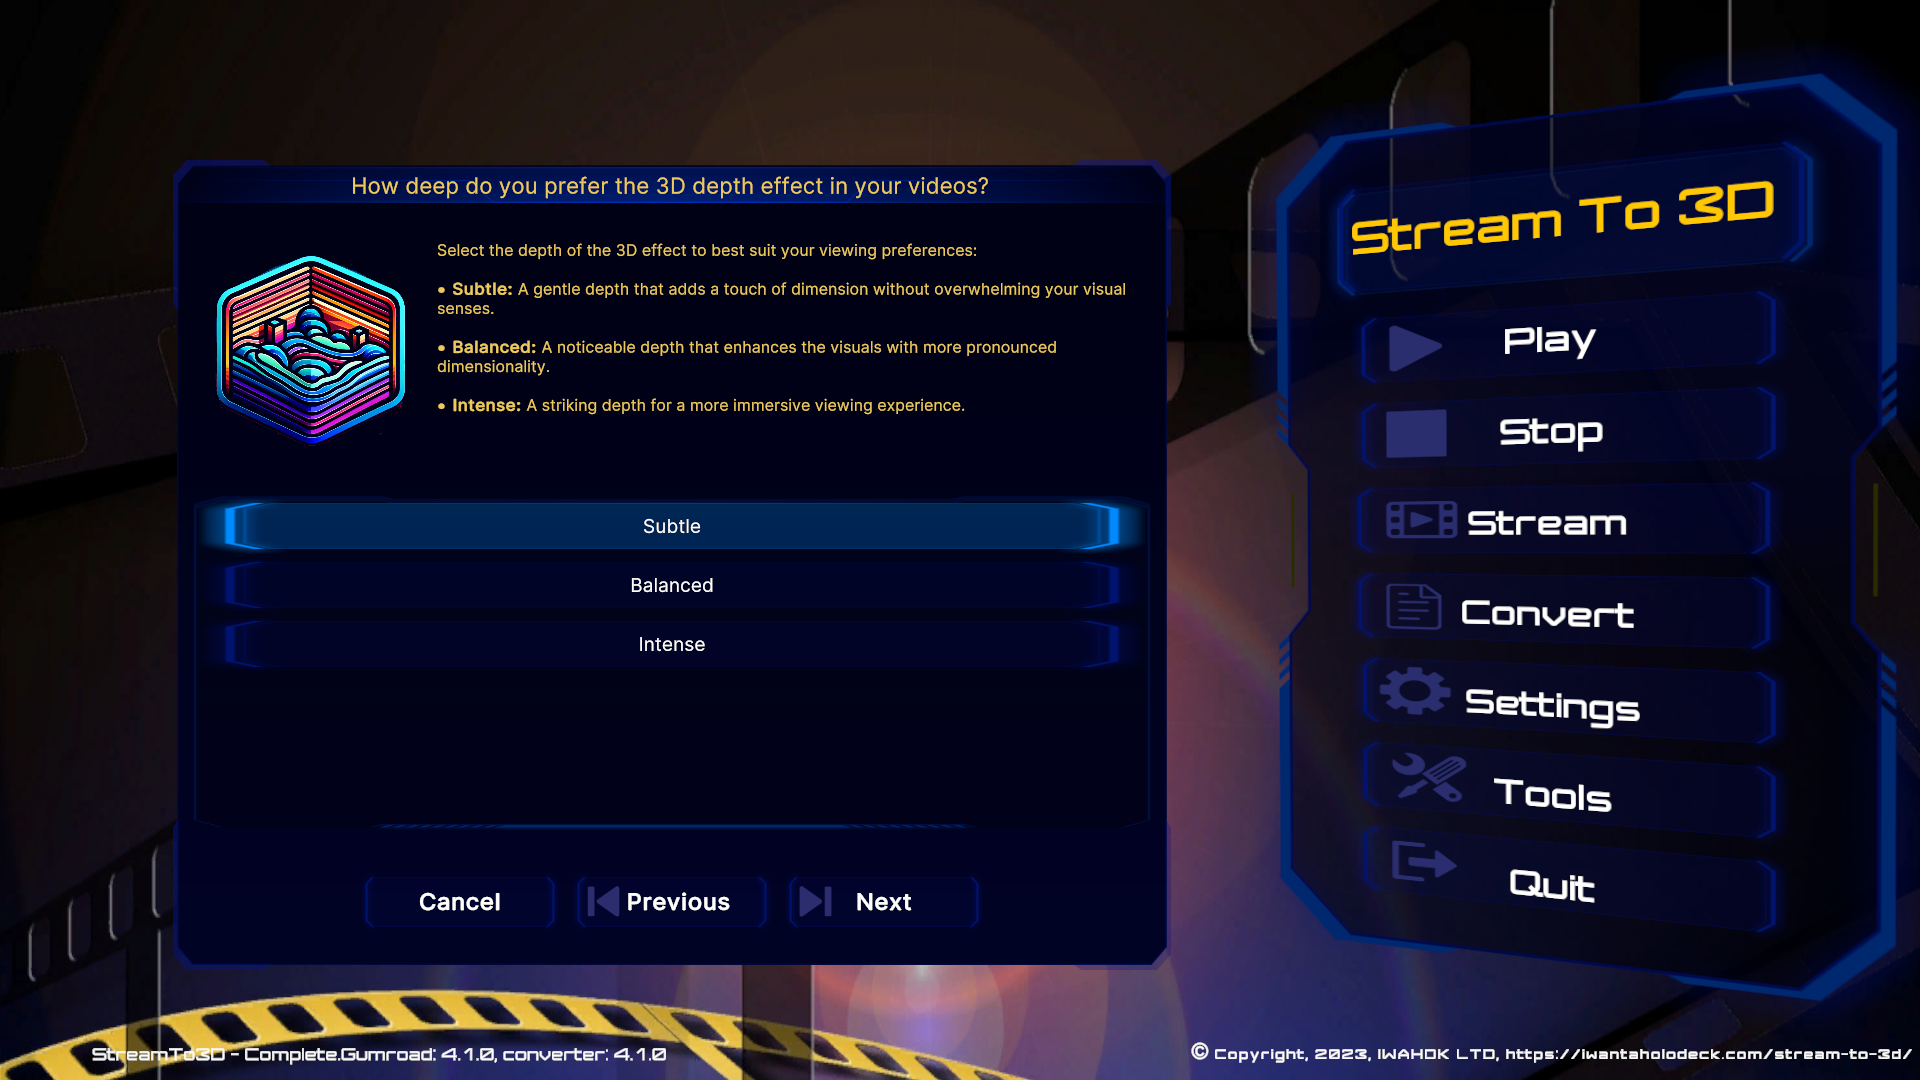
Next, you will be prompted to choose how deep you prefer the 3D depth effect to be in your videos. Select the depth of the 3D effect to best suit your viewing preferences:
• Subtle: A gentle depth that adds a touch of 3D dimensionality without overwhelming your visual senses.
• Balanced: A noticeable depth that enhances the visuals with more pronounced dimensionality.
• Intense: A striking depth for a more immersive viewing experience.
Note that the Balanced and Intense options are significantly more CPU demanding than Subtle and so, depending on the capabilities of your system, you may not achieve real-time conversion for those options.
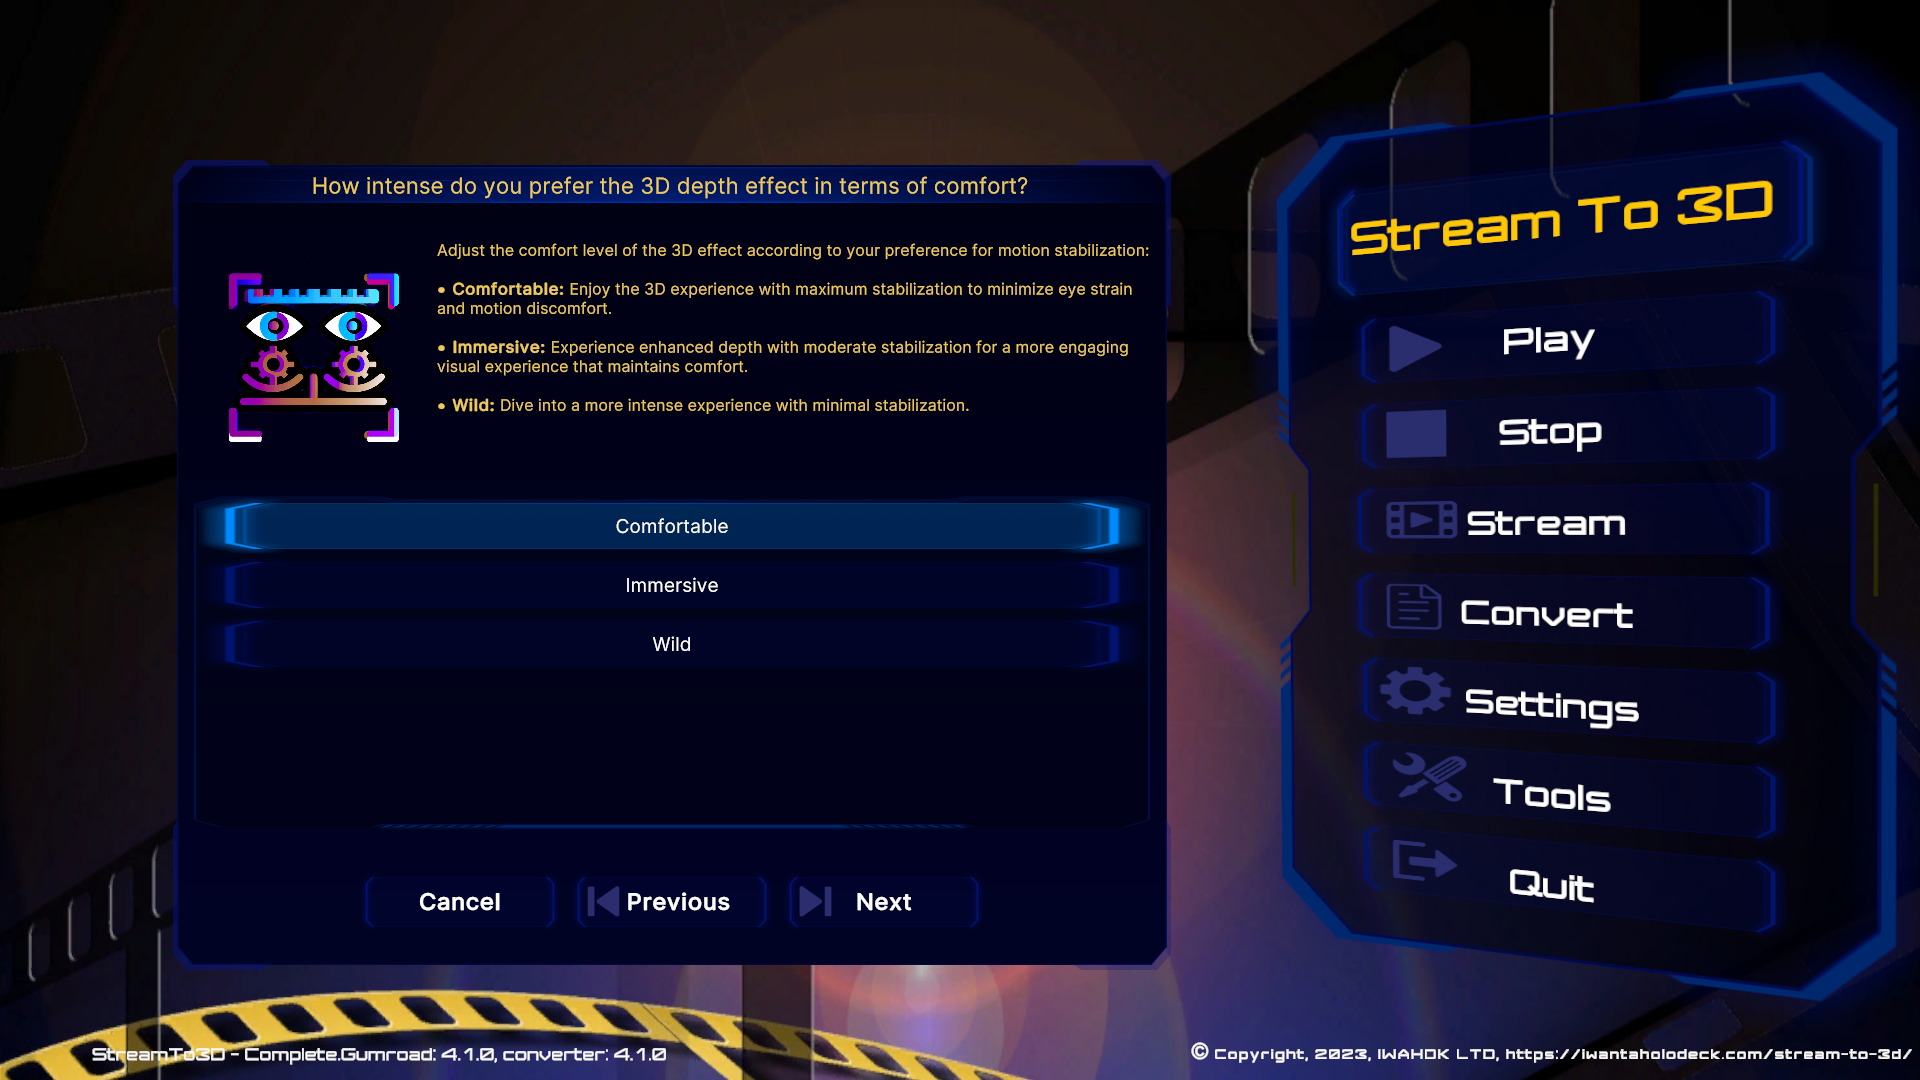
Next, you will be prompted to choose your preference in terms of the intensity of the 3D depth effect in terms of comfort. This adjusts the comfort level of the 3D effect according to your preference for motion stabilization:
• Comfortable: Enjoy the 3D experience with maximum stabilization to minimize eye strain and motion discomfort.
• Immersive: Experience enhanced depth with moderate stabilization for a more engaging visual experience that maintains comfort.
• Wild: Dive into a more intense experience with minimal stabilization.
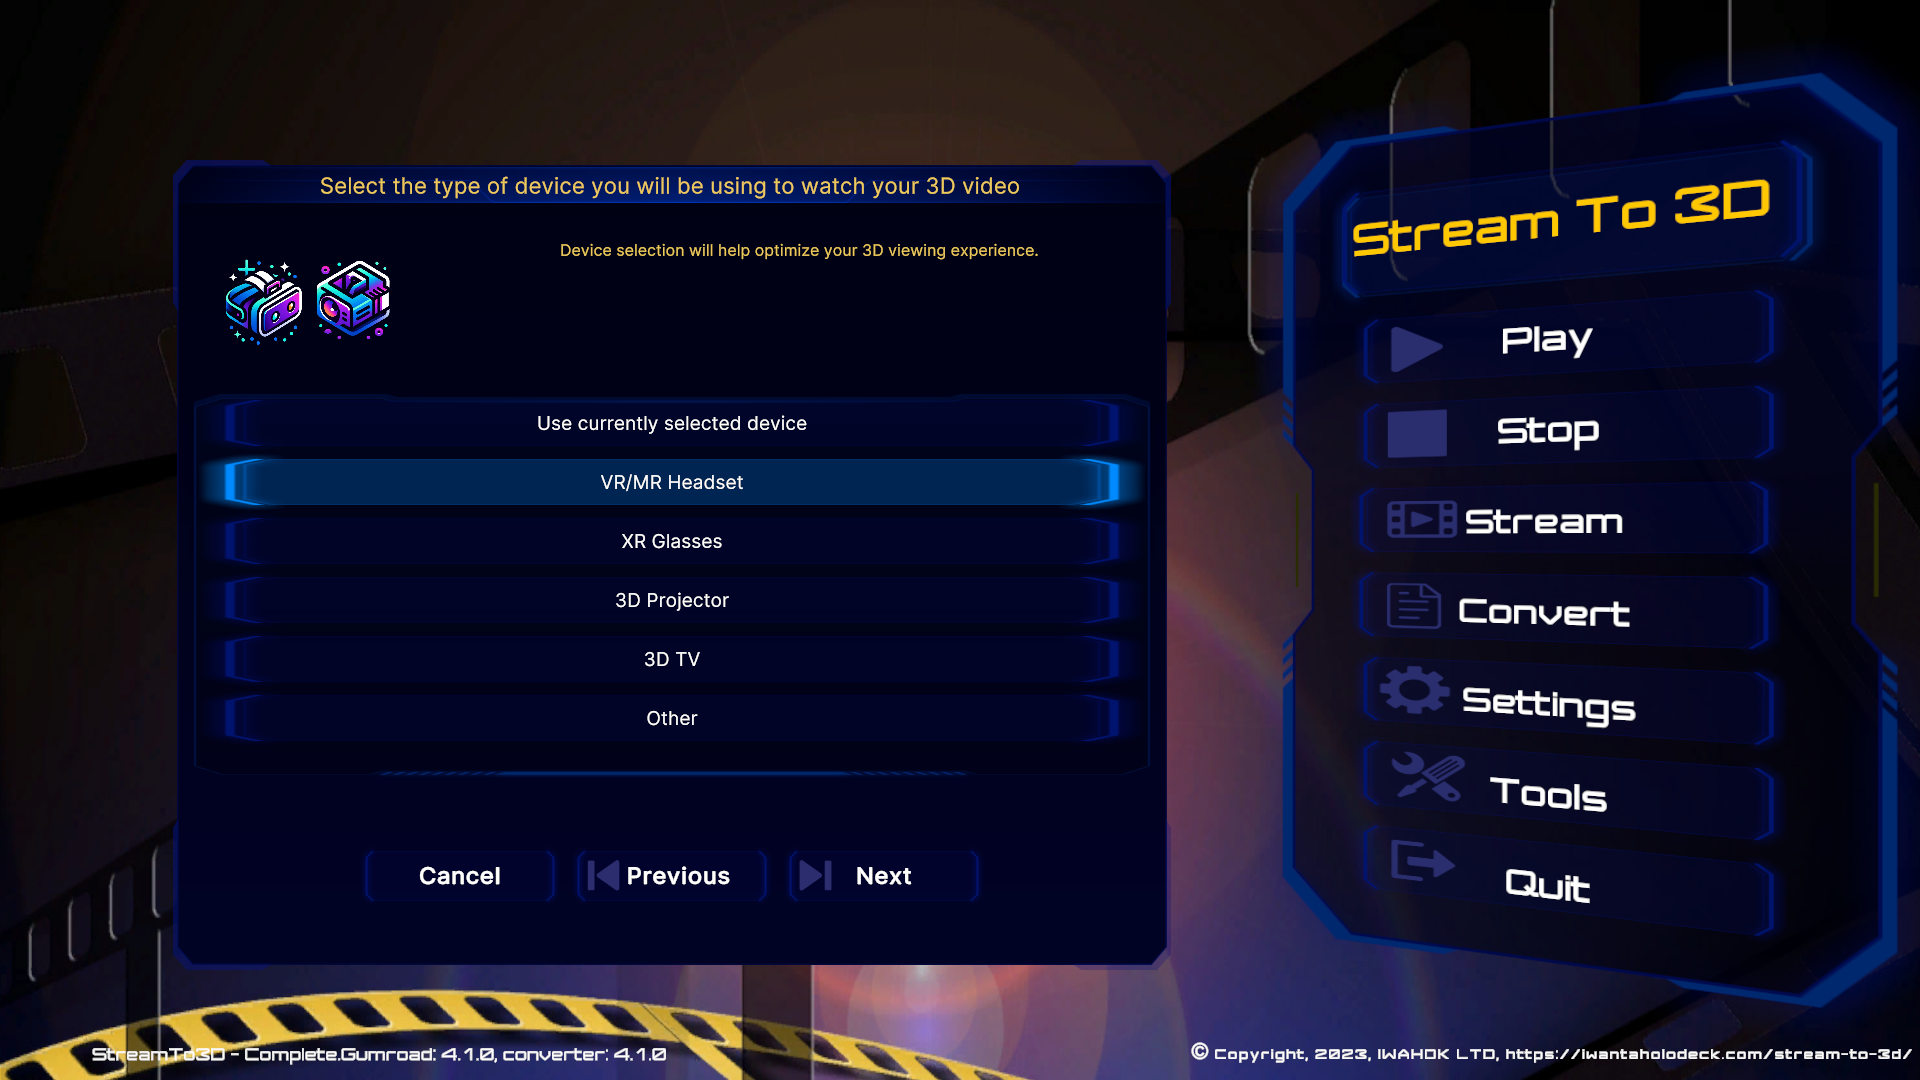
Next you will be prompted to select the type of device you will be using to watch your 3D video. Device selection will help optimize your 3D viewing experience:
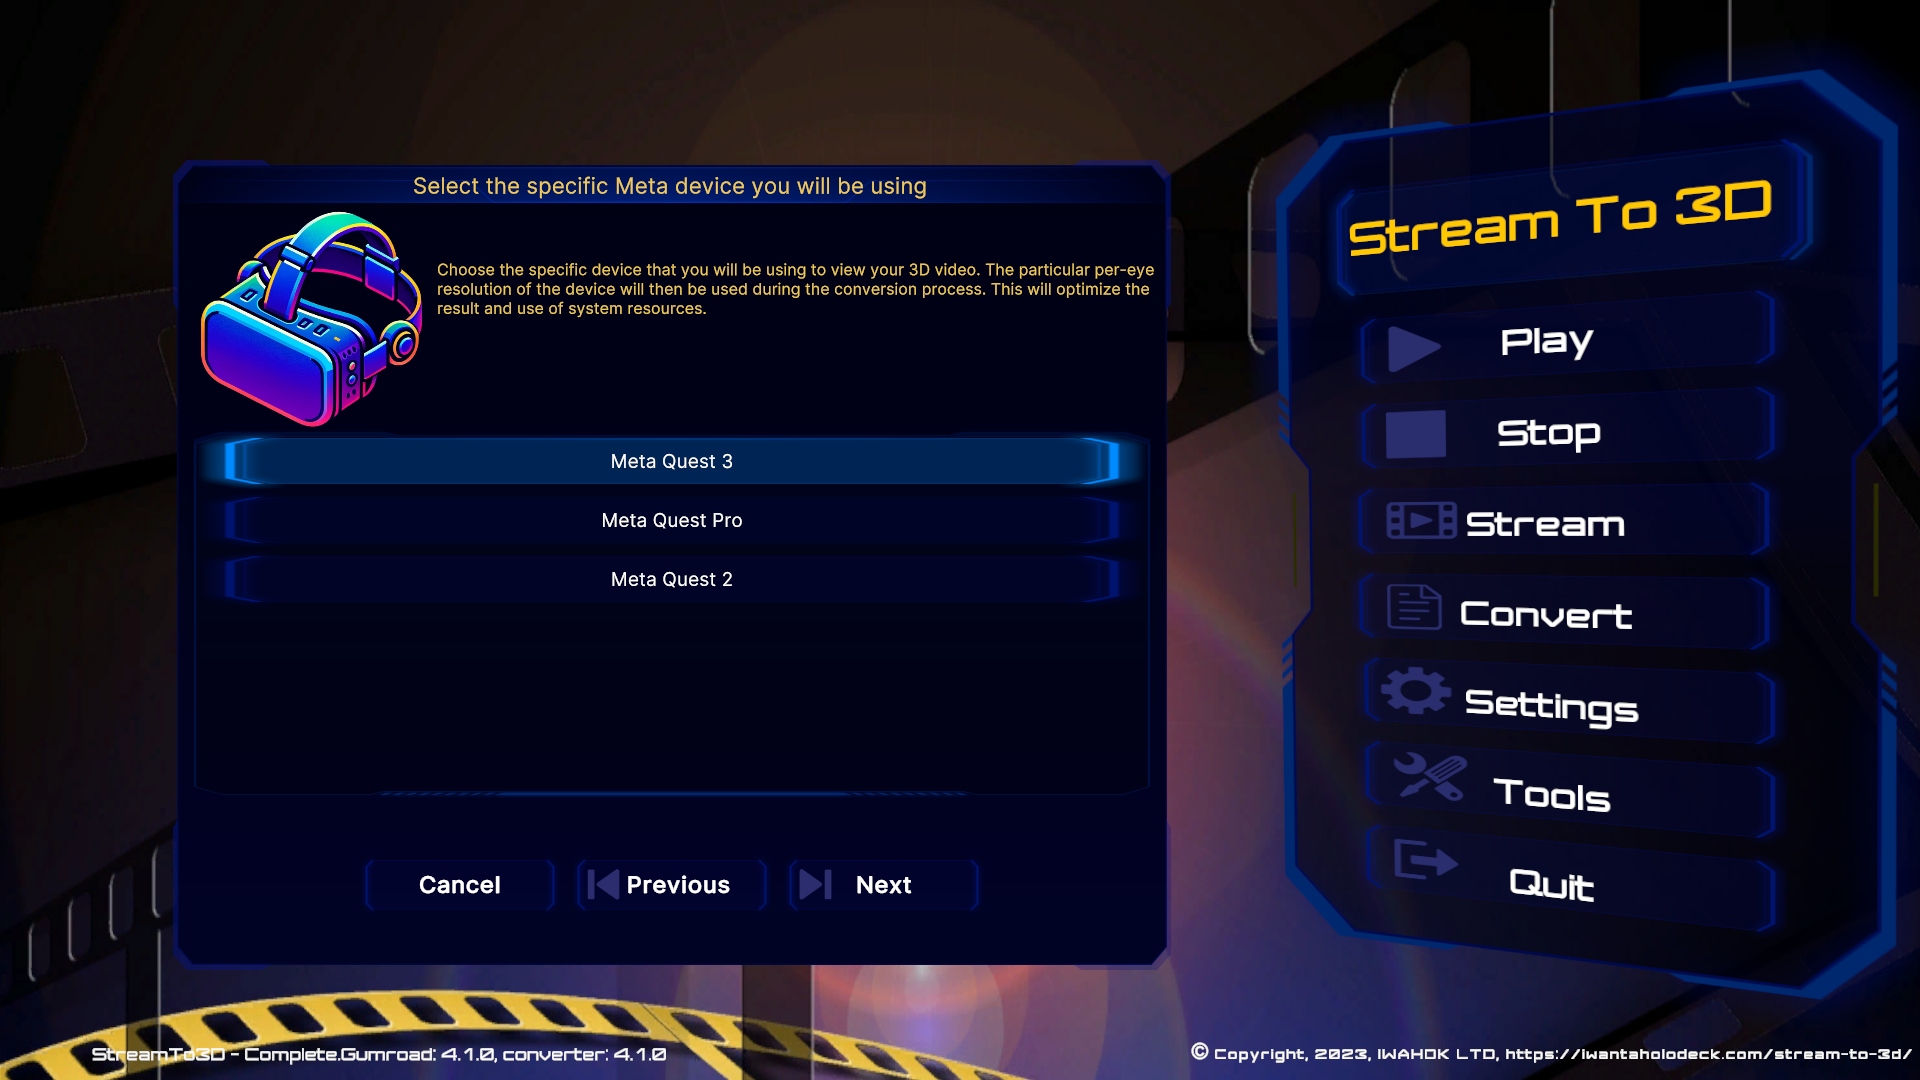
Following vendor selection based on device type, you will be prompted to select the specific device:
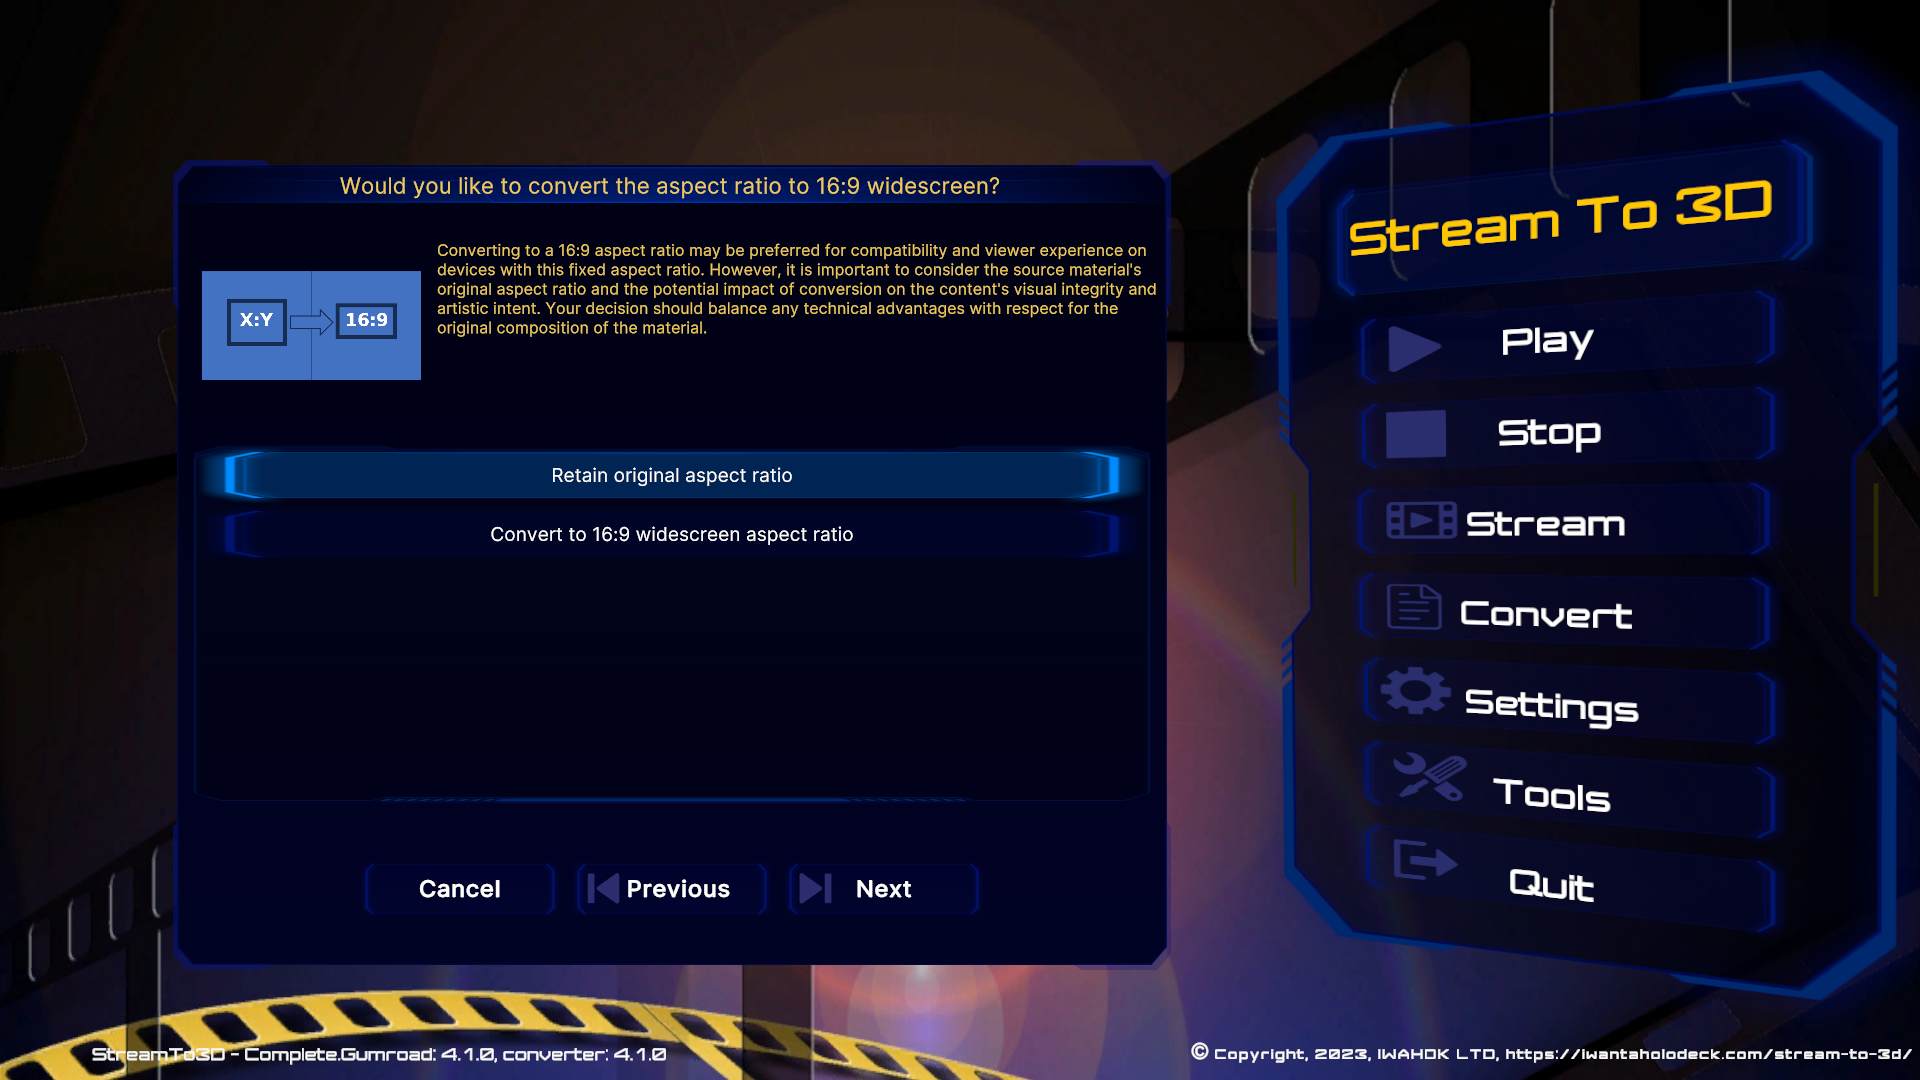
Next, you will be prompted on whether you would like to convert the aspect ratio of the video to 16:9 widescreen format. Converting to a 16:9 aspect ratio may be preferred for compatibility and viewer experience on devices with this fixed aspect ratio. However, it is important to consider the source material's original aspect ratio and the potential impact of conversion on the content's visual integrity and artistic intent. Your decision should balance any technical advantages with respect for the original composition of the material:
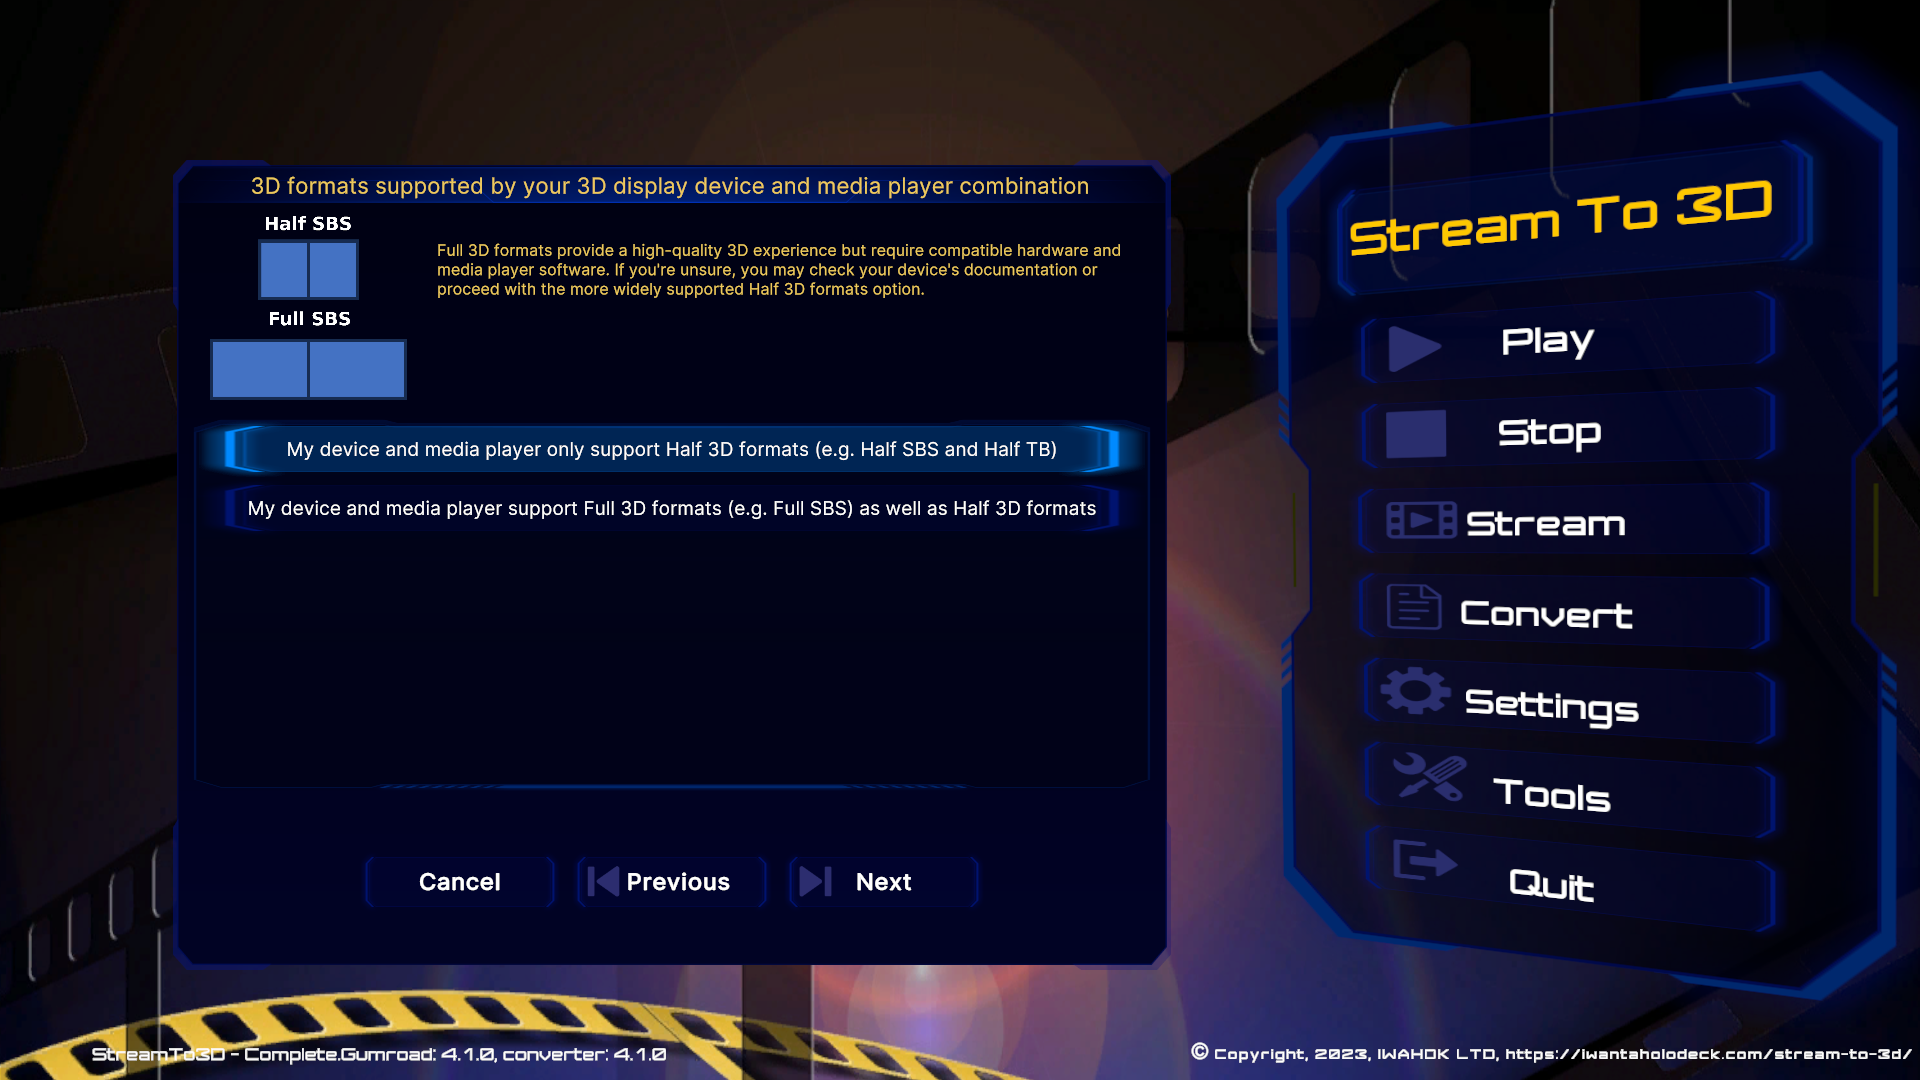
Next, you will be prompted on 3D formats supported by your 3D display device and media player combination. Full 3D formats provide a high-quality 3D experience but require compatible hardware and media player software. If you're unsure, you may check your device's documentation or proceed with the more widely supported Half 3D formats option:
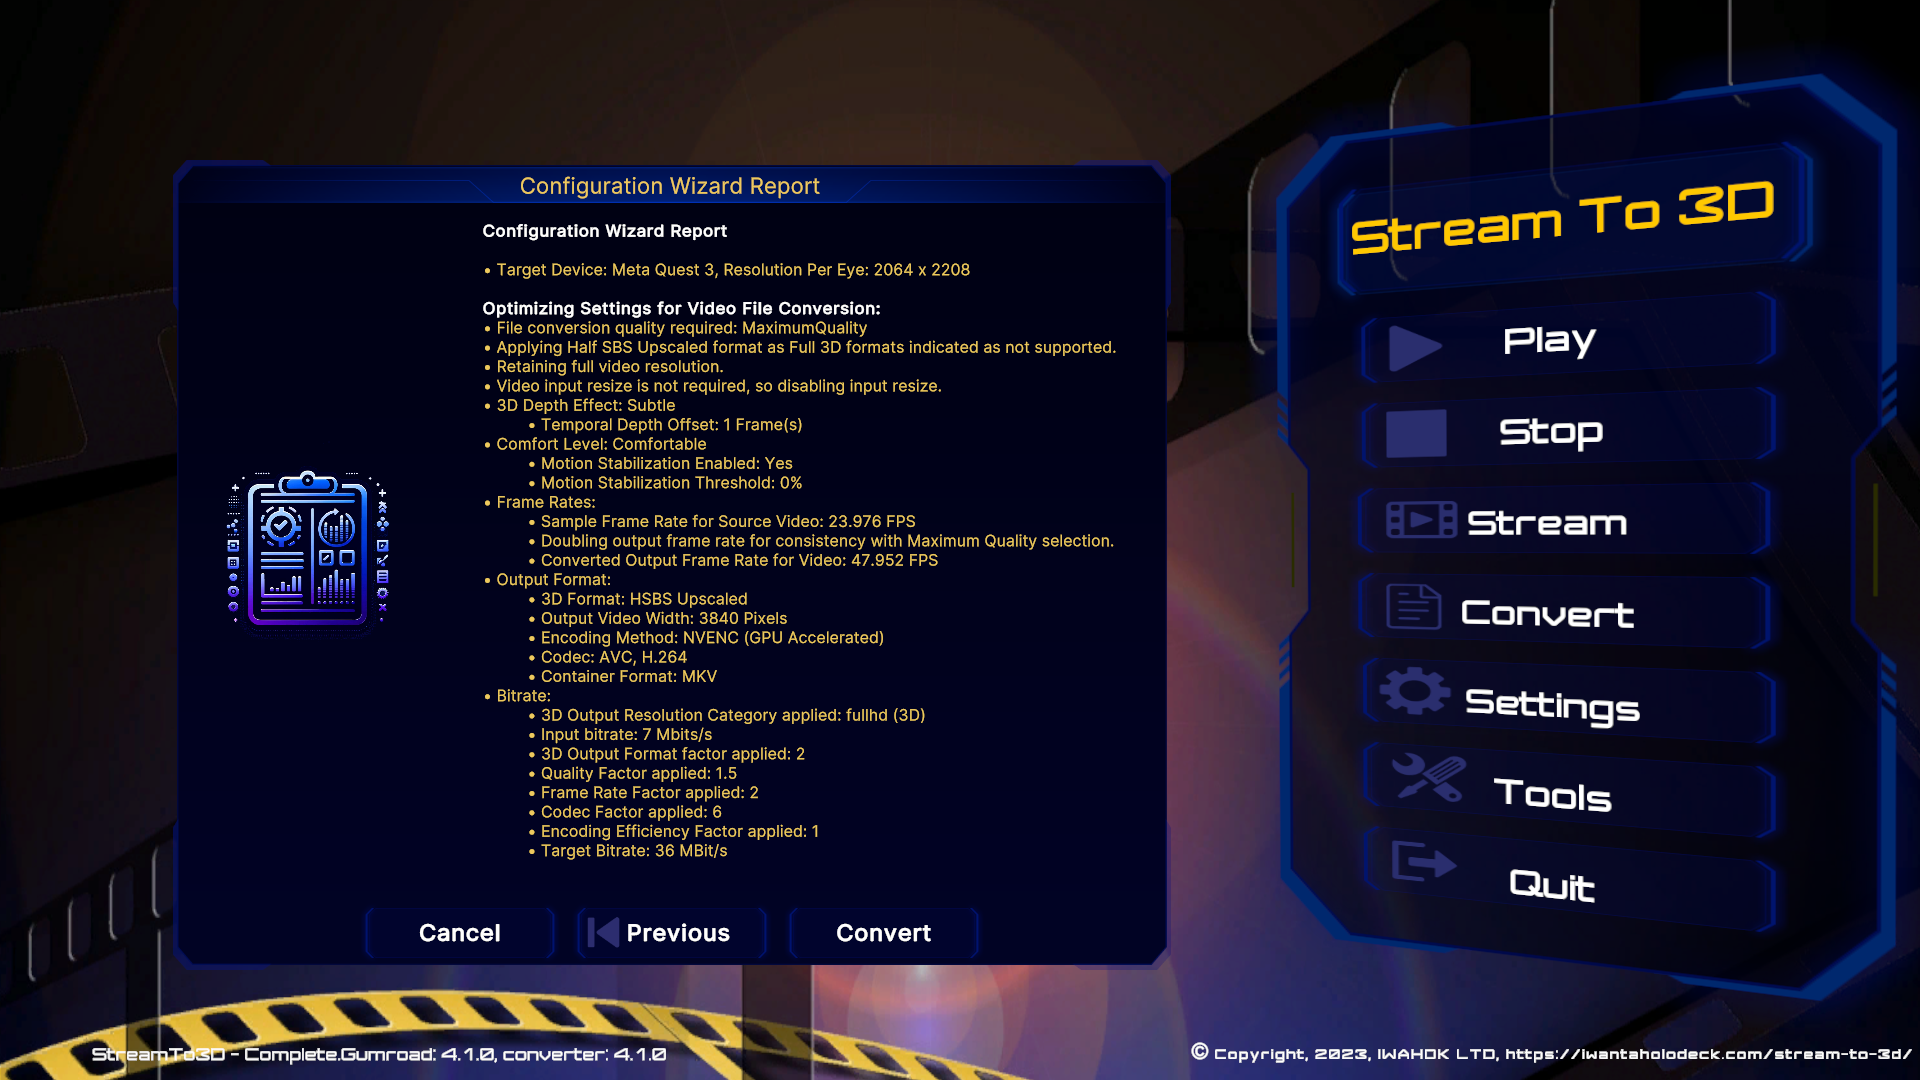
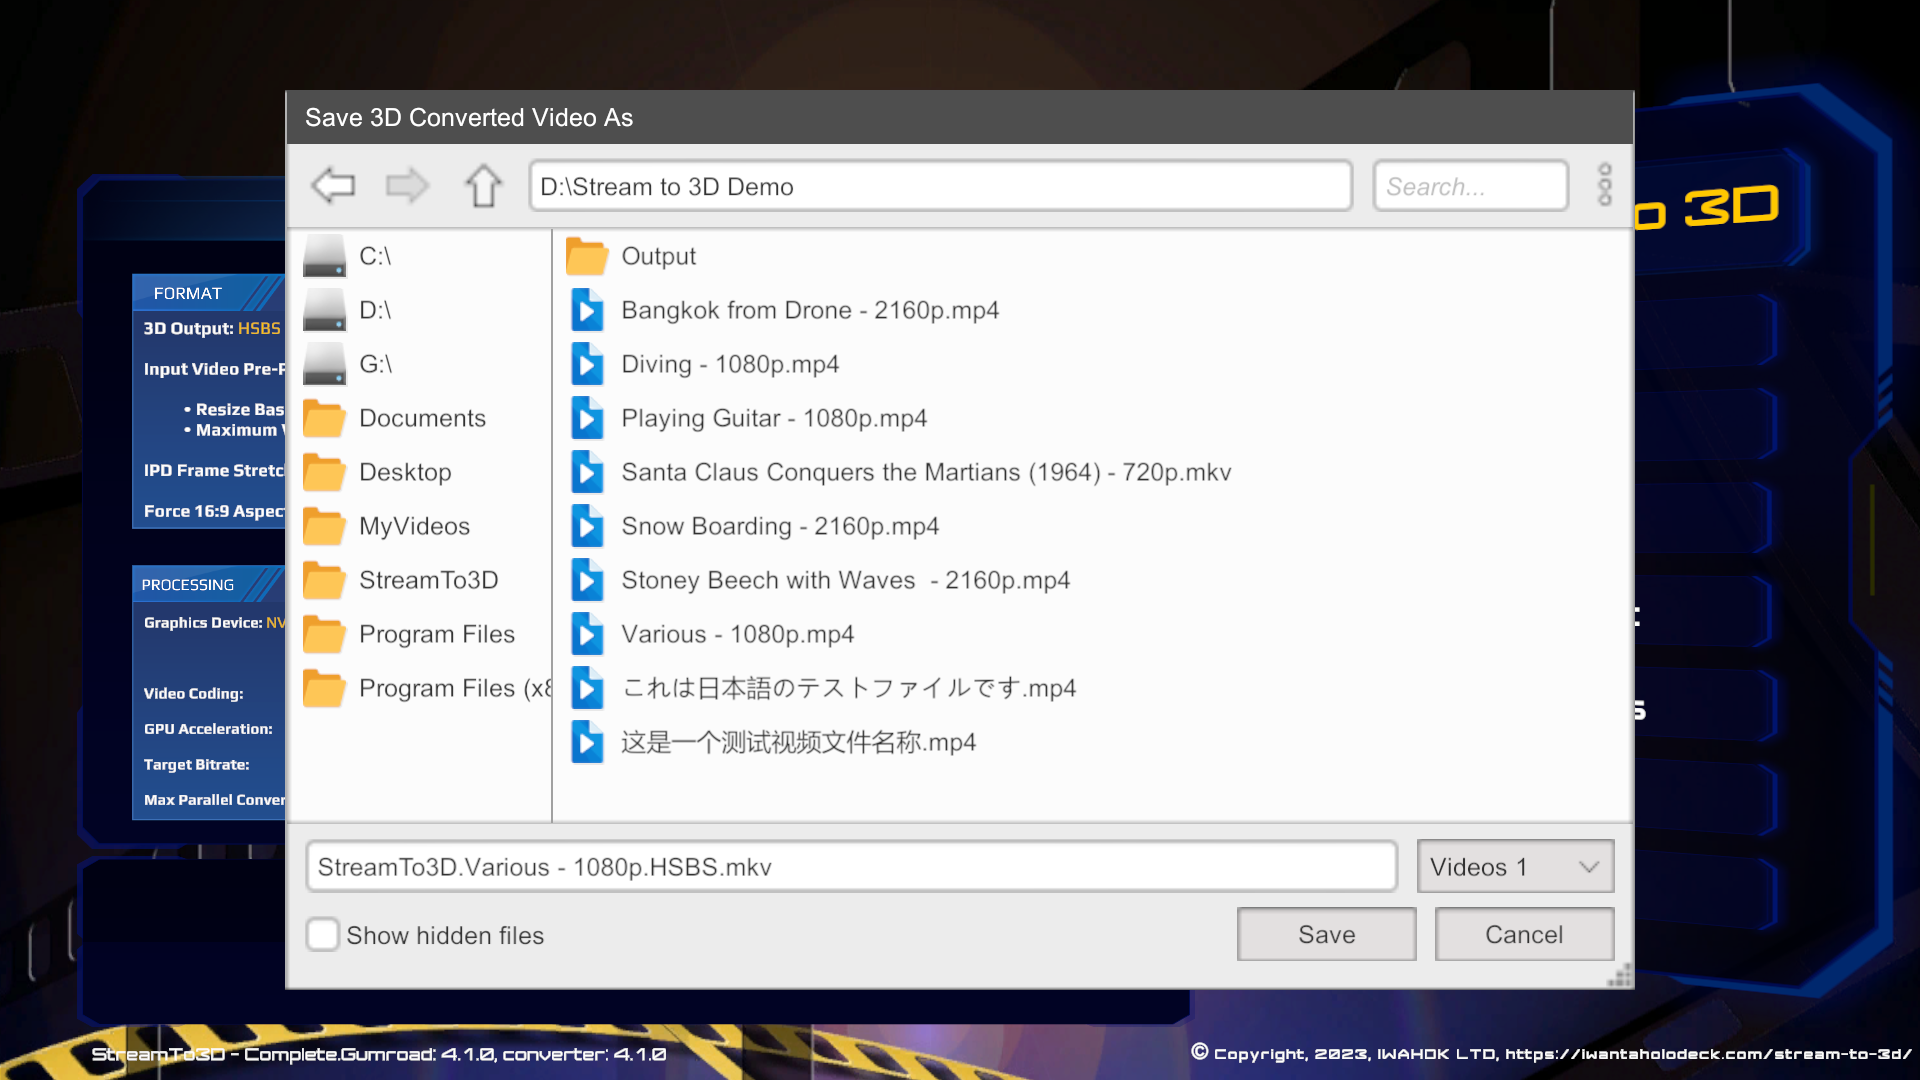
In the final step before your file is converted to 3D, the Configuration Wizard will produce a report, showing the resultant settings that will be applied and the logic for those settings. Pressing the Convert button will begin the conversion process by prompting you for the file name for the converted video:
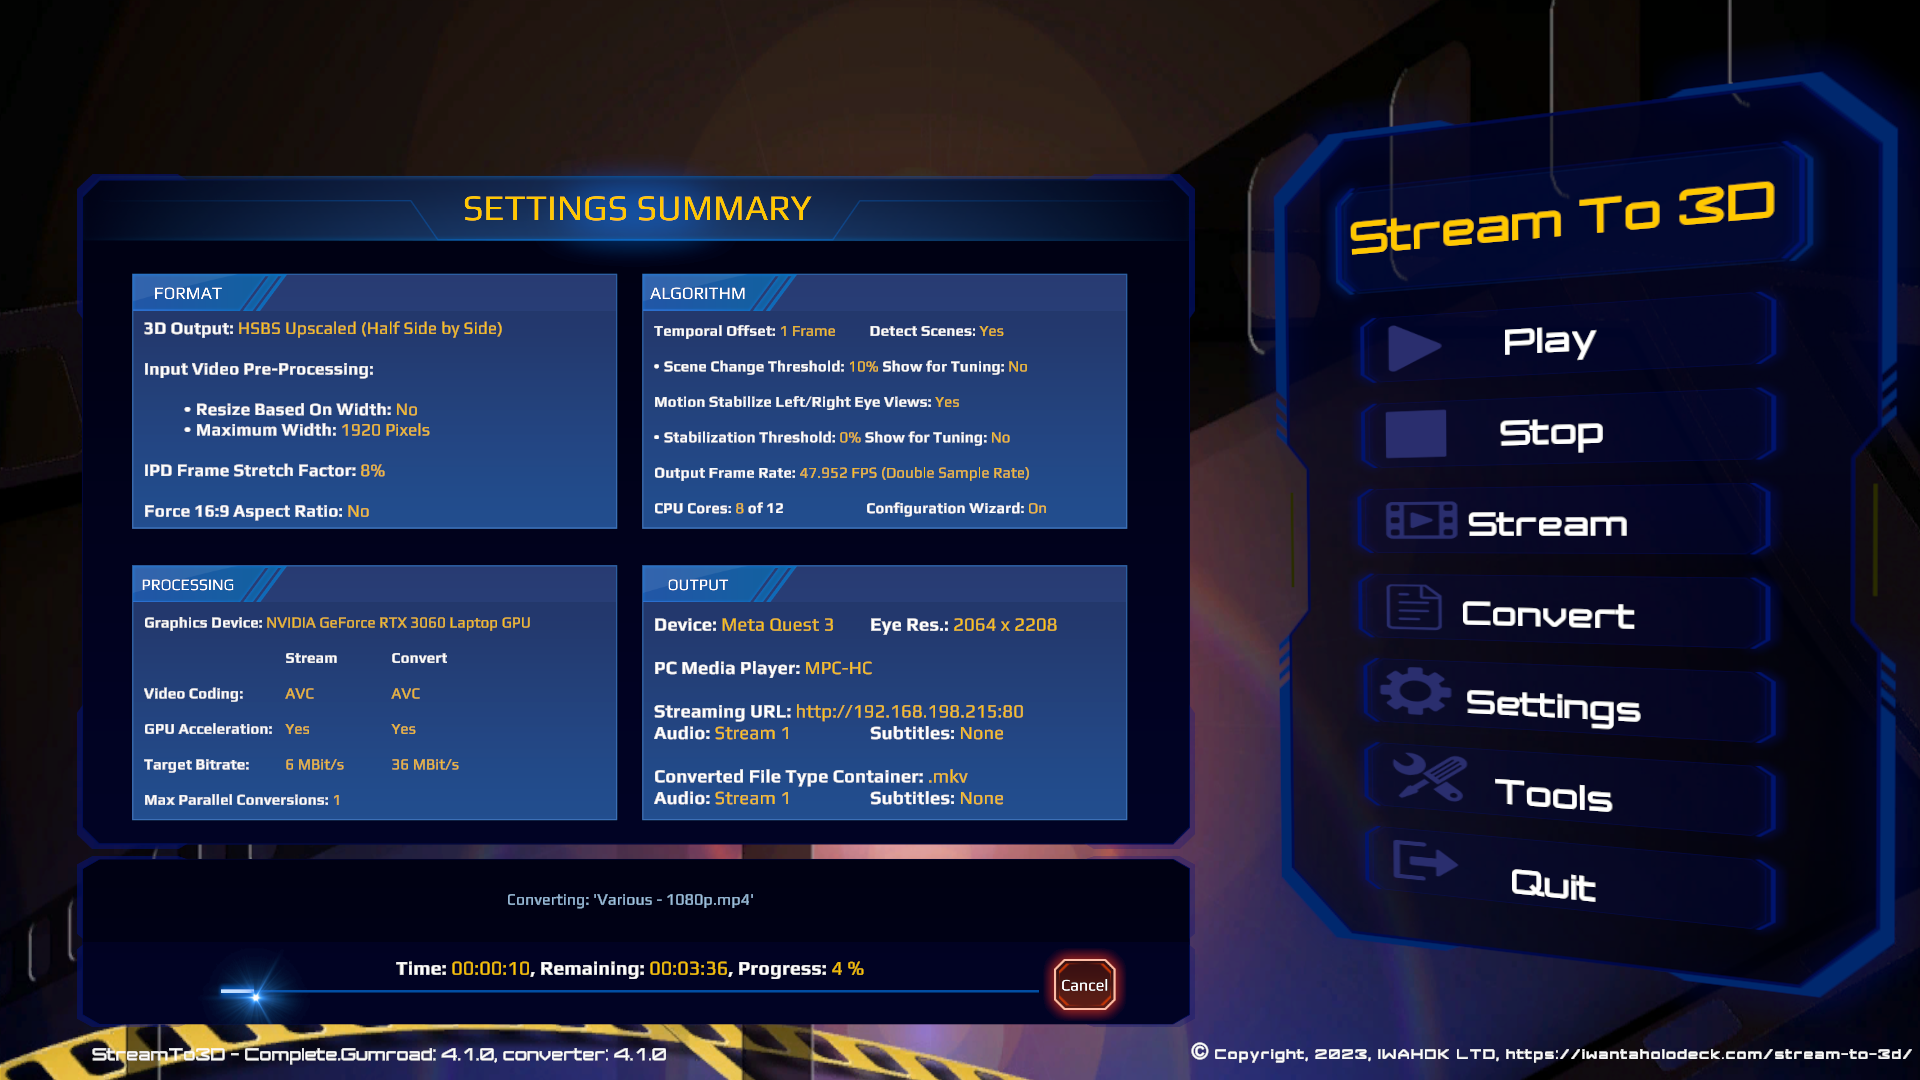
An example screen shot of the resulting conversion process, with progress bar, is shown below:
Return to Stream to 3D Documentation.