Convert 2D Video into Reusable 3D Files
Use Convert to create a reusable stereoscopic 3D version of an ordinary 2D video file. The resulting file is not tied to the device selected in the Configuration Wizard: it can be copied to or opened from any device with a compatible 3D media player for the chosen file format and layout.
Quick start with one video file
- Choose a short, familiar 2D video file without black borders for the first test.
- Click Convert and select the source video.
- If the Configuration Wizard is enabled, select the intended device or viewing route. This chooses suitable output settings; it does not make the file exclusive to that device.
- Keep the default MKV output unless the intended player requires MP4.
- Accept the suggested 3D output name or choose another new destination. Do not select the original 2D source as the destination.
- Complete the conversion, then open the resulting file in a compatible 3D media player.
- Select the same Side-by-Side or Top-and-Bottom layout in the player that was used for the converted output.
Check the result in the player: a converted file can be correct even when the player or display divides or scales its packed 3D frame incorrectly. Select the matching layout manually and keep the viewer at its default or best-fit aspect ratio. For source video with top-and-bottom borders, try SBS; for left-and-right borders or padded 4:3 video, try TB/OU. Establish a clean stereo image before changing depth settings. See “It looks wrong” troubleshooting.
Need help? Start with User FAQ & Troubleshooting. See Logs & Diagnostics, Error Codes (LVE0xx), and Licensing & Activation.
Quick troubleshooting: for common conversion questions see User FAQ → Conversion & playback compatibility. If you’re converting for a player that doesn’t support MKV (for example Bigscreen), see MP4 output instead of MKV. If conversion fails, include the standard support bundle from Logs & Diagnostics.
Convert a 2D video into a 3D file
This mode is accessed via the "Convert" menu button. Stream to 3D can convert most formats of 2D video files into 3D. The 3D video file output supports industry standards and is not specific to VR. In particular, note that Stream to 3D is an ordinary Windows desktop application and has no dependencies on VR software subsystems.
The files can be used with any device supporting 3D playback, e.g. by being loaded onto a VR headset (or accessed by a Windows share) and played back with VR media players (such as BigScreen, SKYBOX VR Video Player, Pigasus etc.), 3D TVs or 3D projectors (e.g. via Kodi, VLC Media Player, Nova Player etc).
The video below provides a comprehensive demonstration and tutorial on Stream to 3D's video file conversion capabilities from 2D to 3D:
Important: For GPU accelerated video encoding, FFmpeg has a dependency on your GPU graphics driver, so you need to make sure that your GPU graphics driver is up to date. You will receive an error from Stream to 3D, telling you to upgrade your graphics driver, during video conversion if there is a mismatch.
In addition to the video, the guidance below will also help you to get the most out of your Stream to 3D experience.
To convert a 2D video file into a 3D version, click Convert in the main menu and select the file. If you have the Configuration Wizard enabled, then you will be prompted for your preferences on how you would like conversion to be handled, see here for detail on the Configuration Wizard prompts that will be presented. You can enable and disable the Configuration Wizard or put it in "auto" mode from Settings. When disabled, or in "auto" mode, the Wizard preference questions are not displayed.
Below is a simple scenario of converting a single 2D video to 3D, without the use of the Configuration Wizard. A more complex example involving batch conversion is described later.
Settings → Conversion
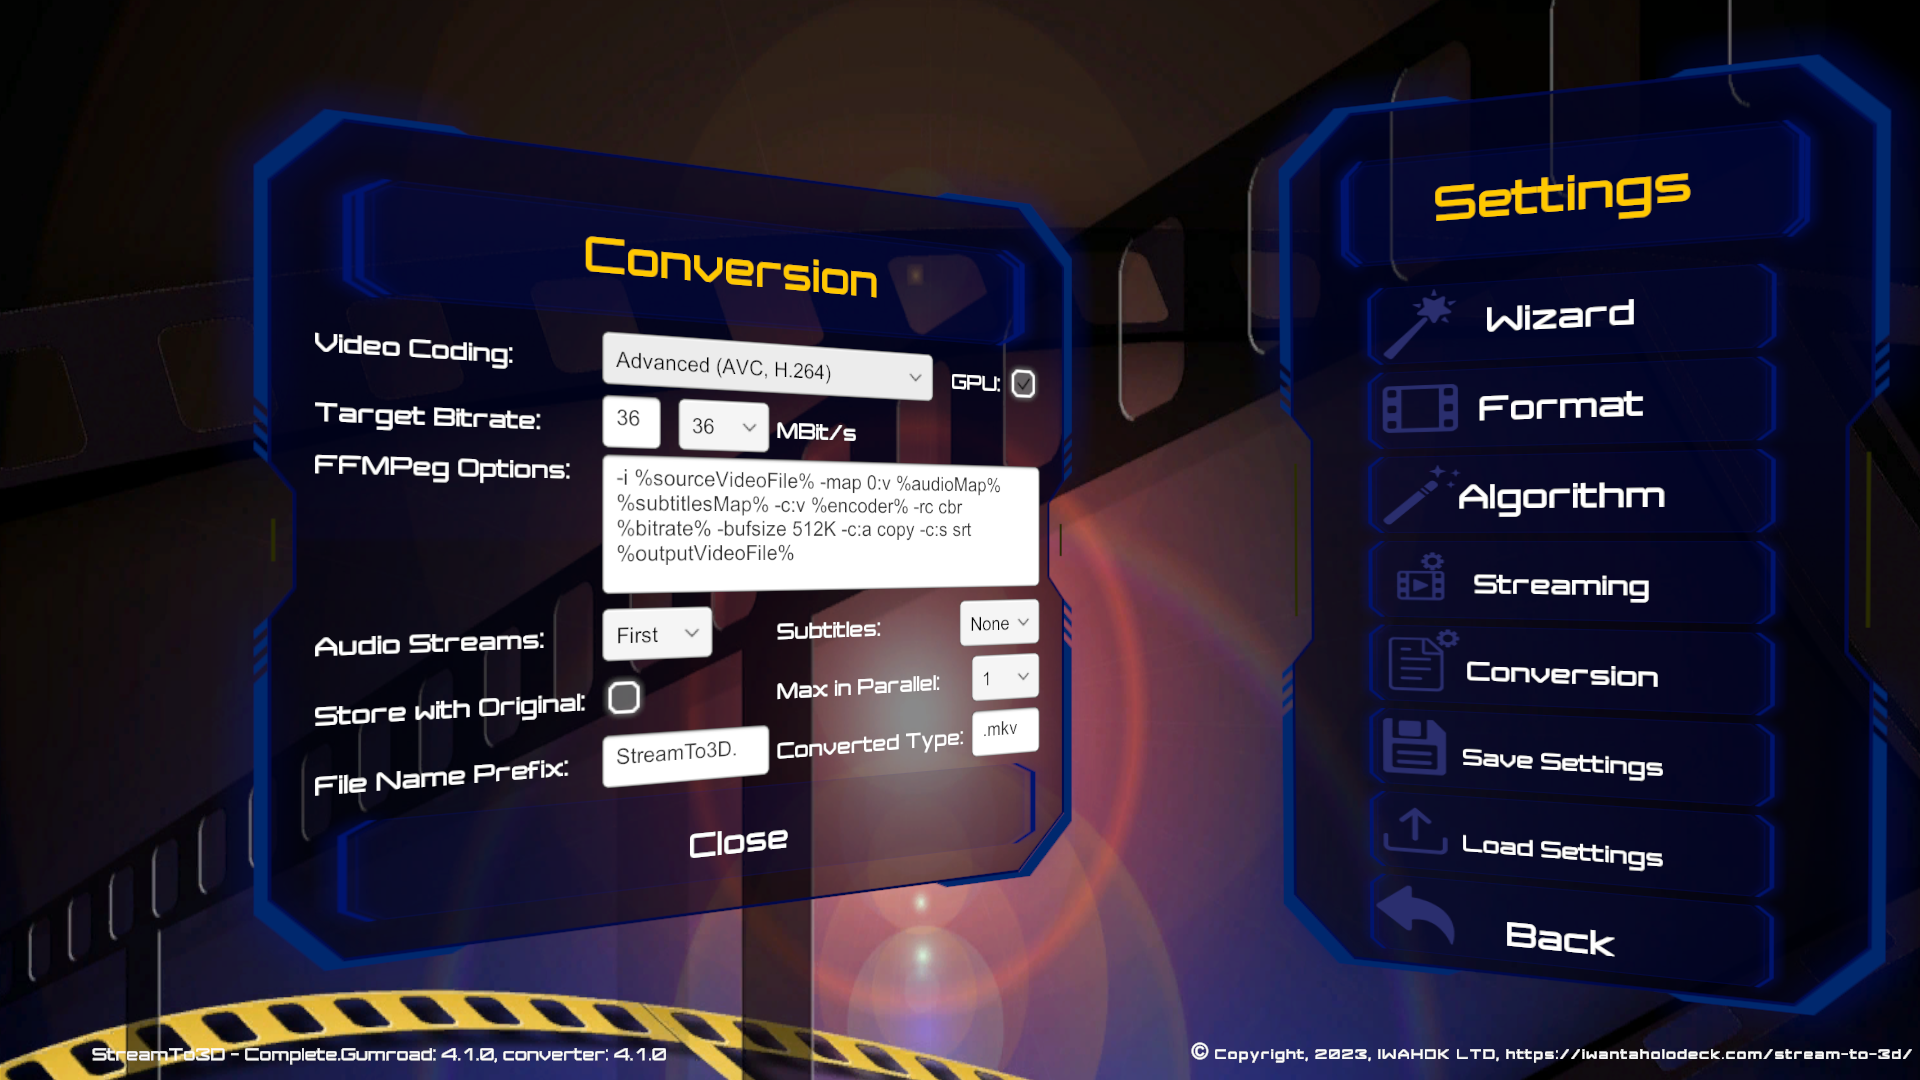
You can control a range of aspects of the conversion process in the "Settings/Conversion" menu. See Screen Shot below:
For detail on configuring the Video Coding, GPU Acceleration and FFmpeg options, see here.
From release 3.5, you can also specify how you would like audio and subtitle streams to be handled. By default, Stream to 3D will include only the first audio stream in the converted video and no subtitle streams. However, the conversion options allow optional inclusion of all audio streams and/or all subtitle streams. Just use the drop-down lists for "Audio Streams" and "Subtitles" to select the required behaviour.
Convert one video file
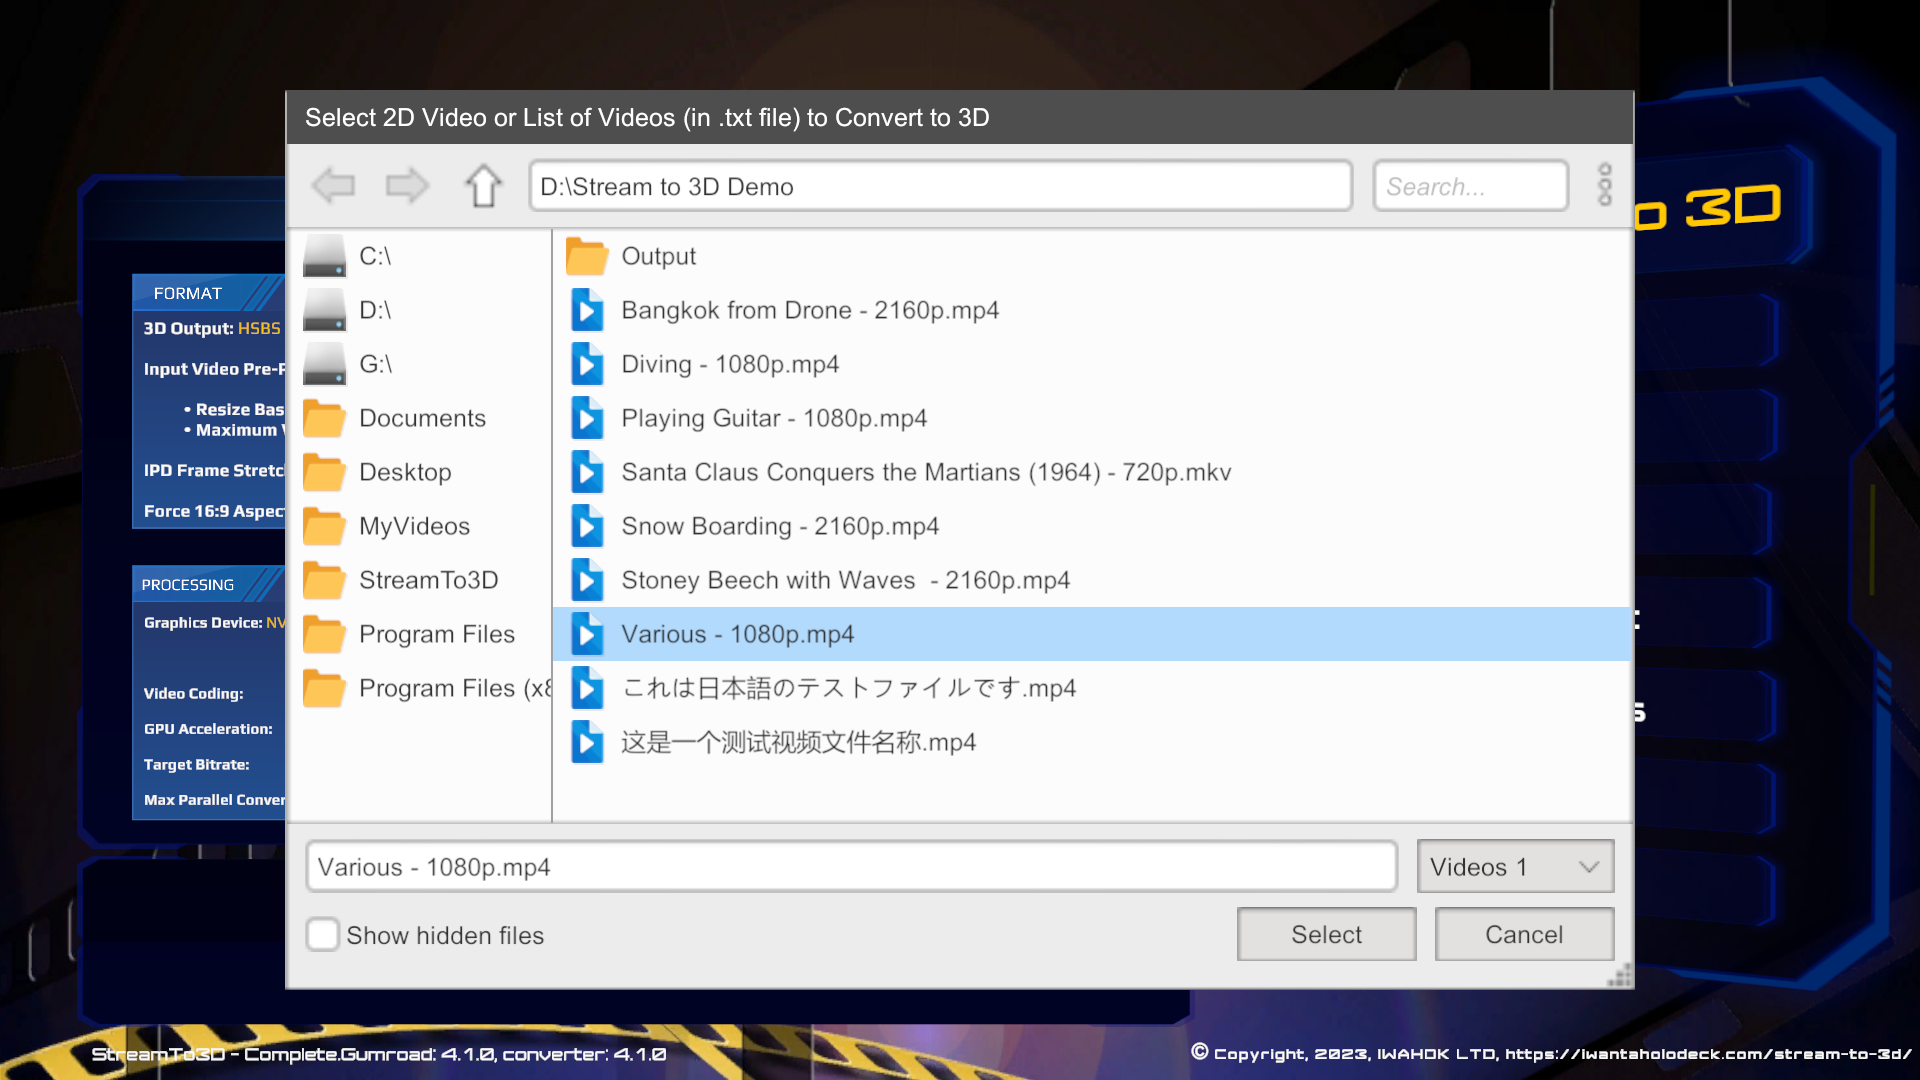
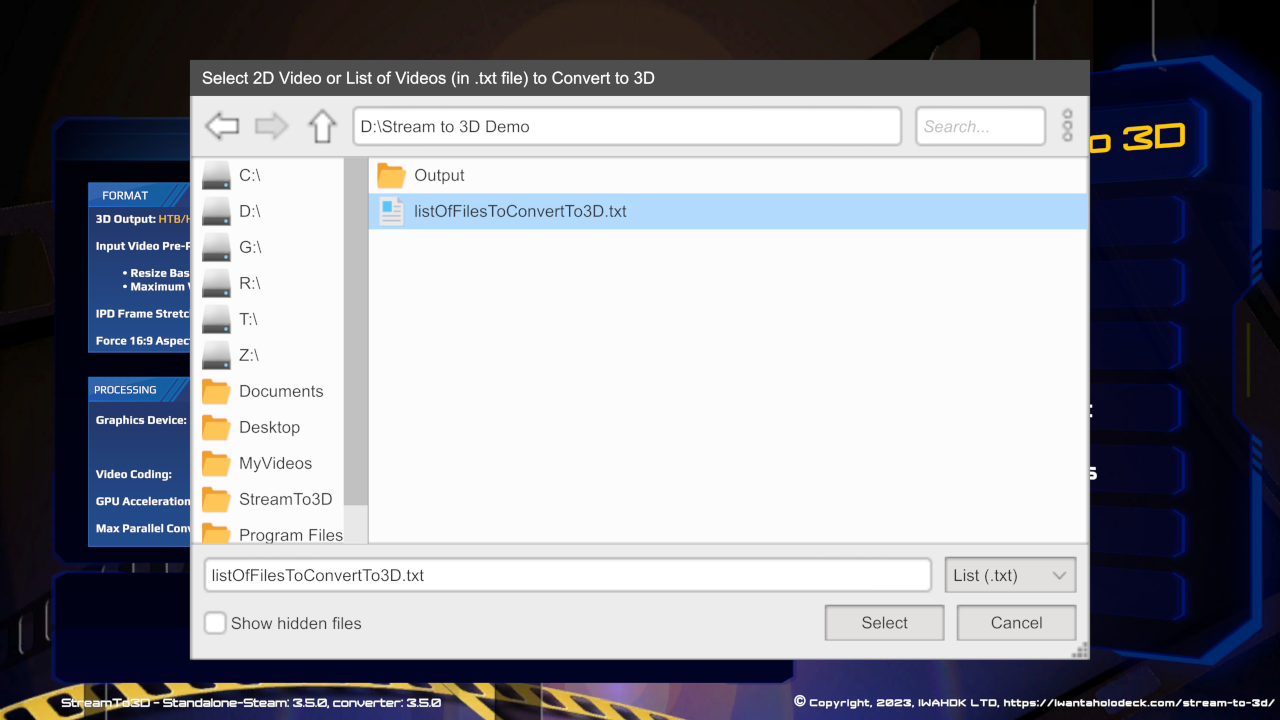
To convert a 2D video to 3D, click "Convert" in the main menu and select the video file for conversion from the file selection dialogue box below. You can also, alternatively, select a ".txt" file containing a list of the path names to videos to convert, for batch mode processing:
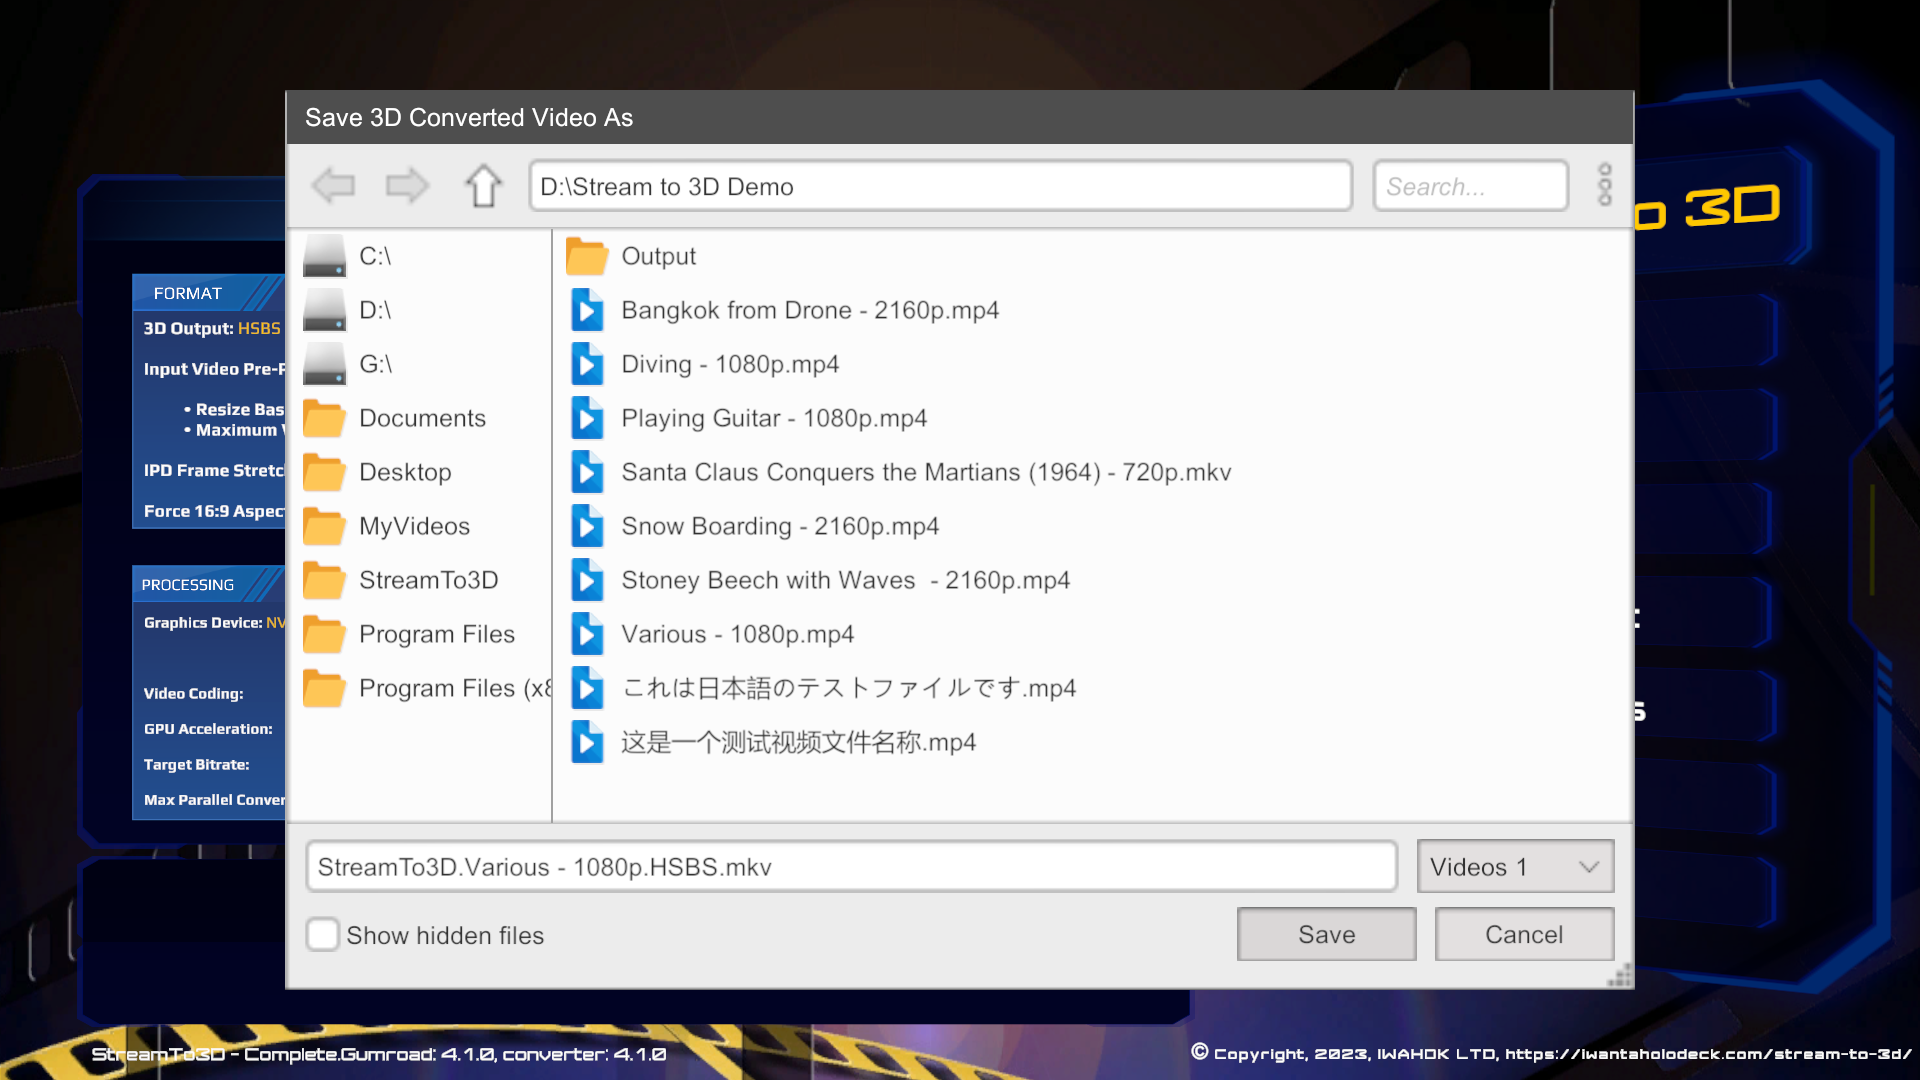
After selecting the source video file, you will be prompted for the destination video file name:
Keep the source video safe: use the suggested 3D output name or choose another new name. Do not click the original 2D source file in the save dialog, because that would select it as the destination.
Output format and playback compatibility
Choose the output container for the player that will open the converted file:
| Format | Use it when | Main benefit |
|---|---|---|
| MKV | The intended player supports MKV. This is the recommended default. | Broad codec support, and a compatible player can begin reading the output while conversion continues. |
| MP4 | The intended player does not support MKV, or retained subtitles do not display correctly. | Broader compatibility with players that expect MP4 and its narrower subtitle representation. |
For example, use MP4 for Bigscreen because it does not support MKV. Follow MP4 output instead of MKV to change the conversion settings.
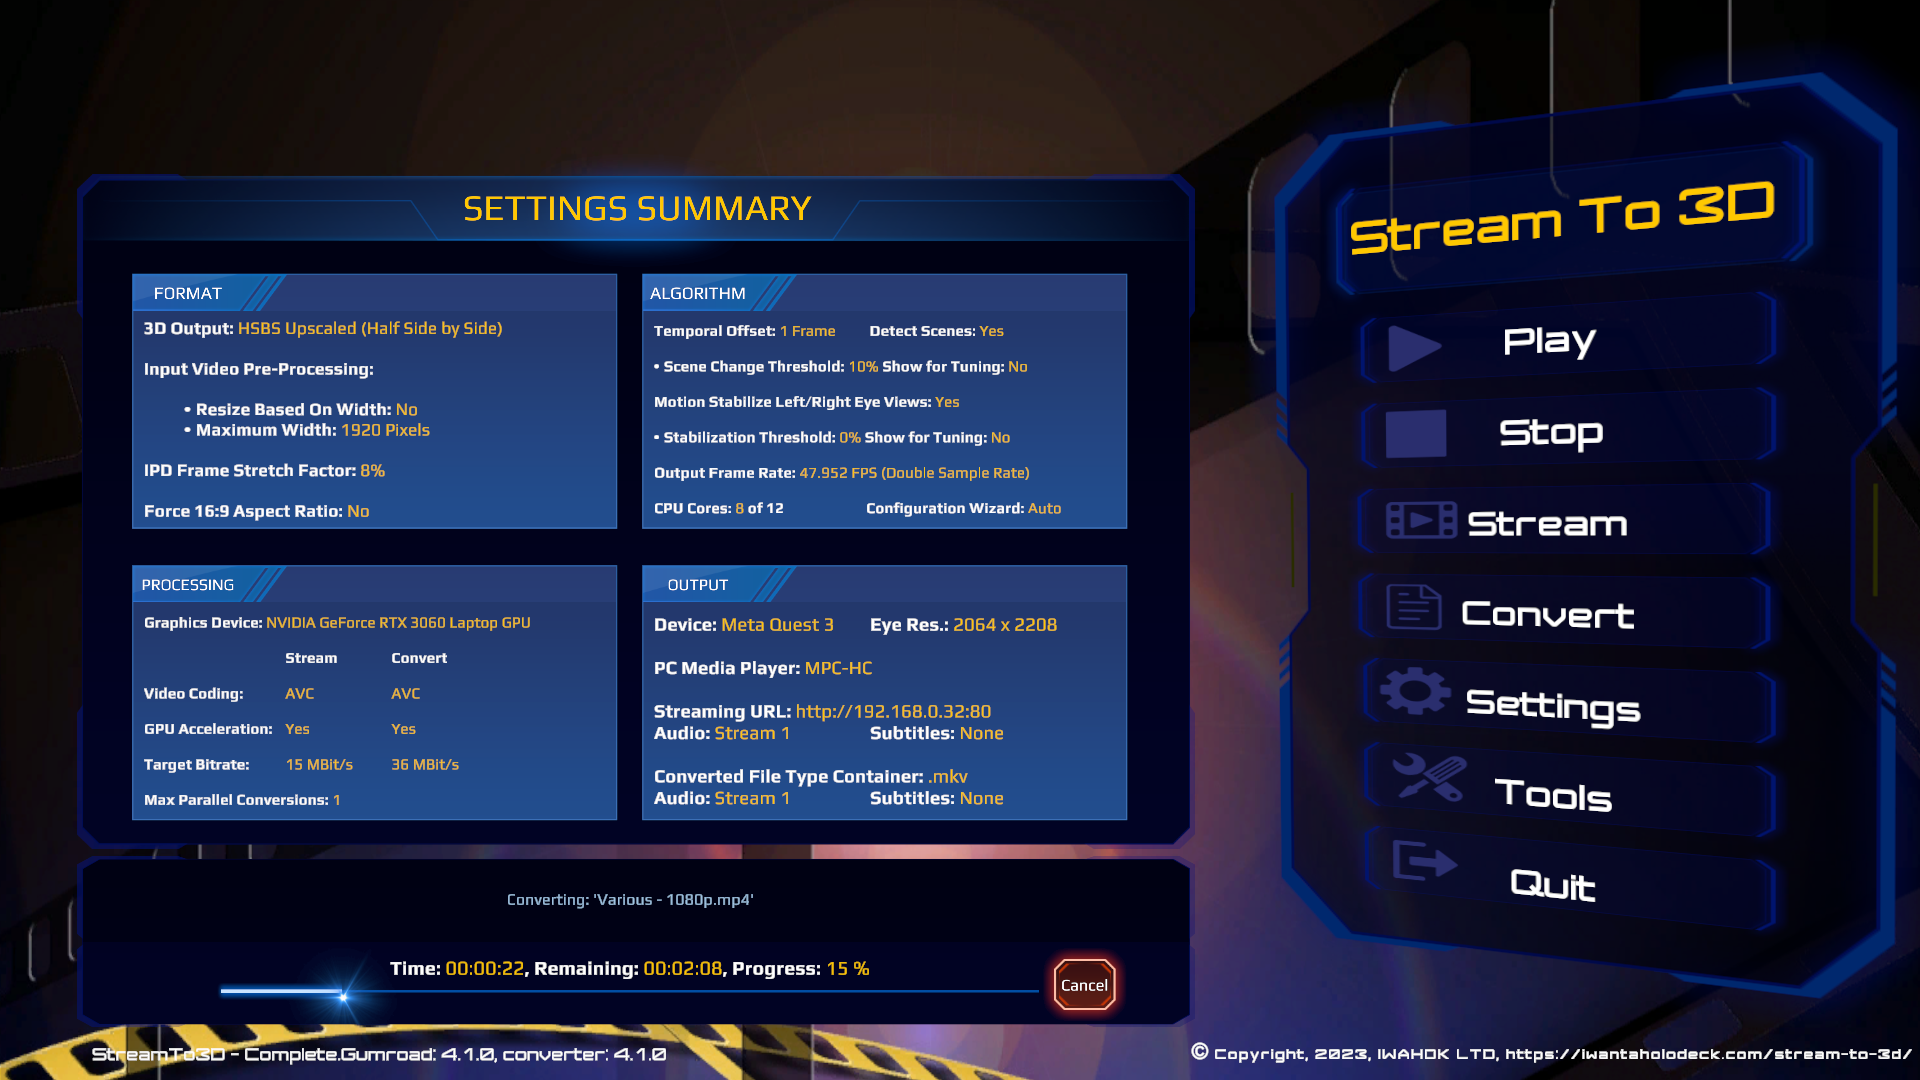
Conversion of the video file will begin once you have selected the destination file name. You will be shown a progress bar detailing the time taken so far to convert the video, an estimate of the time remaining to complete, the percentage progress and the name of the file being converted. The Cancel button presented will allow you to cancel an in progress conversion.
Note that for high resolution, long duration videos or videos involving frame rate conversion, the process may take many hours. The time taken will also depend on the encoding scheme chosen, for example GPU accelerated encoding is much faster than software based, and the number of conversions being processed in parallel:
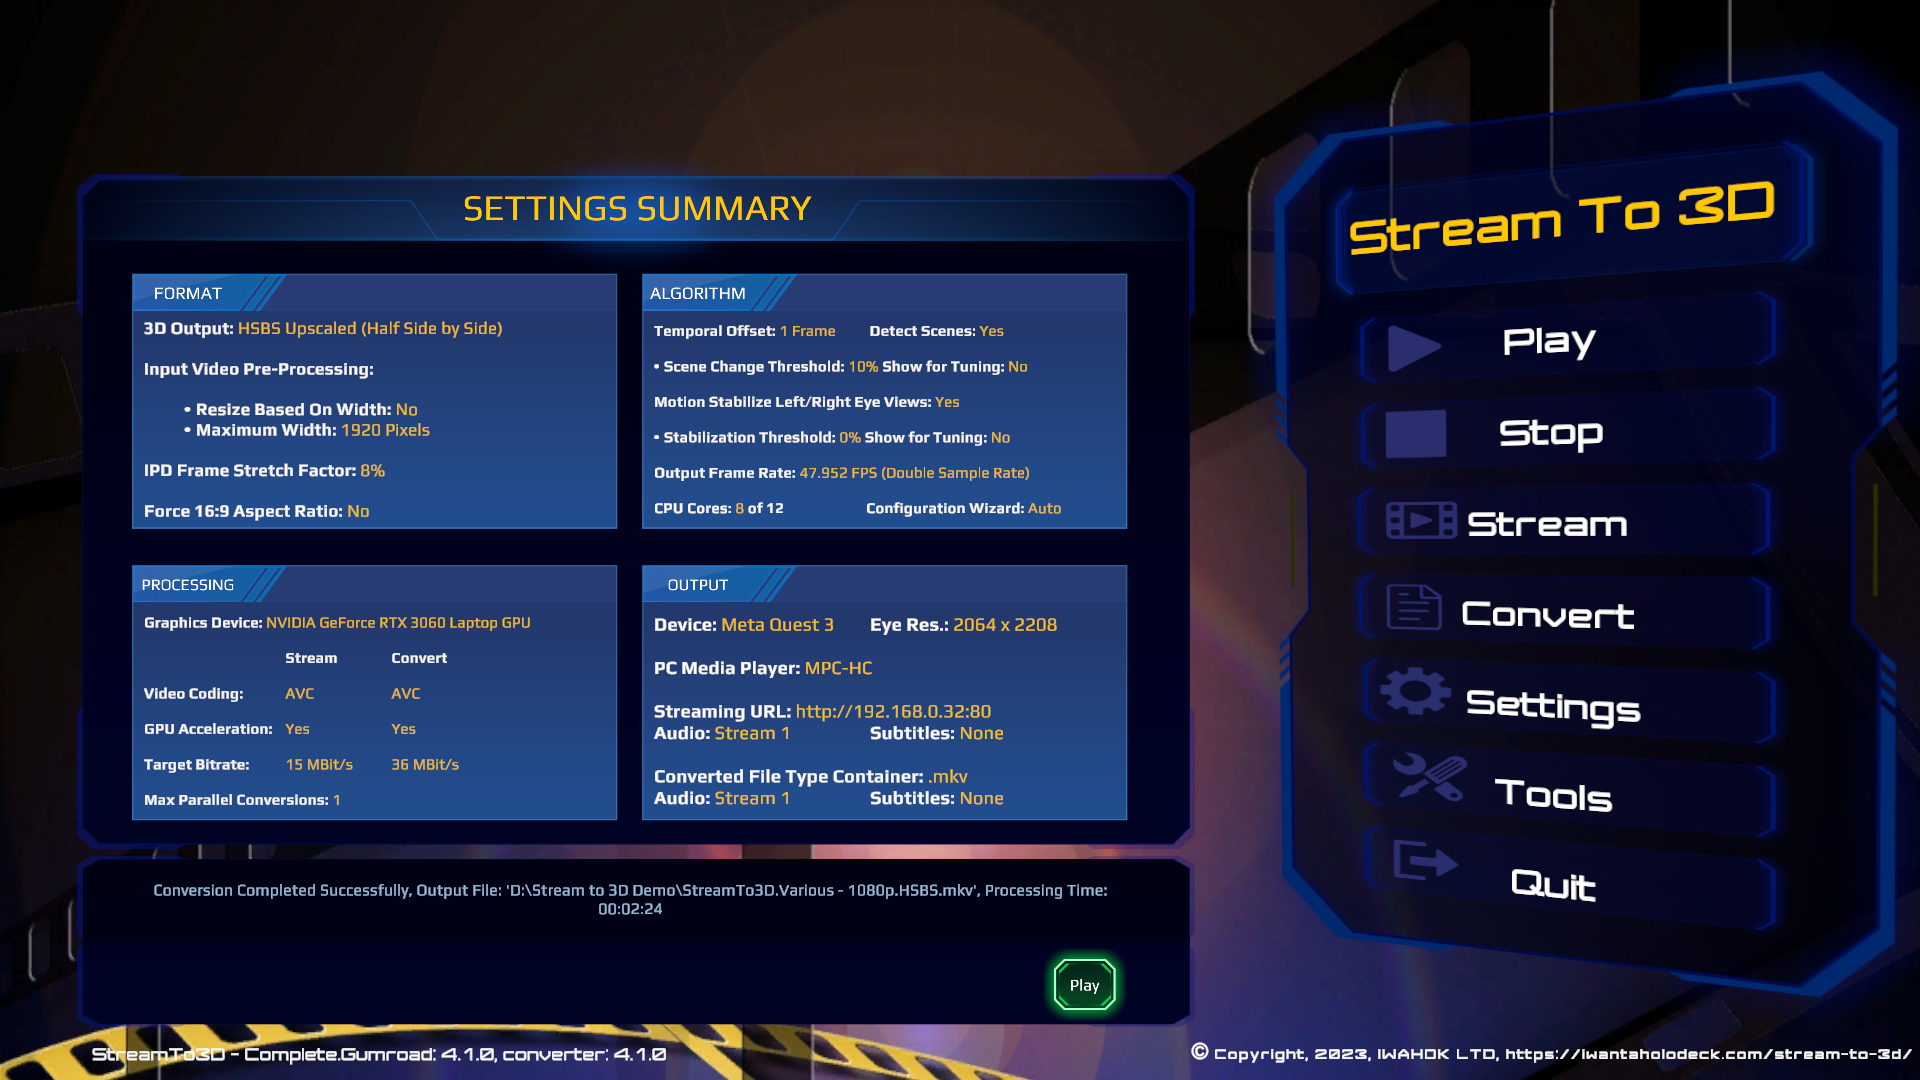
Once the video conversion process is complete, you will be offered the opportunity to play the converted version, via the green play button shown in the screen shot below:
Batch convert multiple 2D videos
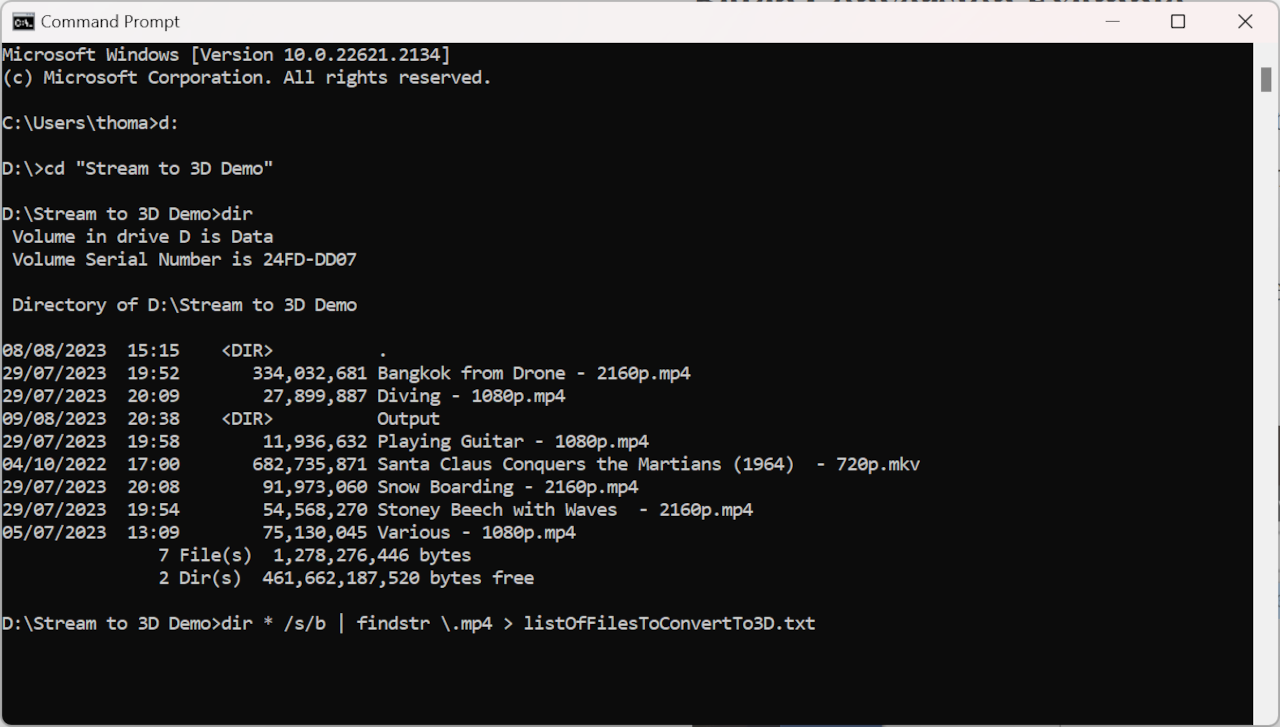
To convert a set of videos, first create a text (".txt") with a list of the video files that you would like to convert, like a playlist (including their path names). An easy way to generate such a file from a directory structure containing candidate video files would be to open a CMD window (N.B. not a Terminal Window), change into the directory containing the video files, and enter a command similar to the one below:
dir * /s/b | findstr \.mkv > listOfFilesToConvertTo3D.txtThis will generate a text file called "listOfFilesToConvertTo3D.txt" containing a list of all of the ".mkv" video files in the current directory and its sub-directories. You can obviously change the file extension from ".mkv" in the command to match any other video formats that you need to process, e.g. ".mp4" in the example below:
Once you have created this file, you can edit it to remove any files that you do not want converted. Note that the batch conversion process will try to ignore files that are already in 3D format. Stream to 3D uses file name pattern matching to distinguish 2D from 3D videos. By default, it will bypass the 2D to 3D conversion function for files that have "3D" in their names or contain ".SBS.", ".TB.", ".HSBS.", ".HTB." or ".3DA." (these being the 3D output formats that Stream to 3D can generate). You can modify this pattern as described here.
You can control several aspects of batch conversion in "Settings/Conversion":

By default, when performing batch conversion, Stream to 3D will prompt for the destination folder in which to save converted videos. However, there is also the option to set Stream to 3D so that it stores converted videos in the same folders as the original videos. This is enabled by checking the "Store with Original" check box.
Stream to 3D can also be configured to support running multiple conversion processes in parallel. The "Max in Parallel" drop-down box will let you set the maximum allowed. Note: use this setting with caution as it can bring your machine to a standstill if you do not have enough processing capacity to run the maximum number of conversion processes specified.
The "File Name Prefix" item on this settings page allows you to specify a prefix file name for your converted videos. The default, as shown, is "StreamTo3D.", which can be edited and indeed left blank. A blank entry may be advisable to assist media players in looking up Meta data on your output video, based on the file name, which a file prefix can confuse.
The "Converted Type" item allows you to change the default type of converted videos to any format supported by FFmpeg (".mkv" is the default conversion type, as this container type allows the converted video to be read by media players, even as conversion progresses, thus supporting a wide range of media players for real-time conversion). Be careful in changing this type as other FFmpeg option items, e.g. codec options, may also need to change to be compatible with your chosen output type. As an example, you can re-configure Stream to 3D to output ".mp4" files by following the guidance here (you might need this for BigScreen as it does not support ".mkv" files).
Batch Conversion Example
Let's continue with a batch conversion example. Having created a text file listing the videos to convert to 3D, click "Convert" in the main menu. This will bring up the file selection dialogue below. You can use the filter drop-down to filter for text files. Navigate to your list file and select it:
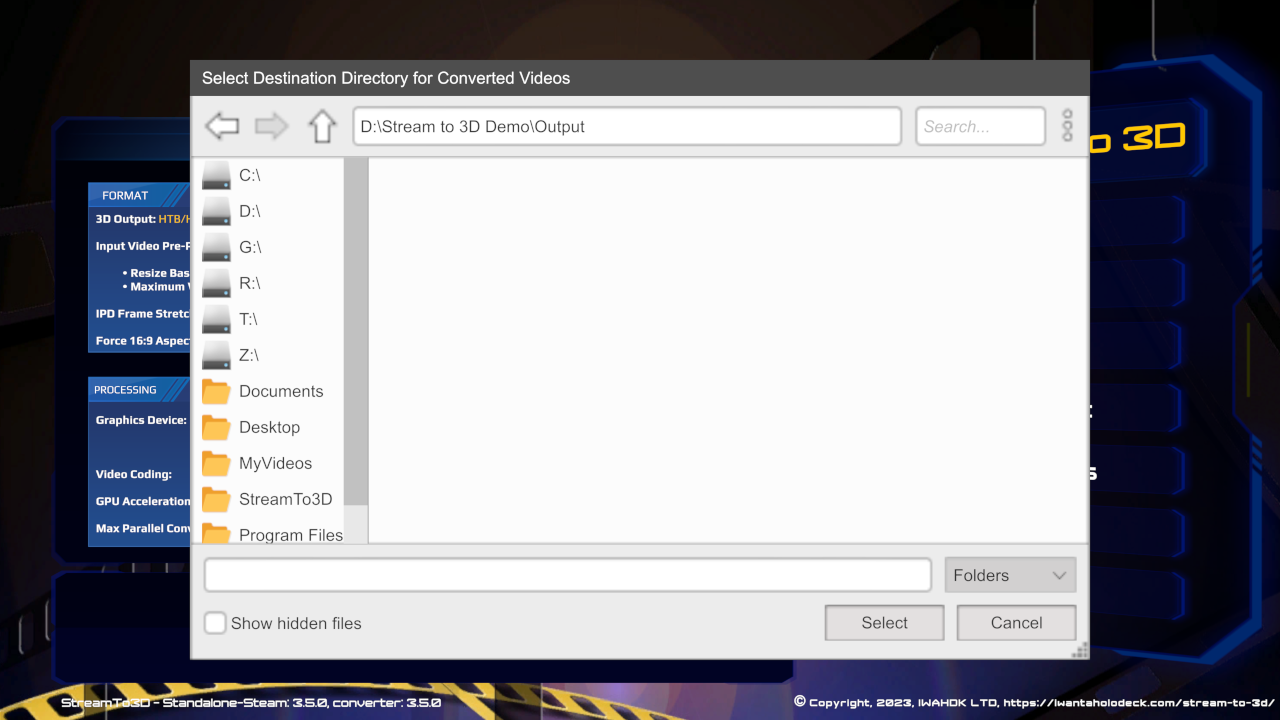
In this configuration, videos are set to be converted and saved in a single folder, so the next dialogue asks for the destination directory to be specified:
In the screen shot below, we can see the batch conversion in progress. There are two "Cancel" buttons.
The first "Cancel" button allows cancellation of conversion for the video whose progress bar is currently being displayed. The progress bar is displayed for 5 seconds at a time in a round-robin fashion for each video being converted. The number in the square brackets on the right gives a 5 second count down until when data for the next video in the list will be displayed. This gives time for you to review progress of each video and decide on whether you would like conversion to continue for that video, given the data on time remaining etc displayed in the progress bar. Note that the conversion process can take many hours for long videos.
The second "Cancel All" button will cancel conversion for all video conversions in progress.

Conversion results and support logs
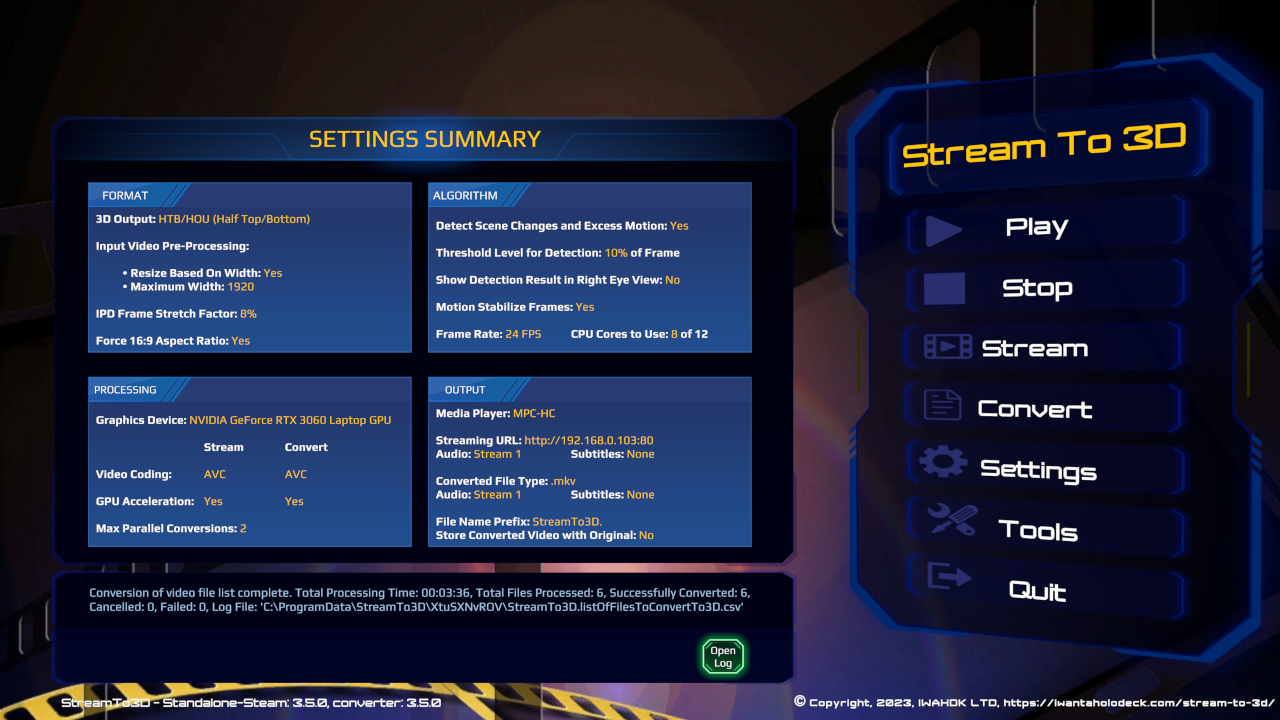
The screen shot below shows the display when batch conversion is complete. A summary showing a count of successful, failed and cancelled conversions is provided together with a button that allows review of the conversion summary log file:
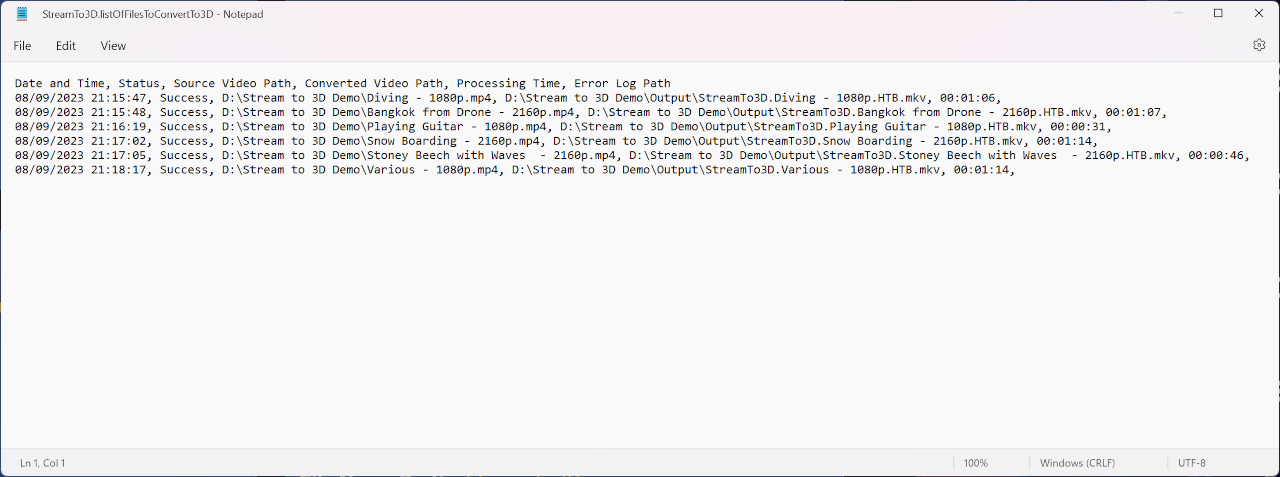
For detailed information on batch conversion status, Stream to 3D creates a ".csv" log file containing the batch conversion results, listing; the date and time of conversion completion for each file, the source video path, the converted video path, the processing time and (if applicable) the path to the log file for failed video conversions for diagnosis purposes. See example below:
Convert a Live Source to a 3D file
Converting an existing 2D video file is the primary Convert workflow described above. As an additional option, editions that include Convert can record a PC screen, camera or capture-device Live Source as a 3D video file for later viewing. The Real-Time edition does not include Convert for either video files or Live Sources.
The resulting file is device-independent and can be used with any compatible 3D media player that supports its file format and SBS or TB layout.
- Choose Convert and select the Live Sources shortcut in the source browser.
- Create the default sources if prompted, then select the screen, camera or capture-device source.
- Set the maximum capture duration and, for screen capture, choose the display or region.
- Choose an output folder with enough free space and complete the normal conversion settings.
See Using a Live Source for timing, audio and output-folder guidance.
Return to Stream to 3D Documentation.