PC Screen or Live Video Conversion to 3D
Need help? Start with User FAQ & Troubleshooting. See Logs & Diagnostics, Error Codes (LVE0xx), and Licensing & Activation.
Live Capture Source Creator: Step-by-step guide
Introduction
In addition to converting video files to 3D, Stream to 3D also supports 3D conversion from live video sources such as video played on your PC screen, webcams or video capture devices. This is enabled through the Stream to 3D application itself, together with its utility program Live Capture Source Creator.
The Live Capture Source Creator utility program generates files representing live video sources which the Stream to 3D application can then read and convert into 3D video output, applying the same functionality as for standard video files. It is only necessary to create a live video source file once for each live source, this file can then be reused for any sessions involving that source.
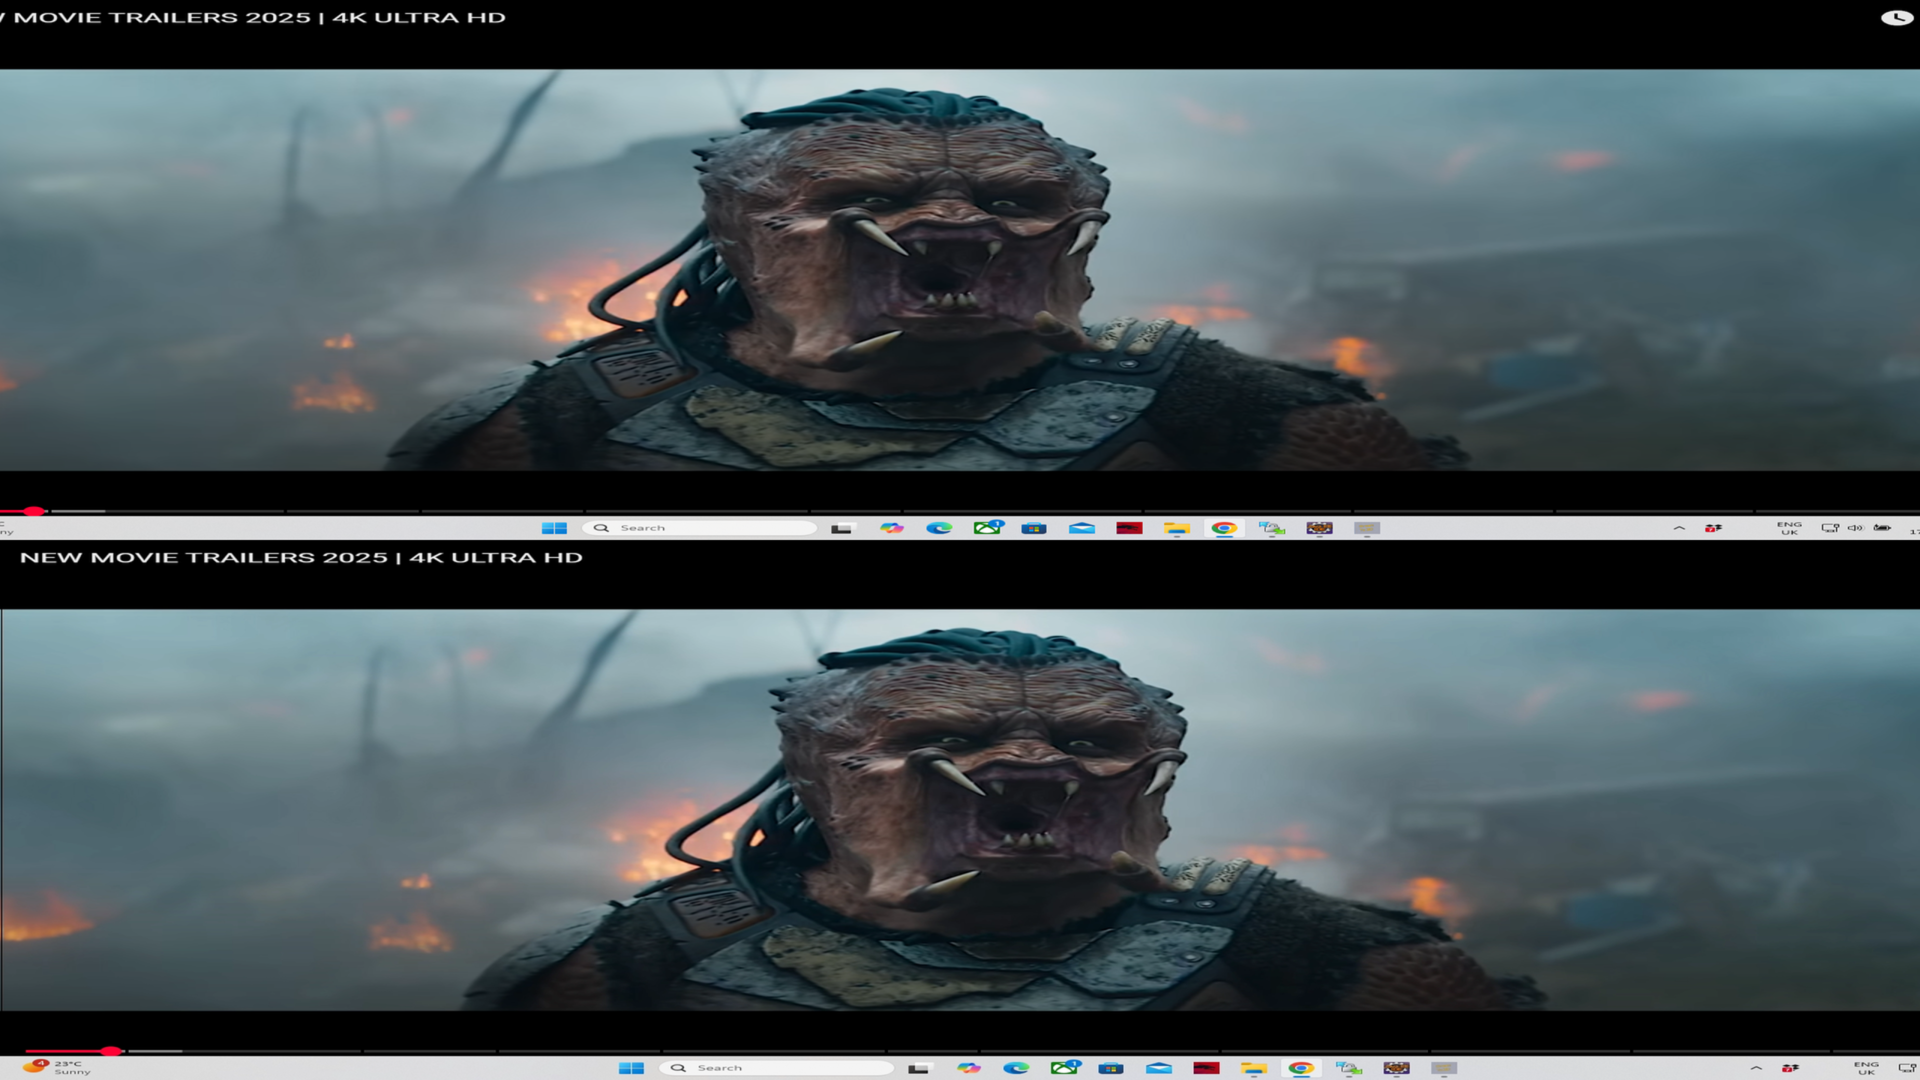
The video below shows an example of capturing the PC Screen, which is playing a Youtube video, and watching it in 3D in Virtual Desktop within an Oculus Quest 3 Headset. As shown in the example, the video can be watched in 2D and 3D at the same time, using two virtual monitors, or the monitor showing the 2D video can be removed/hidden:
Live Capture Source Creator
This utility enables support for live video and audio sources, including specialised built-in support for capturing video directly from one of your PC displays via screen-capture-recorder and its audio companion, virtual-audio-capturer. A detailed step-by-step usage guide for Live Capture Source Creator is provided here, with the key steps given below.
Open the Stream to 3D Live Capture Source Creator from the main Stream to 3D application folder, as shown in the image below.
- For Steam store users, the application folder will be:
C:\Program Files (x86)\Steam\steamapps\common\Stream to 3D
- For Gumroad and Itch.io store users, the application folder will be:
C:\Program Files\StreamTo3D

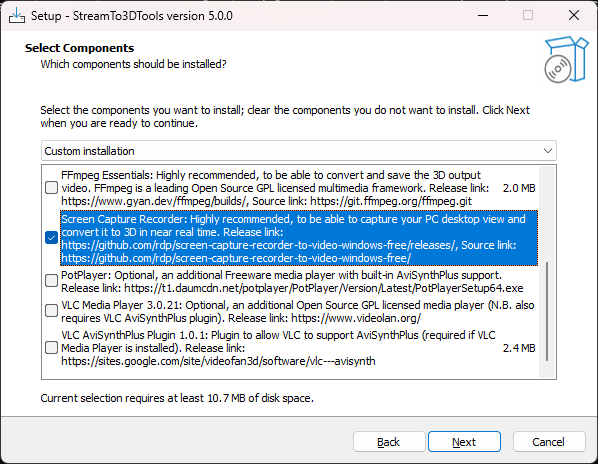
Important: If you are a Steam user who has upgraded to Release 5, you will also need to update your tools installation in order to add the Screen Capture Recorder tool so that you can use the Screen Capture to 3D functionality. You can do this by running the tools installer here:
C:\Program Files (x86)\Steam\steamapps\common\Stream to 3D
The installer is called:
StreamTo3DToolsStandalone.SteamSetup.exe

Make sure to select Screen Capture Recorder, at least, as shown in the screenshot below:
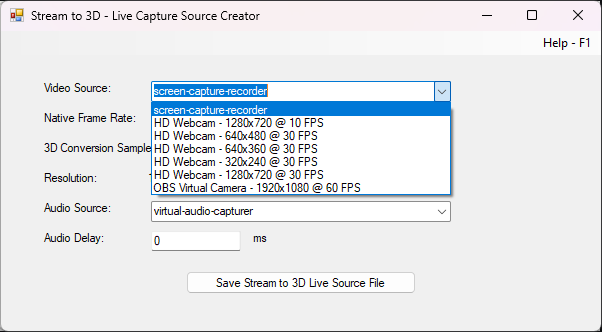
You will also find find the "StreamTo3DLiveCaptureSourceCreator.exe" in that folder. After running it, you should be presented with the dialog below.
Select the required video and audio sources from the drop down lists:
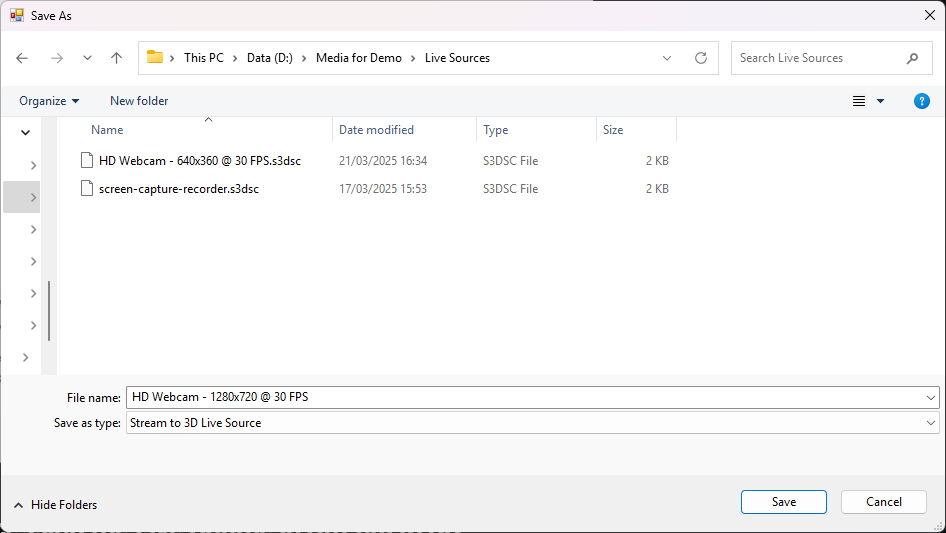
Save the resulting 3D Live Source file:
Processing the Live Source File in Stream to 3D
This is a PC screen video capture example. It uses Virtual Desktop and an Oculus Quest 3 VR headset. In addition to the video, you may also need to configure your system to avoid audio echo from your source PC screen when watching the 3D version in VR. This can be handled by the use of a Virtual Audio device as described here, this guidance leverages the free tool Voicemeeter Banana for this purpose.
- The example uses Stream to 3D's Play functionality, which provides real-time conversion to 3D, outputting the 3D video to one of the monitors/displays of the PC.
- Capturing from and displaying to the same single PC screen at the same time is obviously not possible. The example assumes that the system has at least two displays/monitors. This could be a laptop with an external monitor (as in this example) or alternatively, a HDMI plug can be used to create a secondary display. There are also software solutions to simulate external displays.
- If you do have only one display, you can use the Convert function. This would convert video from your PC display to a 3D video file. You could then watch the 3D video file after conversion has completed or during conversion (if accessing the 3D file from another device via a share).
- The actual system employed here consists of a laptop with an Nvidia 3060 GPU and a secondary display as an external monitor, with the display set to extend the laptop's primary display.
- The primary and secondary displays are visualised in an Oculus Quest 3 VR headset via Virtual Desktop. The primary display is the laptop's main screen (1080p resolution). This is used to play the source 2D video, which in this case is a Youtube video displayed in a web browser. The secondary display is a Dell monitor, with a resolution of 2560x1440 pixels.
- Stream to 3D should be launched on, or moved to, the secondary display. This is where the 3D video view will be shown. The Stream to 3D Play function, when used with the Configuration Wizard, will detect the display resolution and generate 3D output that is optimised for it. It will also ensure that the 3D media player is launched on this display. Stream to 3D will minimize itself, by default, during playback.
The video below has been recorded in the Oculus Quest 3 VR headset. It shows operation of Stream to 3D with Virtual Desktop, two virtual desktop displays and playback and conversion of a Youtube video to 3D:
- The screen shots below illustrate the process from the above video step by step.
- The Configuration Wizard is enabled in this example. You can disable it via Settings/Wizard if required.
- All of Stream to 3D's functions; Play, Capture and Stream are available for use with live sources.
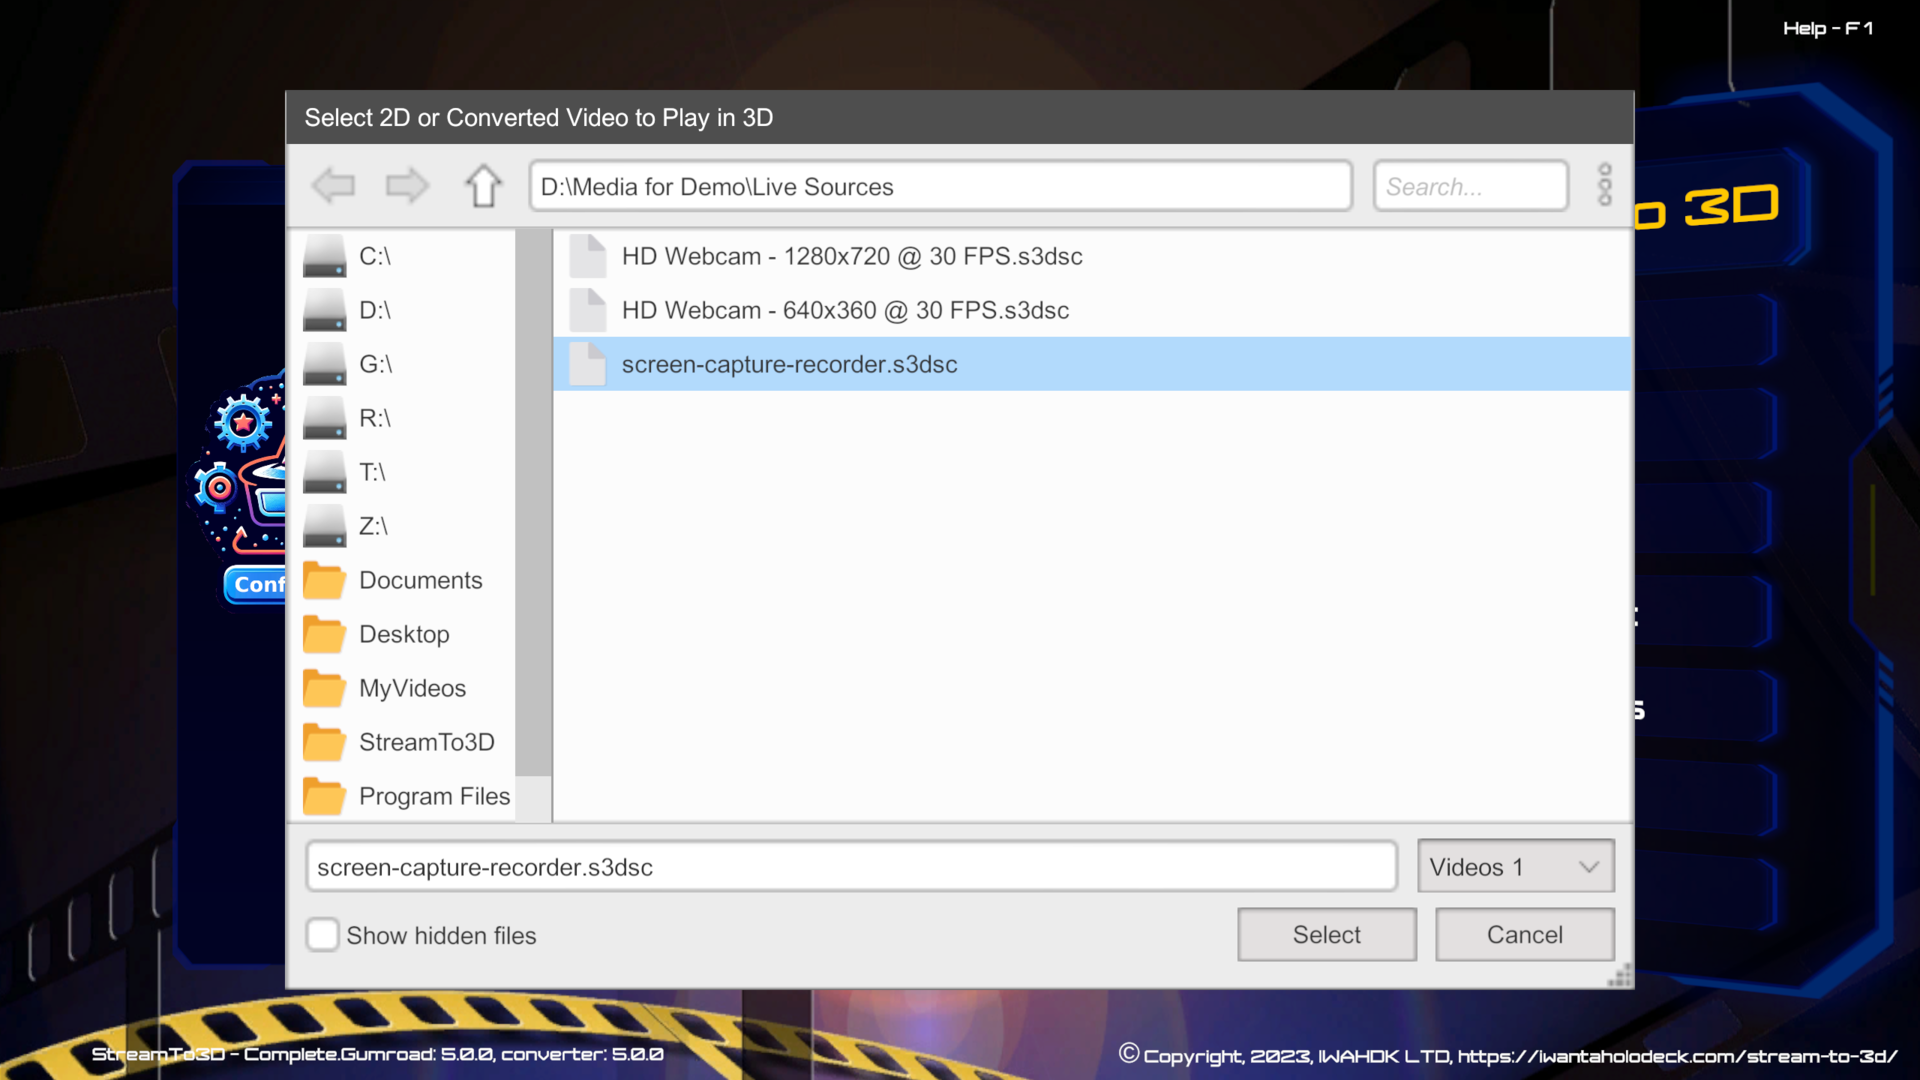
- The first step is to launch the main Stream to 3D application and open your created
.s3dscfile. The example uses the Play main menu option as illustrated below:
- This is a PC screen video capture example, enabled by screen-capture-recorder, so the "screen-capture-recorder.s3dsc" file is selected:
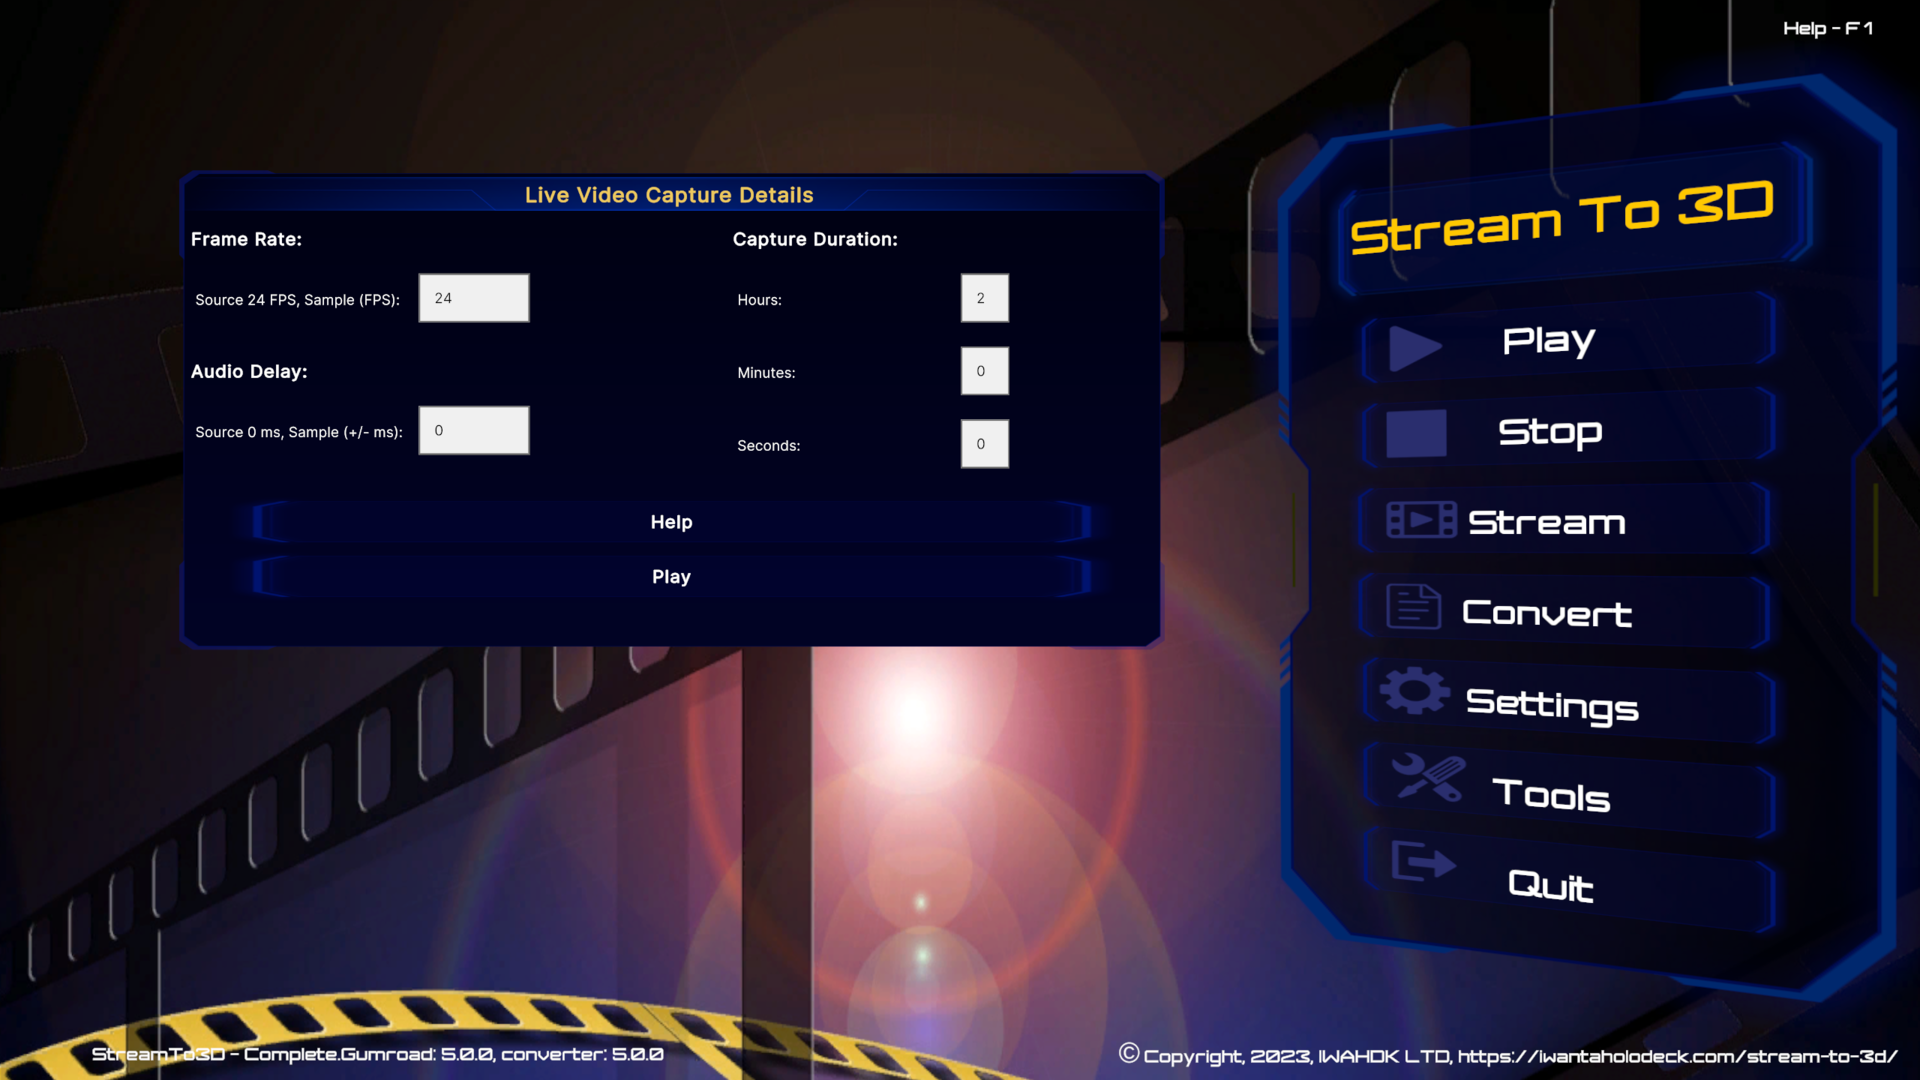
You will next see the Live Video Capture Details Dialog. Here, you can edit:
- The frame rate at which to sample the live video for 3D conversion (defaults to the native frame rate of the source).
- The capture duration (default: 2 hours). This is to automate the capture process if left unattended (you will also be able to manually terminate the capture earlier if desired).
- The required audio delay (in milliseconds). This may be required to correct any discrepancy between video and audio synchronisation. N.B. This should not occur with screen capture sources.
- The Help button, will take you to the guidance here.
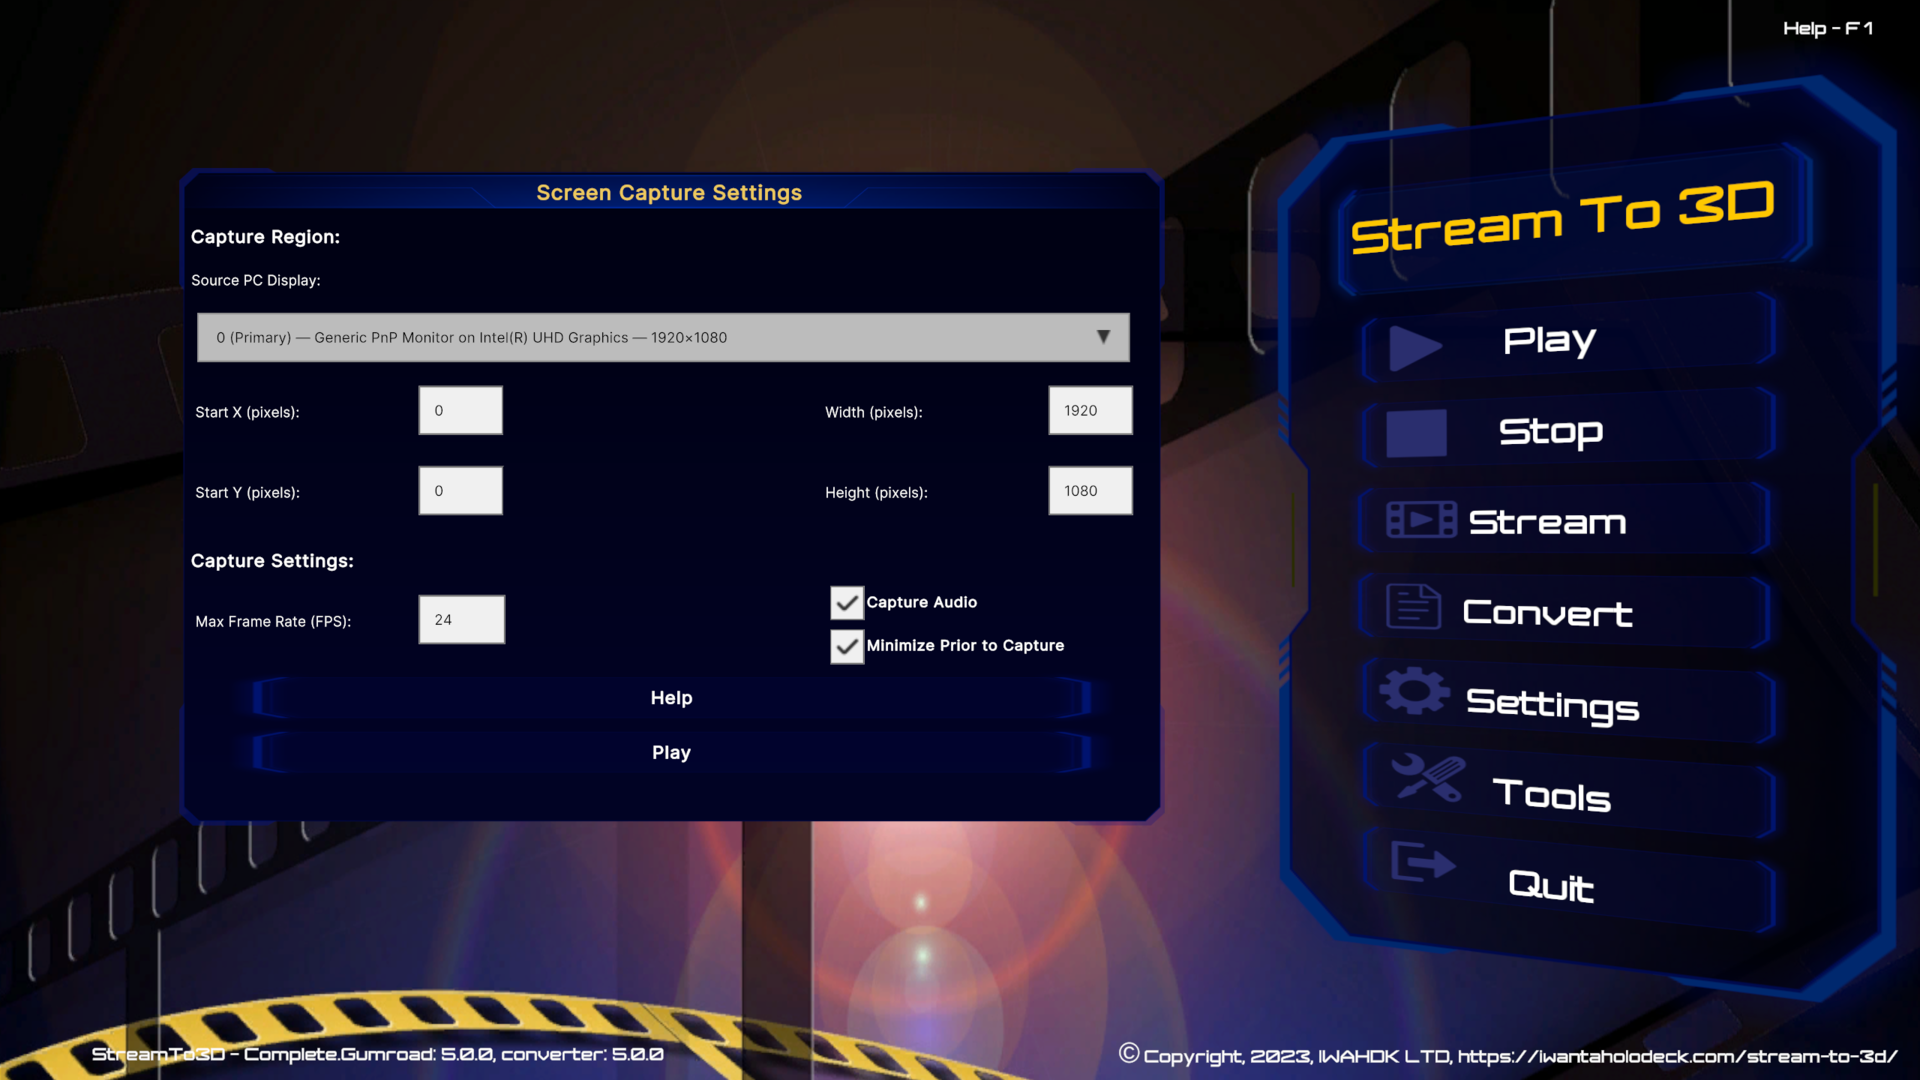
Pressing Play will take you to the Screen Capture Settings dialog. These settings allow you to:
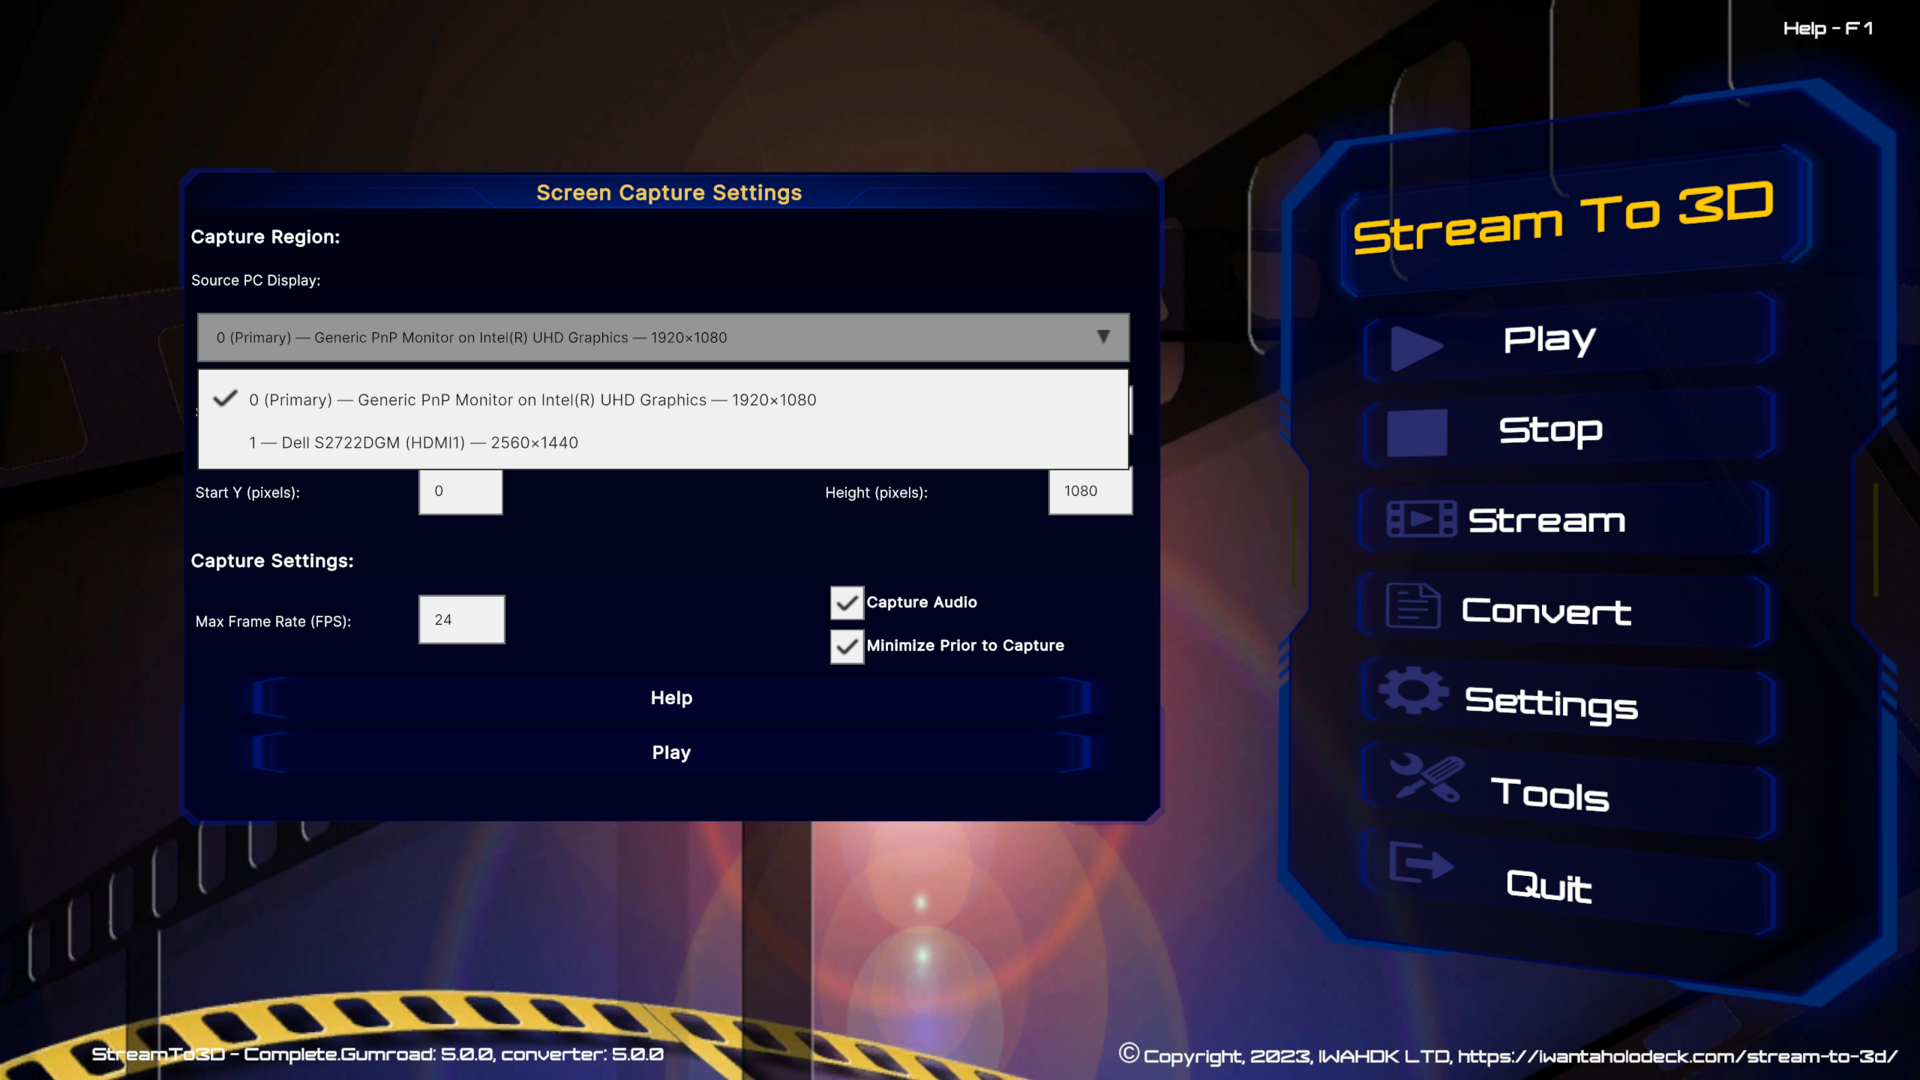
- Specify the PC screen display from which video will be captured from the drop-down list.
- Specify a region of the screen to capture, specified by the top left hand corner (x,y pixel co-ordinates) together with the width and height of the region in pixels. Changing the selected display for capture will automatically reset the capture width and height to that of the selected display.
- Define the maximum native frame rate at which the underlying screen-capture-recorder technology will record video.
- Specify audio capture preferences (whether or not to record audio).
- The minimize prior to capture option indicates whether or not to minimize the Stream to 3D application before initiating screen capture. This is particularly useful in single display systems, as if Stream to 3D is not minimized then it becomes part of the captured video.
- The Help button, will take you to the guidance here.
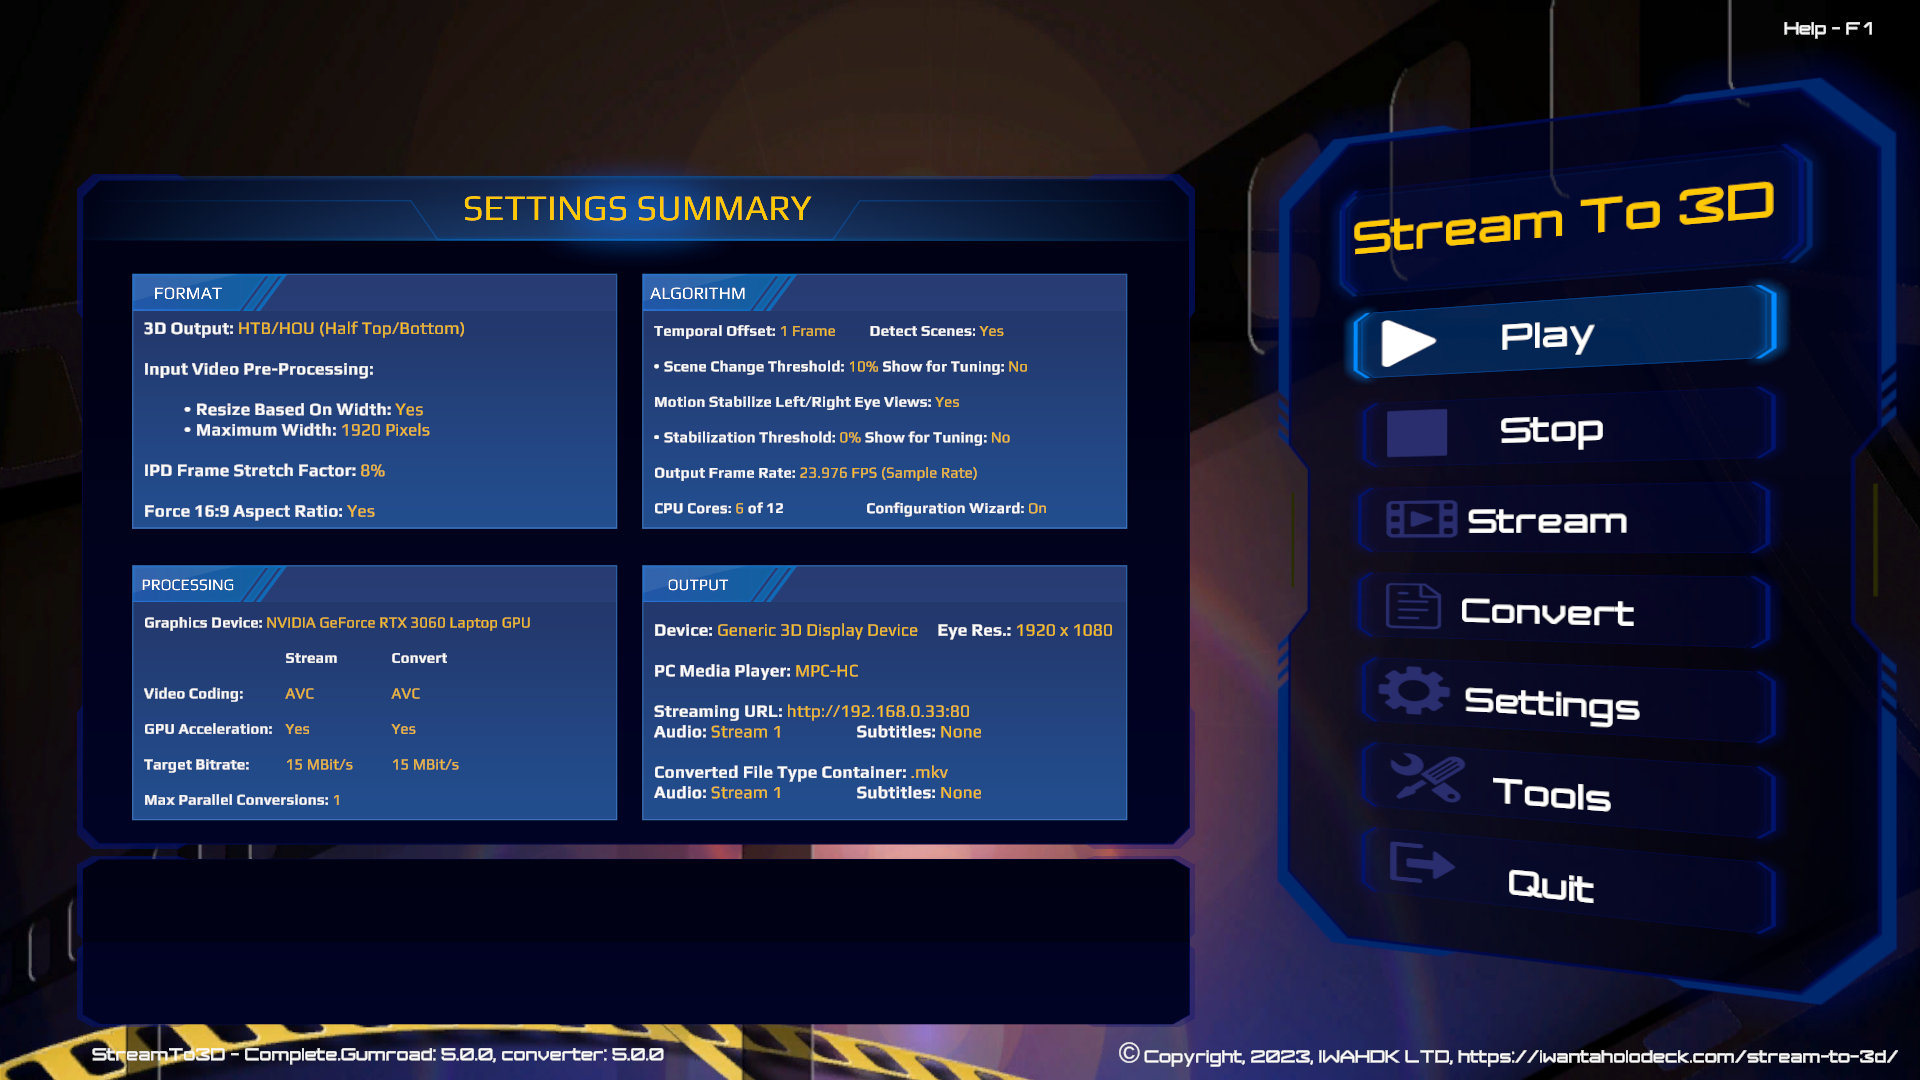
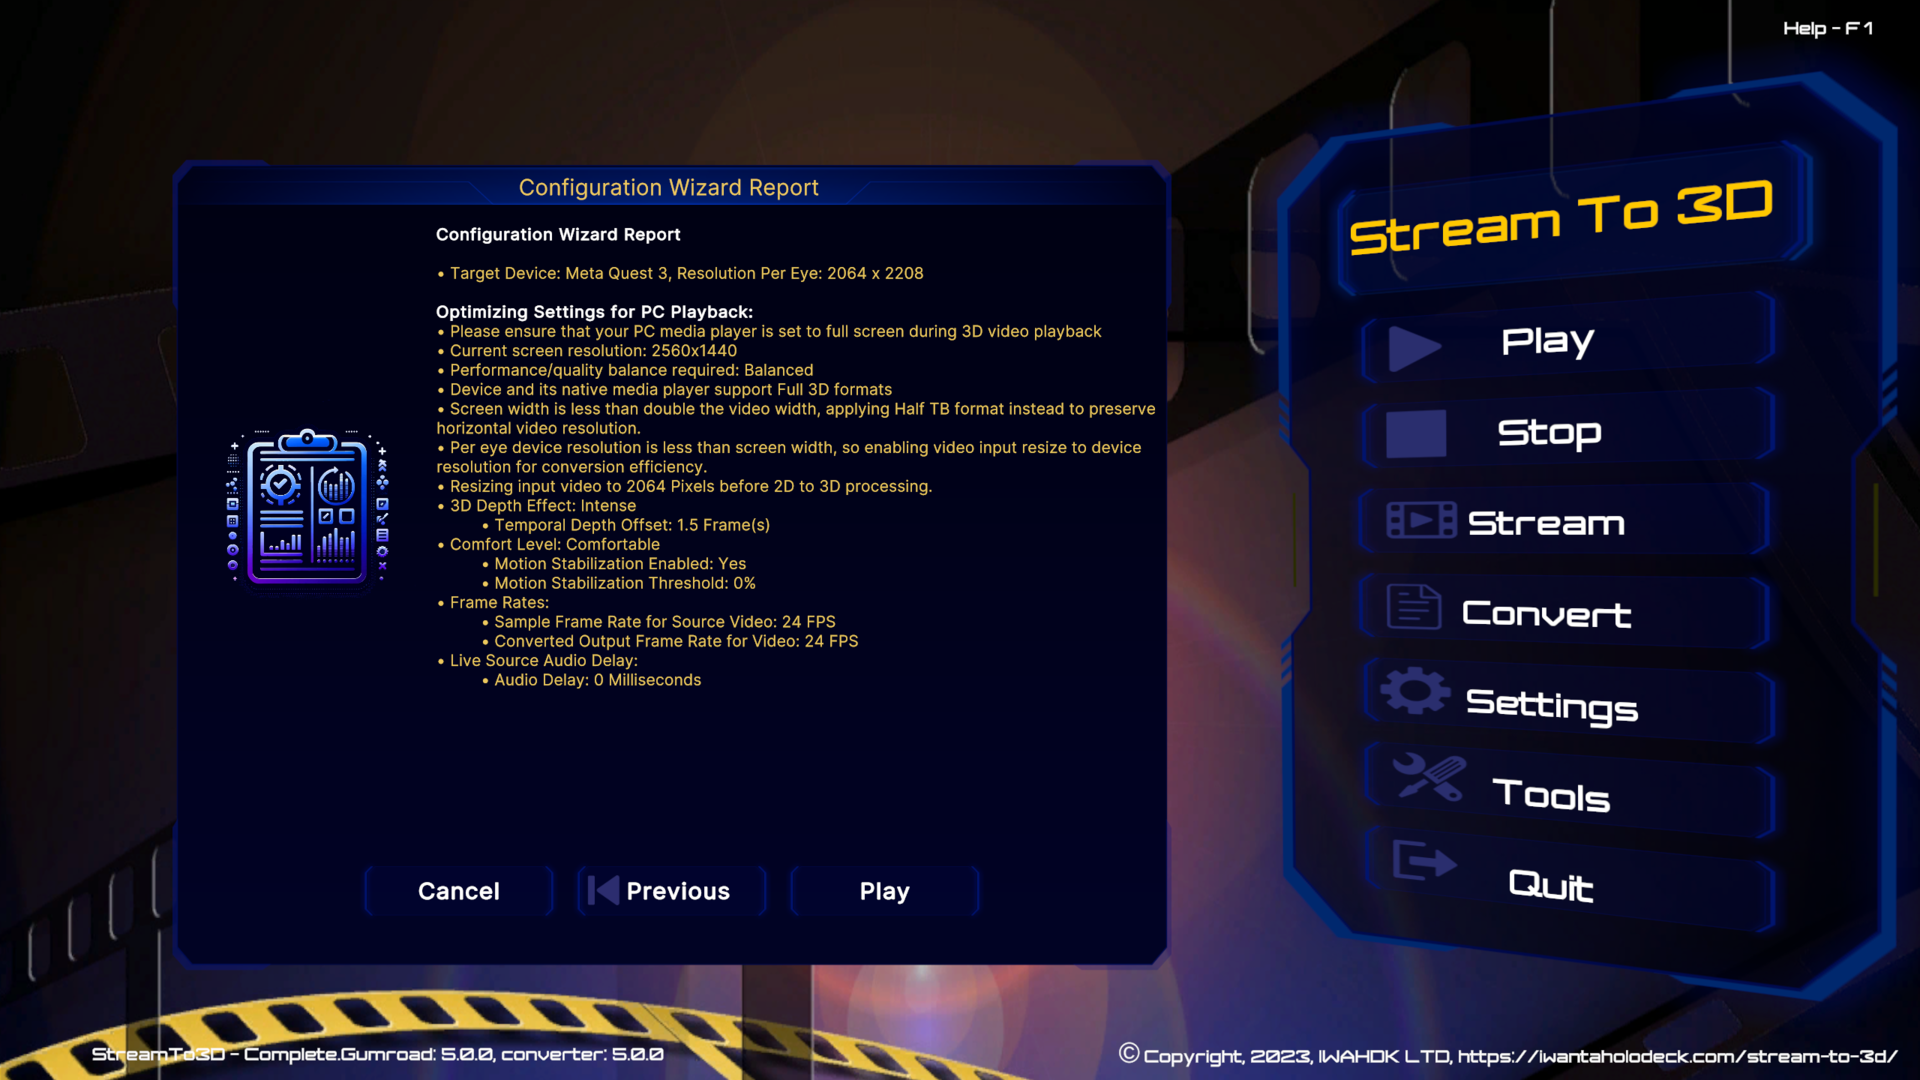
Pressing Play will then take you to the Configuration Wizard (if you have it enabled). The subsequent workflow steps follow the standard Stream to 3D video conversion process. The full set of screens for this example are provided here for easy reference. The Wizard will conclude with the summary screen below, pressing Play will launch the media player to show the 3D content:
- For details on Stream to 3D Play functionality, see Real-time Conversion and Playback.
- For the main documentation hub, see Stream to 3D Configuration Guide.
Performance Considerations
Near real-time conversion performance depends heavily on hardware capability, video resolution, and frame rate. Adjust settings appropriately based on your system’s capacity.
Click here to go to the Usage and Configuration home page.