Screen Capture Recorder Example Screen Shots
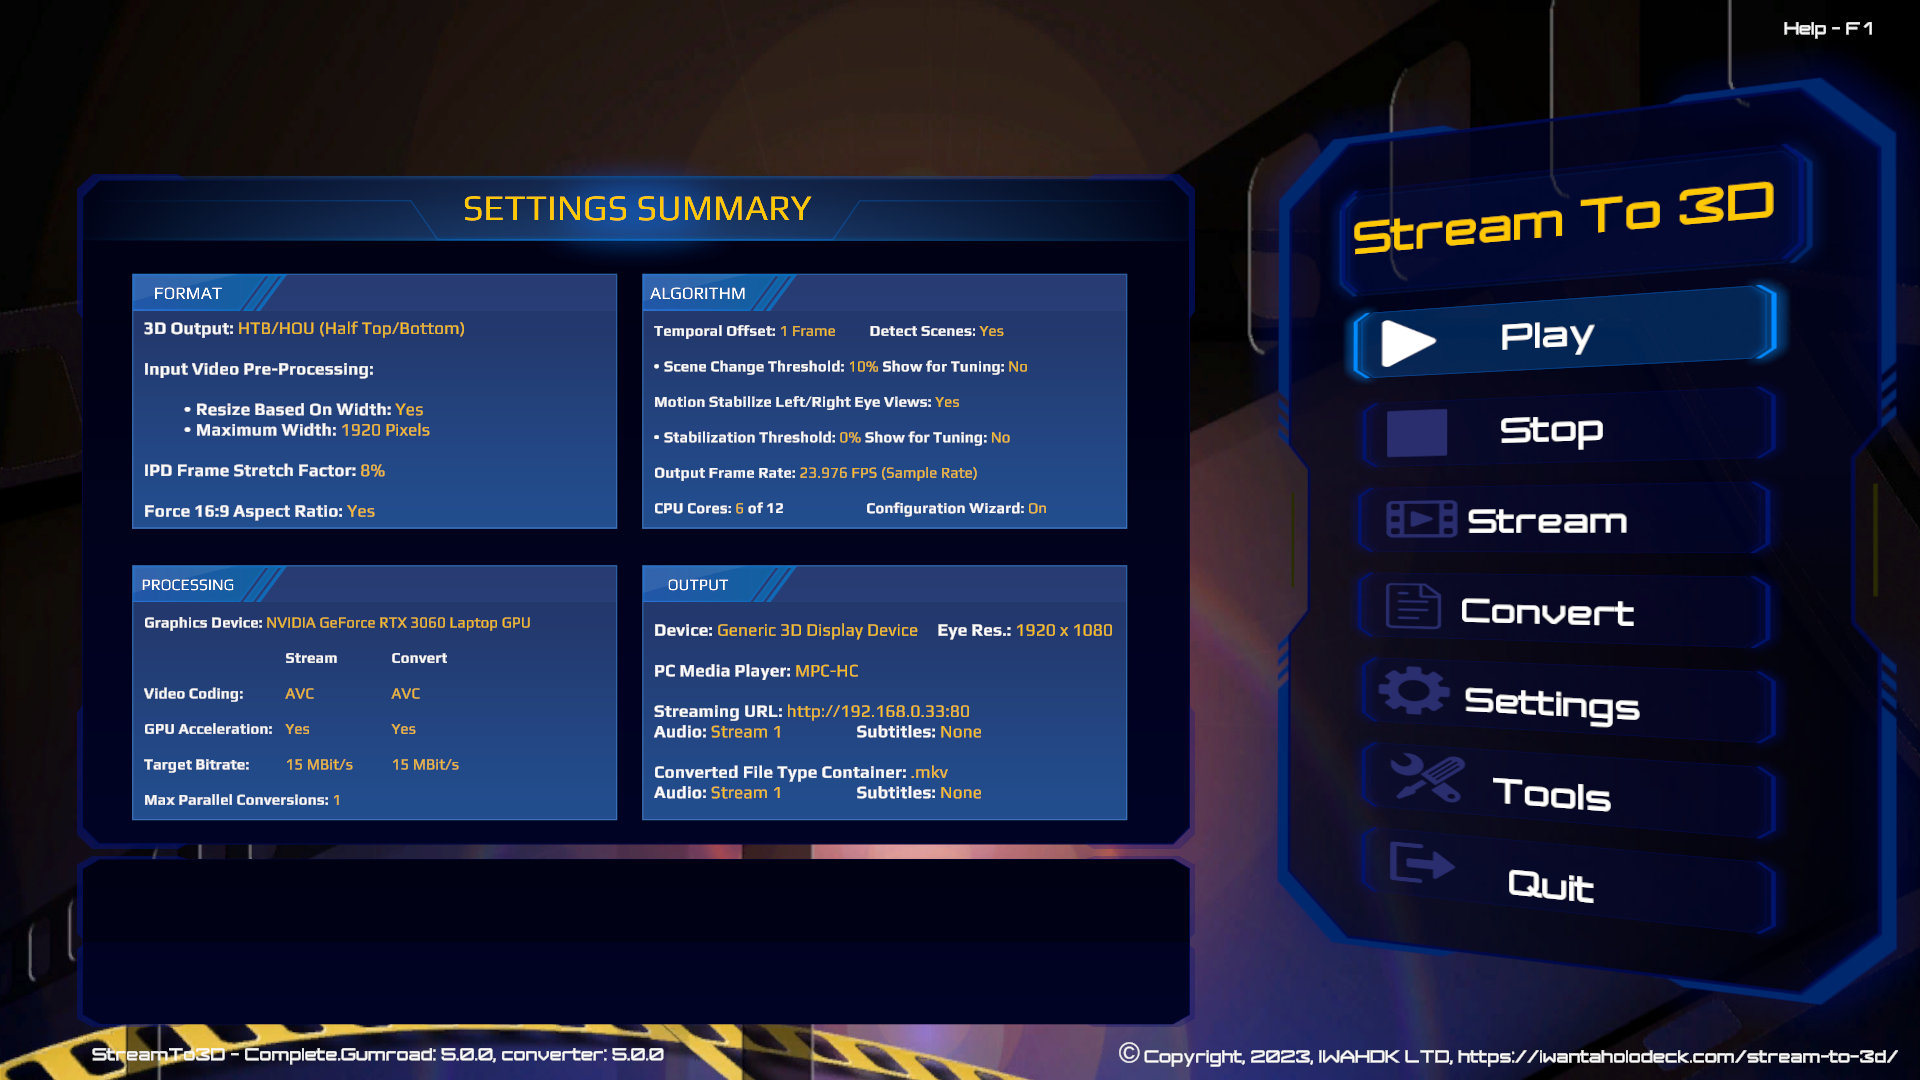
- The screen shots below illustrate the 3D conversion process using Stream to 3D's Play function and Screen Catpture Recorder live source file.
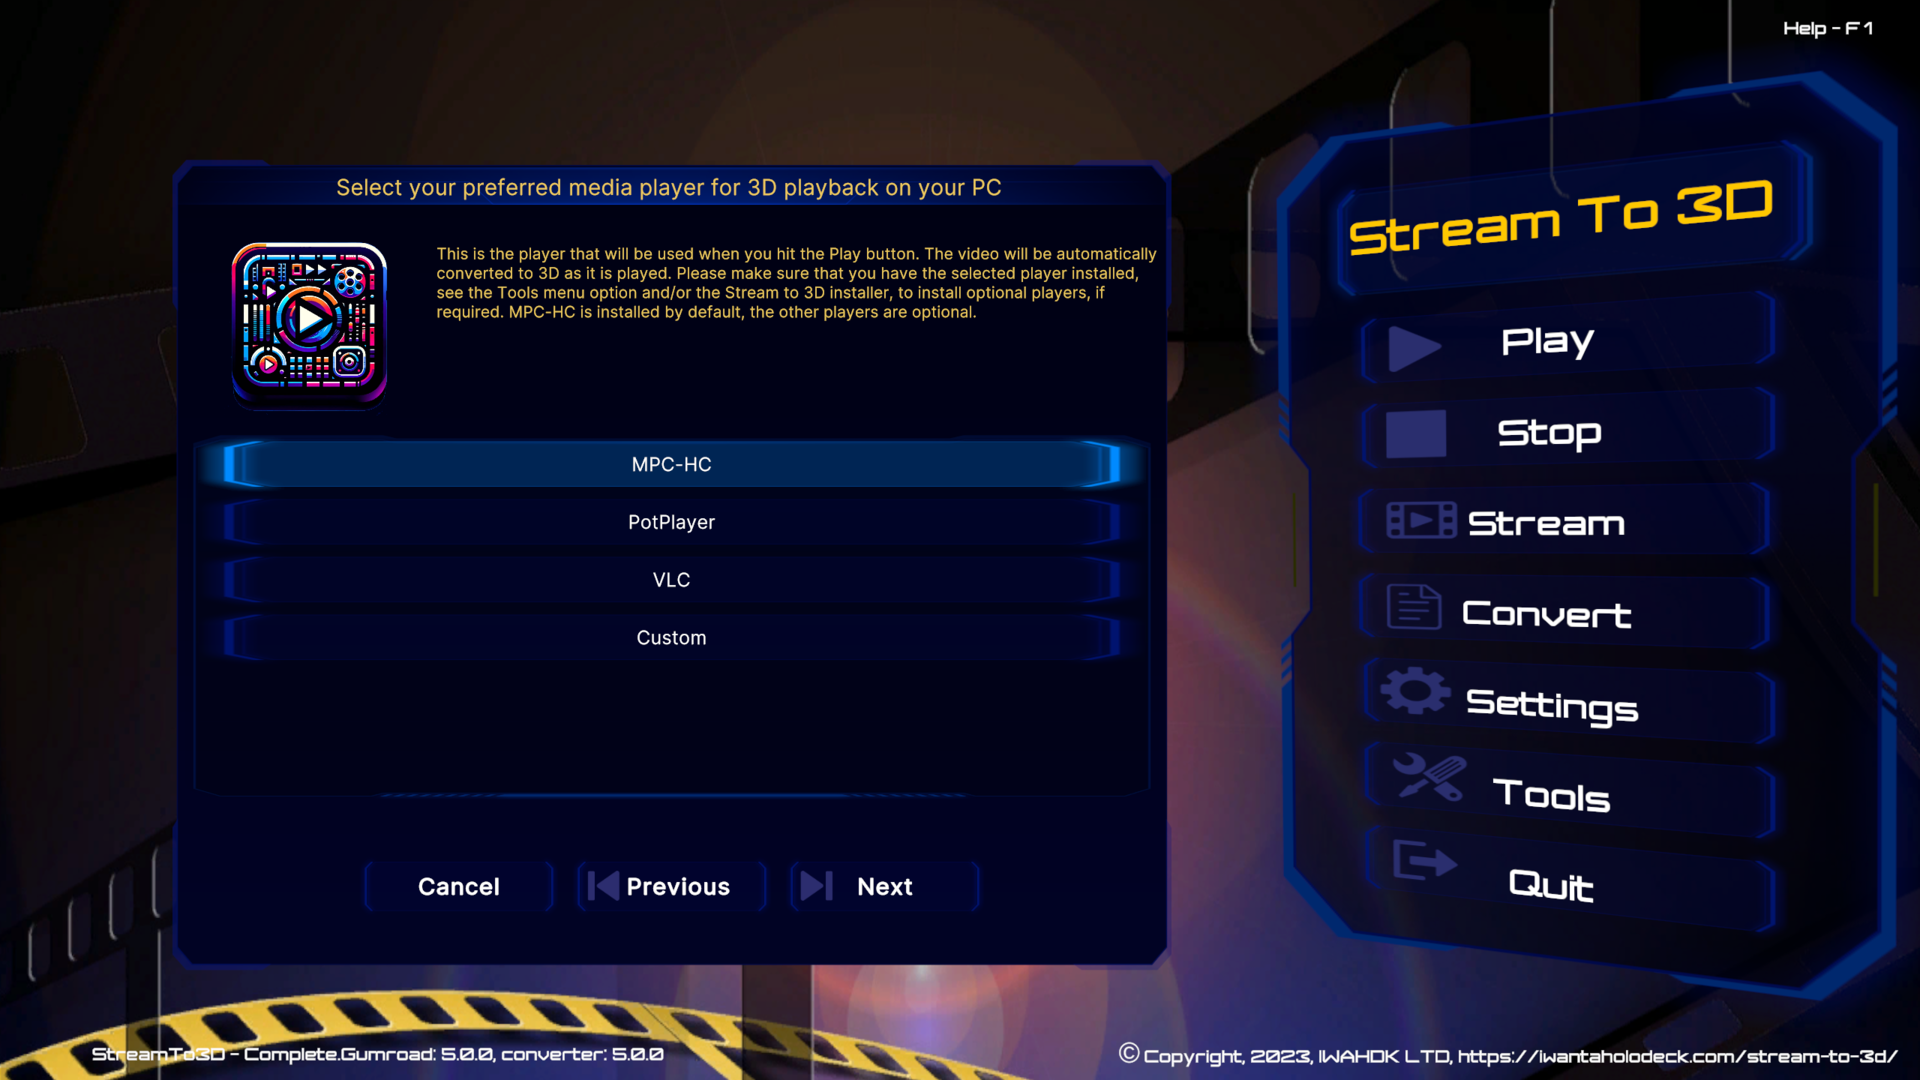
- The Configuration Wizard is enabled in this example. You can disable it via Settings/Wizard if required.
- All of Stream to 3D's functions; Play, Capture and Stream are available for use with live sources.
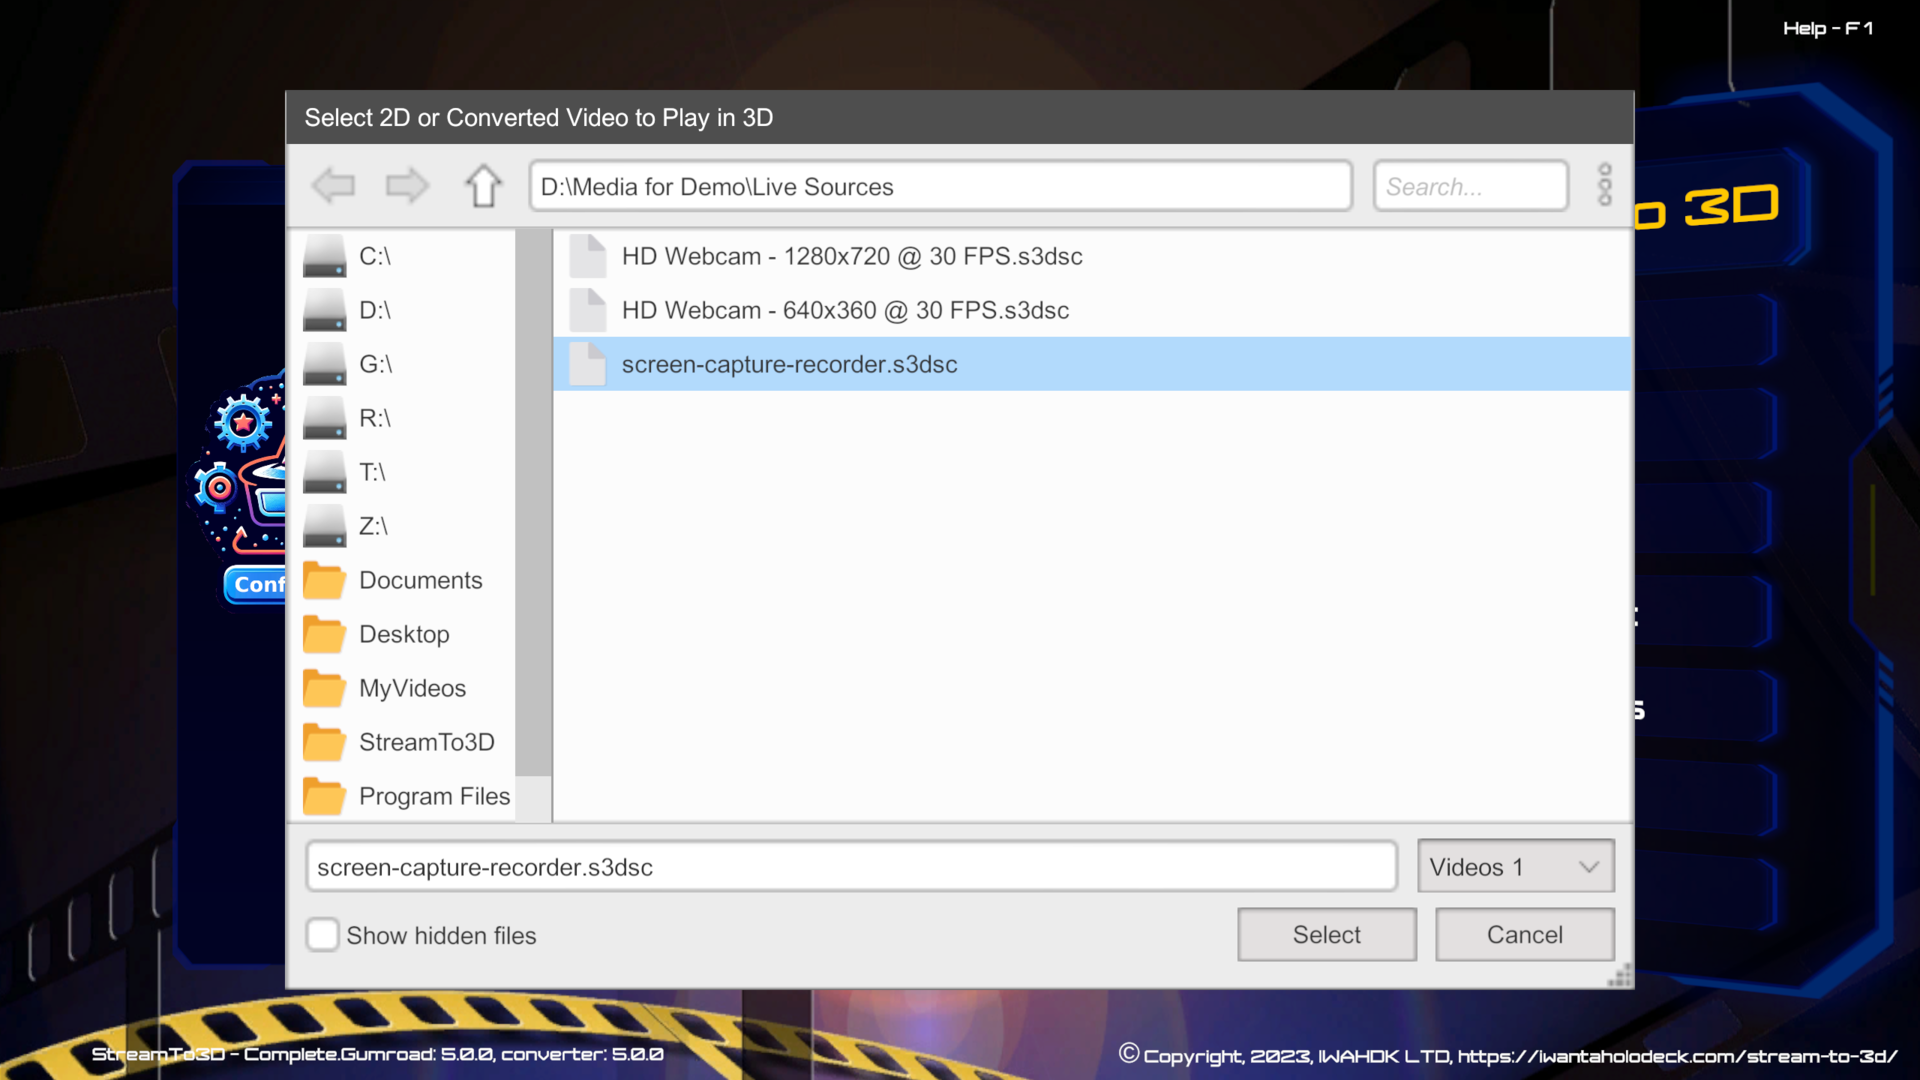
- The first step is to launch the main Stream to 3D application and open your created
.s3dsclive source file. The example uses the Play main menu option as illustrated below:
- This is a PC screen video capture example, enabled by screen-capture-recorder, so the "screen-capture-recorder.s3dsc" file is selected:
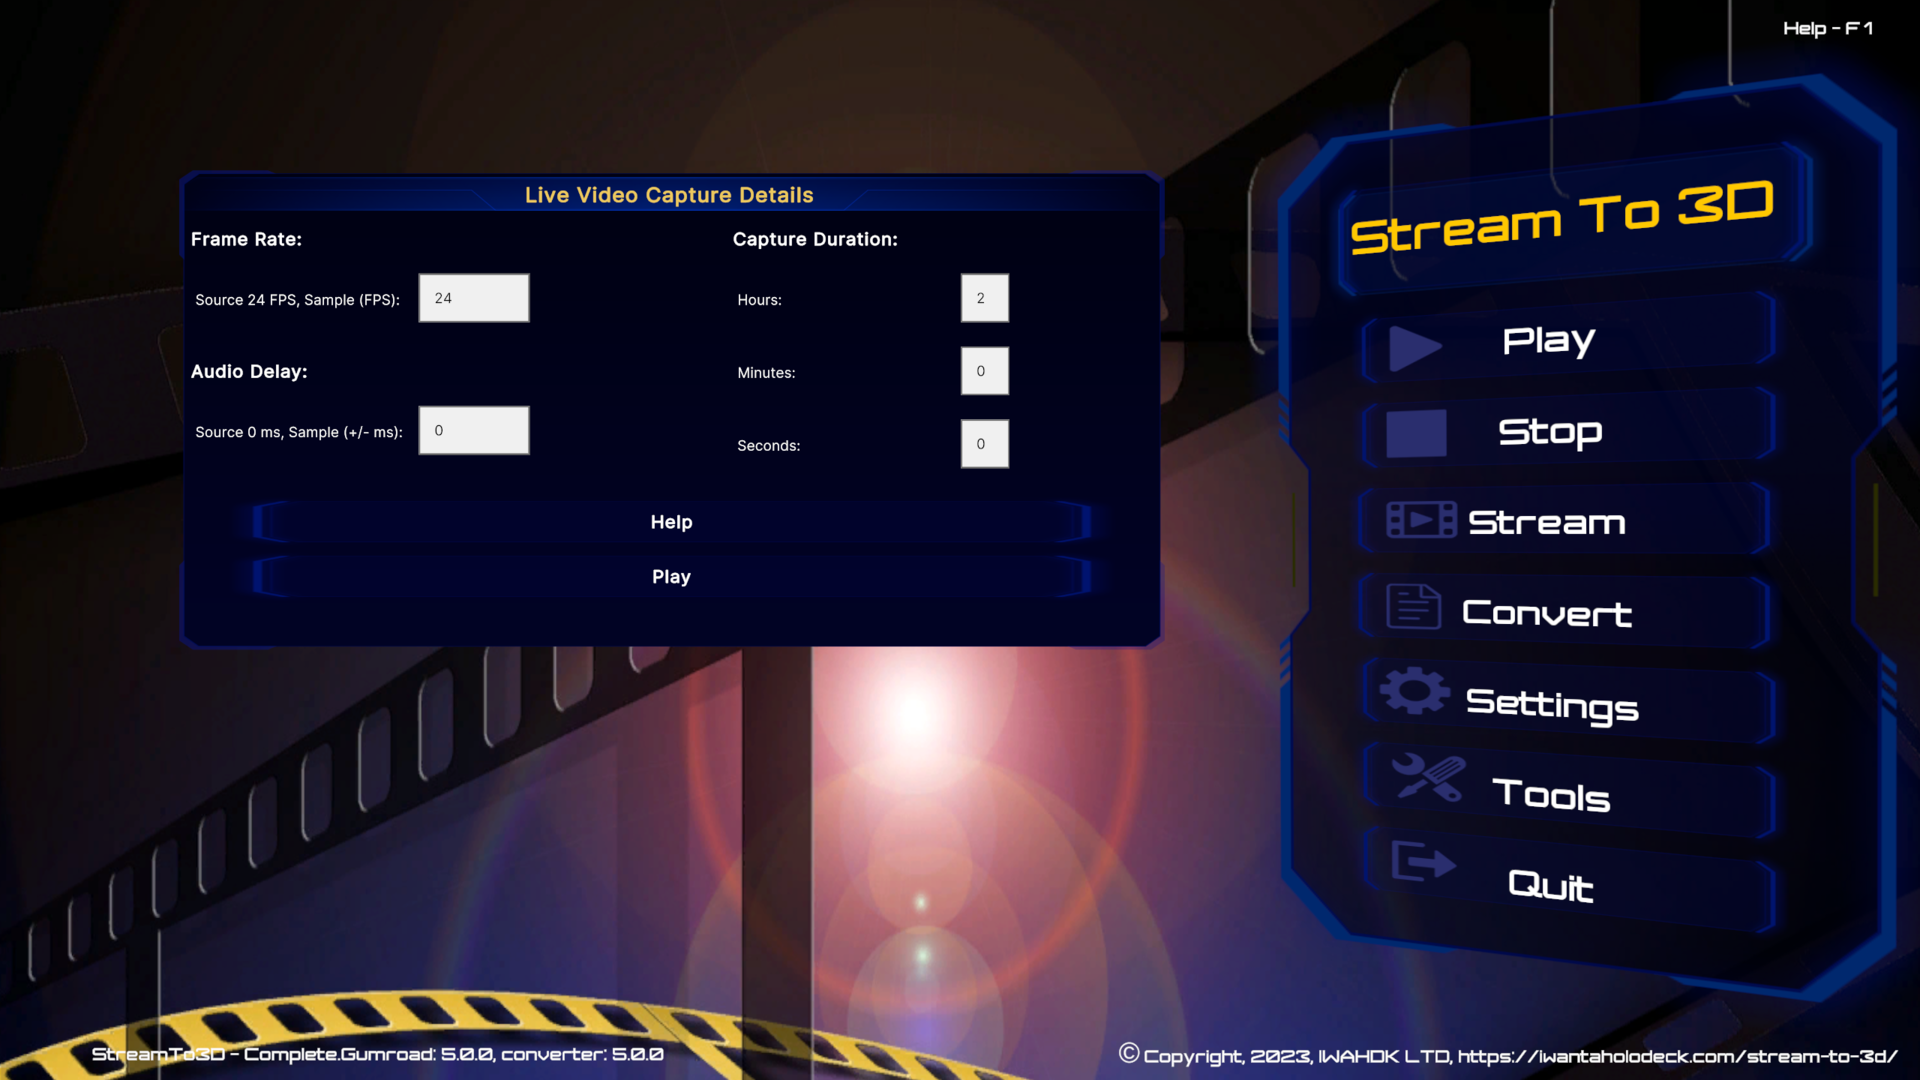
You will next see the Live Video Capture Details Dialog. Here, you can edit:
- The frame rate at which to sample the live video for 3D conversion (defaults to the native frame rate of the source).
- The capture duration (default: 2 hours). This is to automate the capture process if left unattended (you will also be able to manually terminate the capture earlier if desired).
- The required audio delay (in milliseconds). This may be required to correct any discrepancy between video and audio synchronisation. N.B. This should not occur with screen capture sources.
- The Help button, will take you to the guidance here.
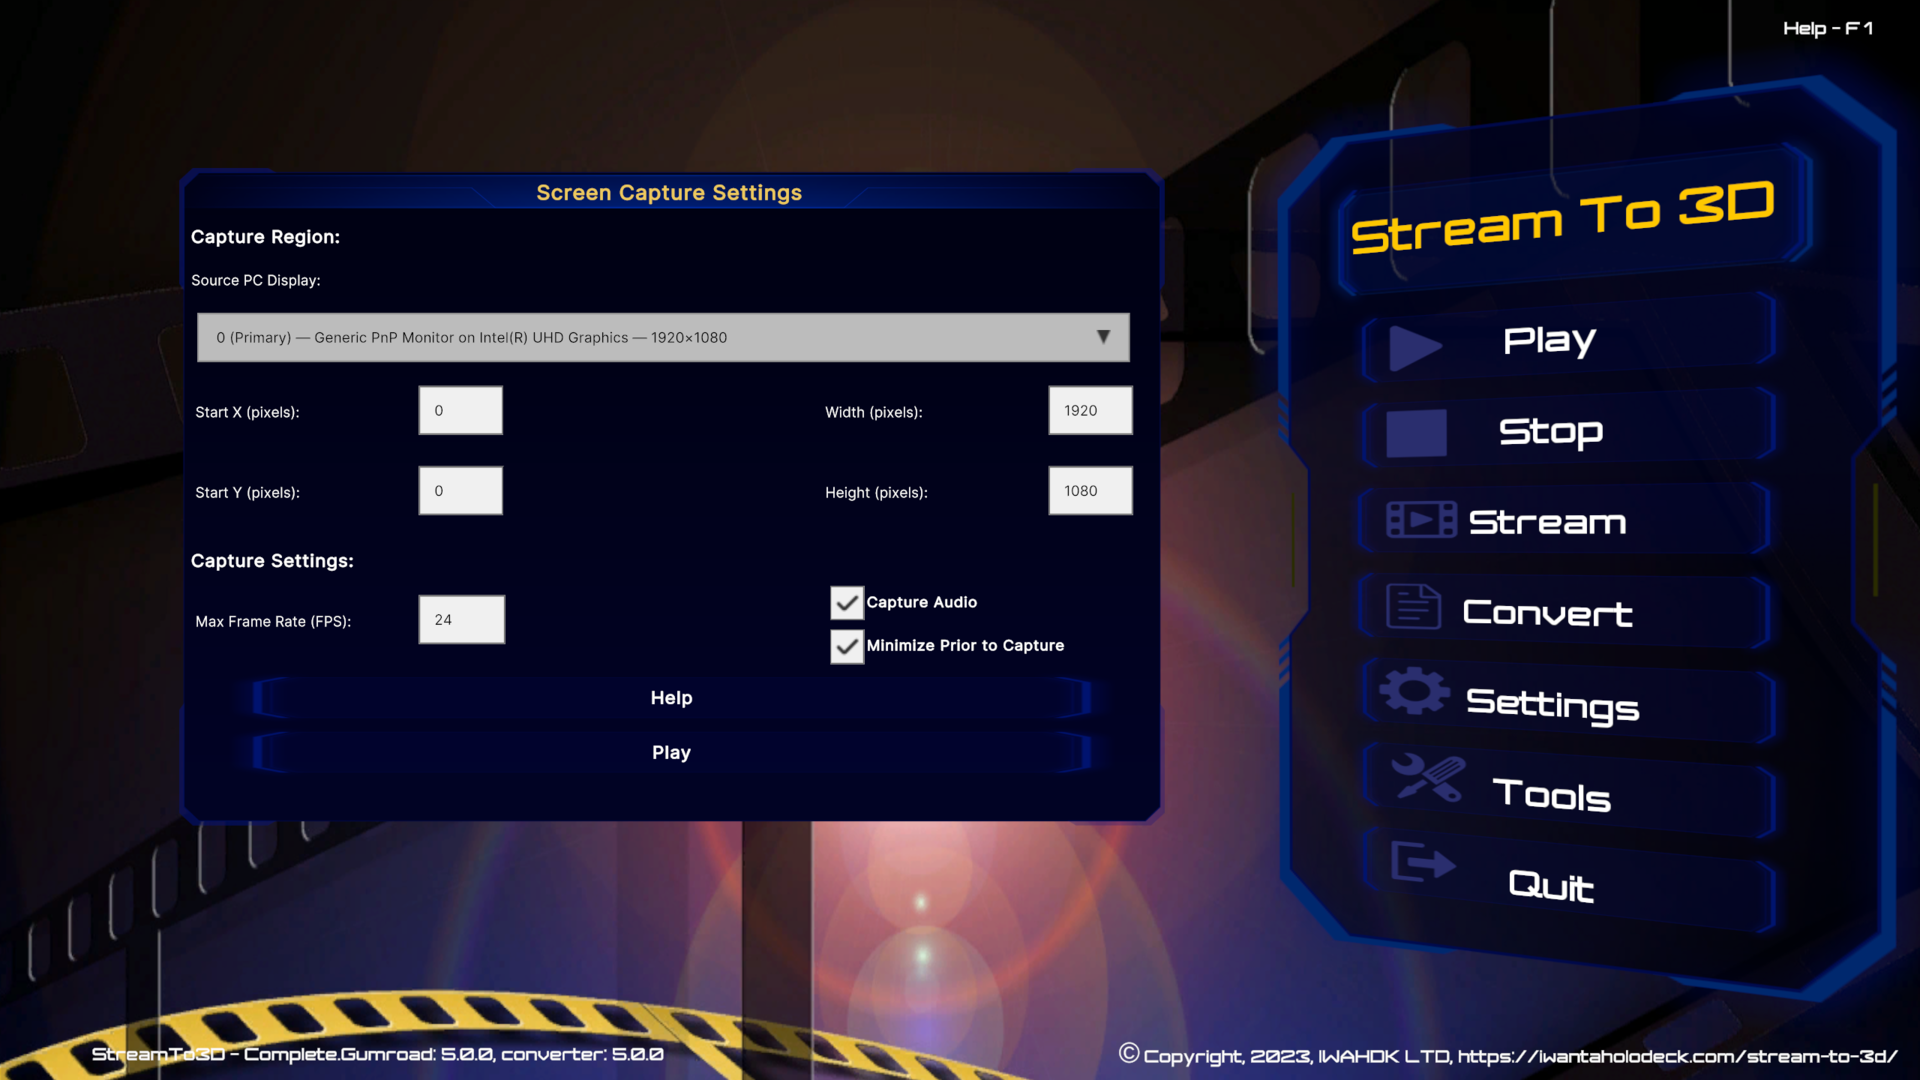
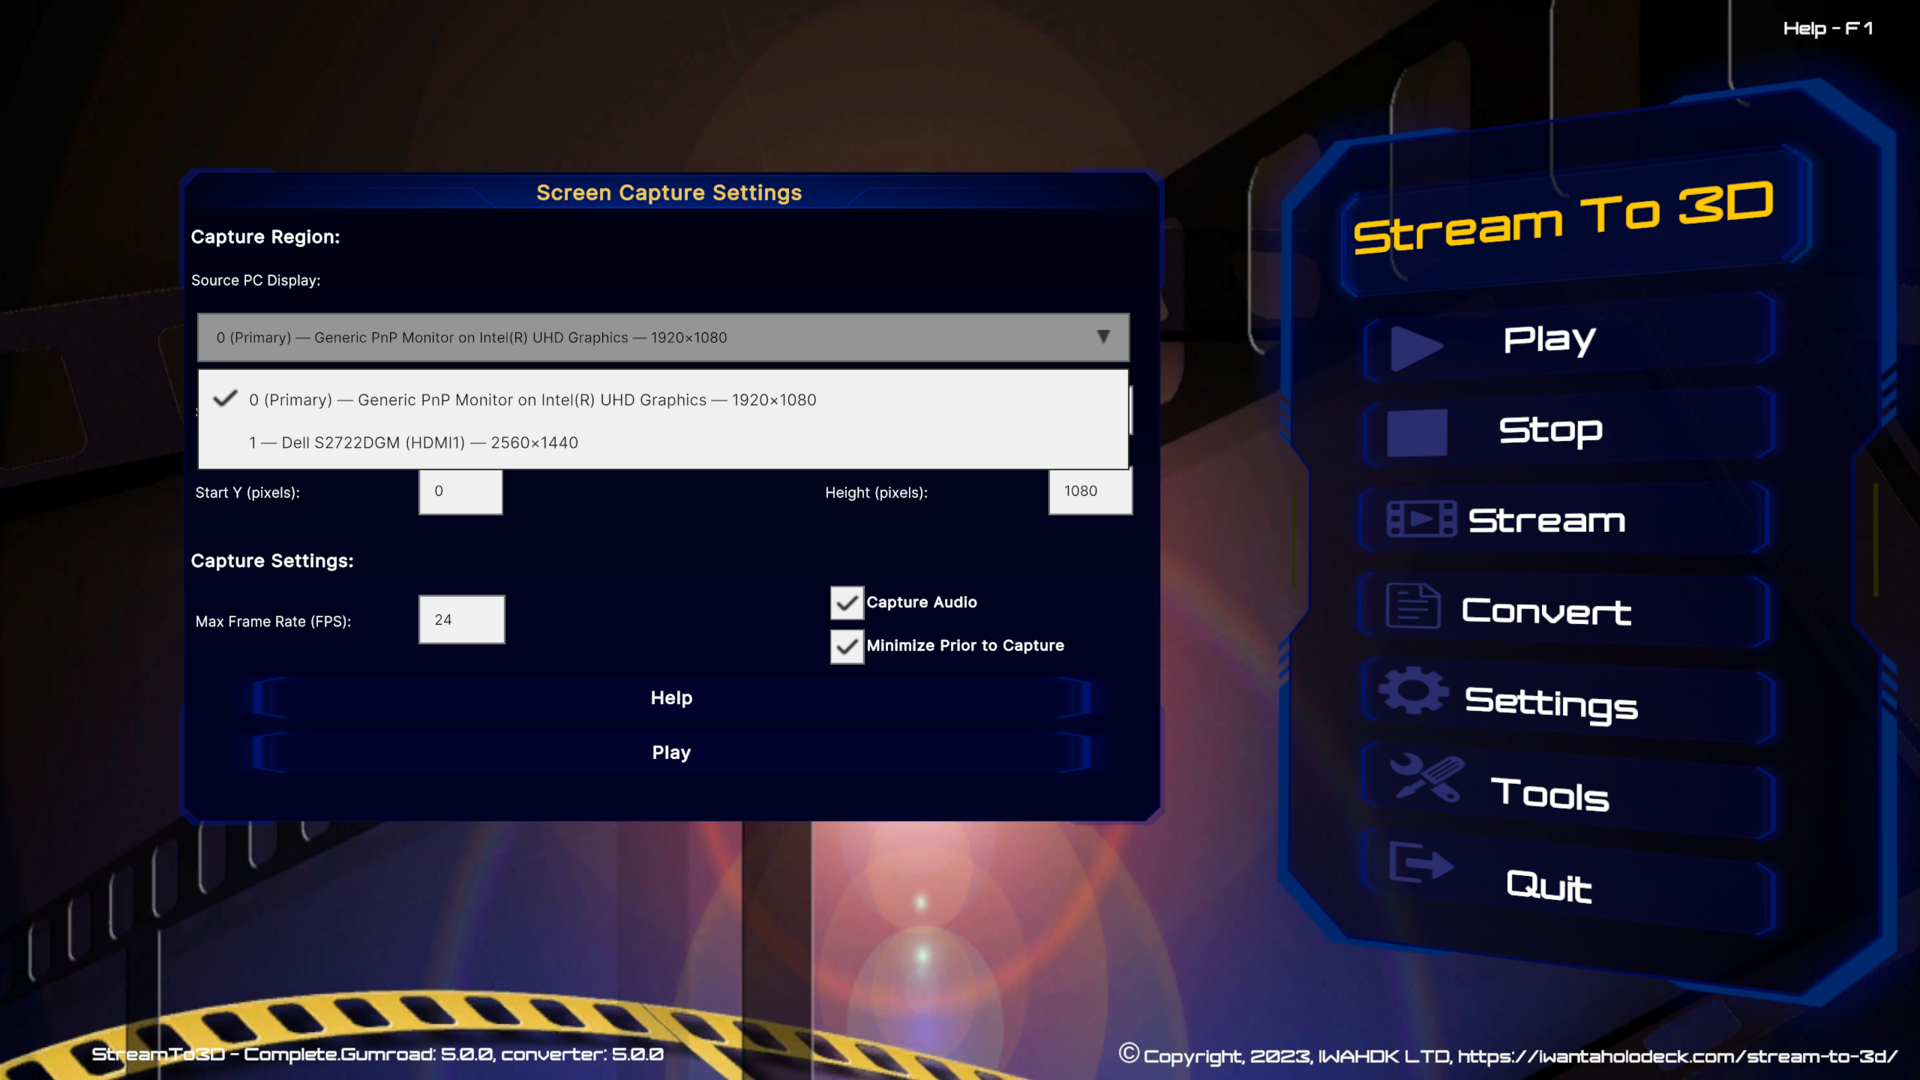
Pressing Play will take you to the Screen Capture Settings dialog. These settings allow you to:
- Specify the PC screen display from which video will be captured from the drop-down list.
- Specify a region of the screen to capture, specified by the top left hand corner (x,y pixel co-ordinates) together with the width and height of the region in pixels. Changing the selected display for capture will automatically reset the capture width and height to that of the selected display.
- Define the maximum native frame rate at which the underlying screen-capture-recorder technology will record video.
- Specify audio capture preferences (whether or not to record audio).
- The minimize prior to capture option indicates whether or not to minimize the Stream to 3D application before initiating screen capture. This is particularly useful in single display systems, as if Stream to 3D is not minimized then it becomes part of the captured video.
- The Help button, will take you to the guidance here.
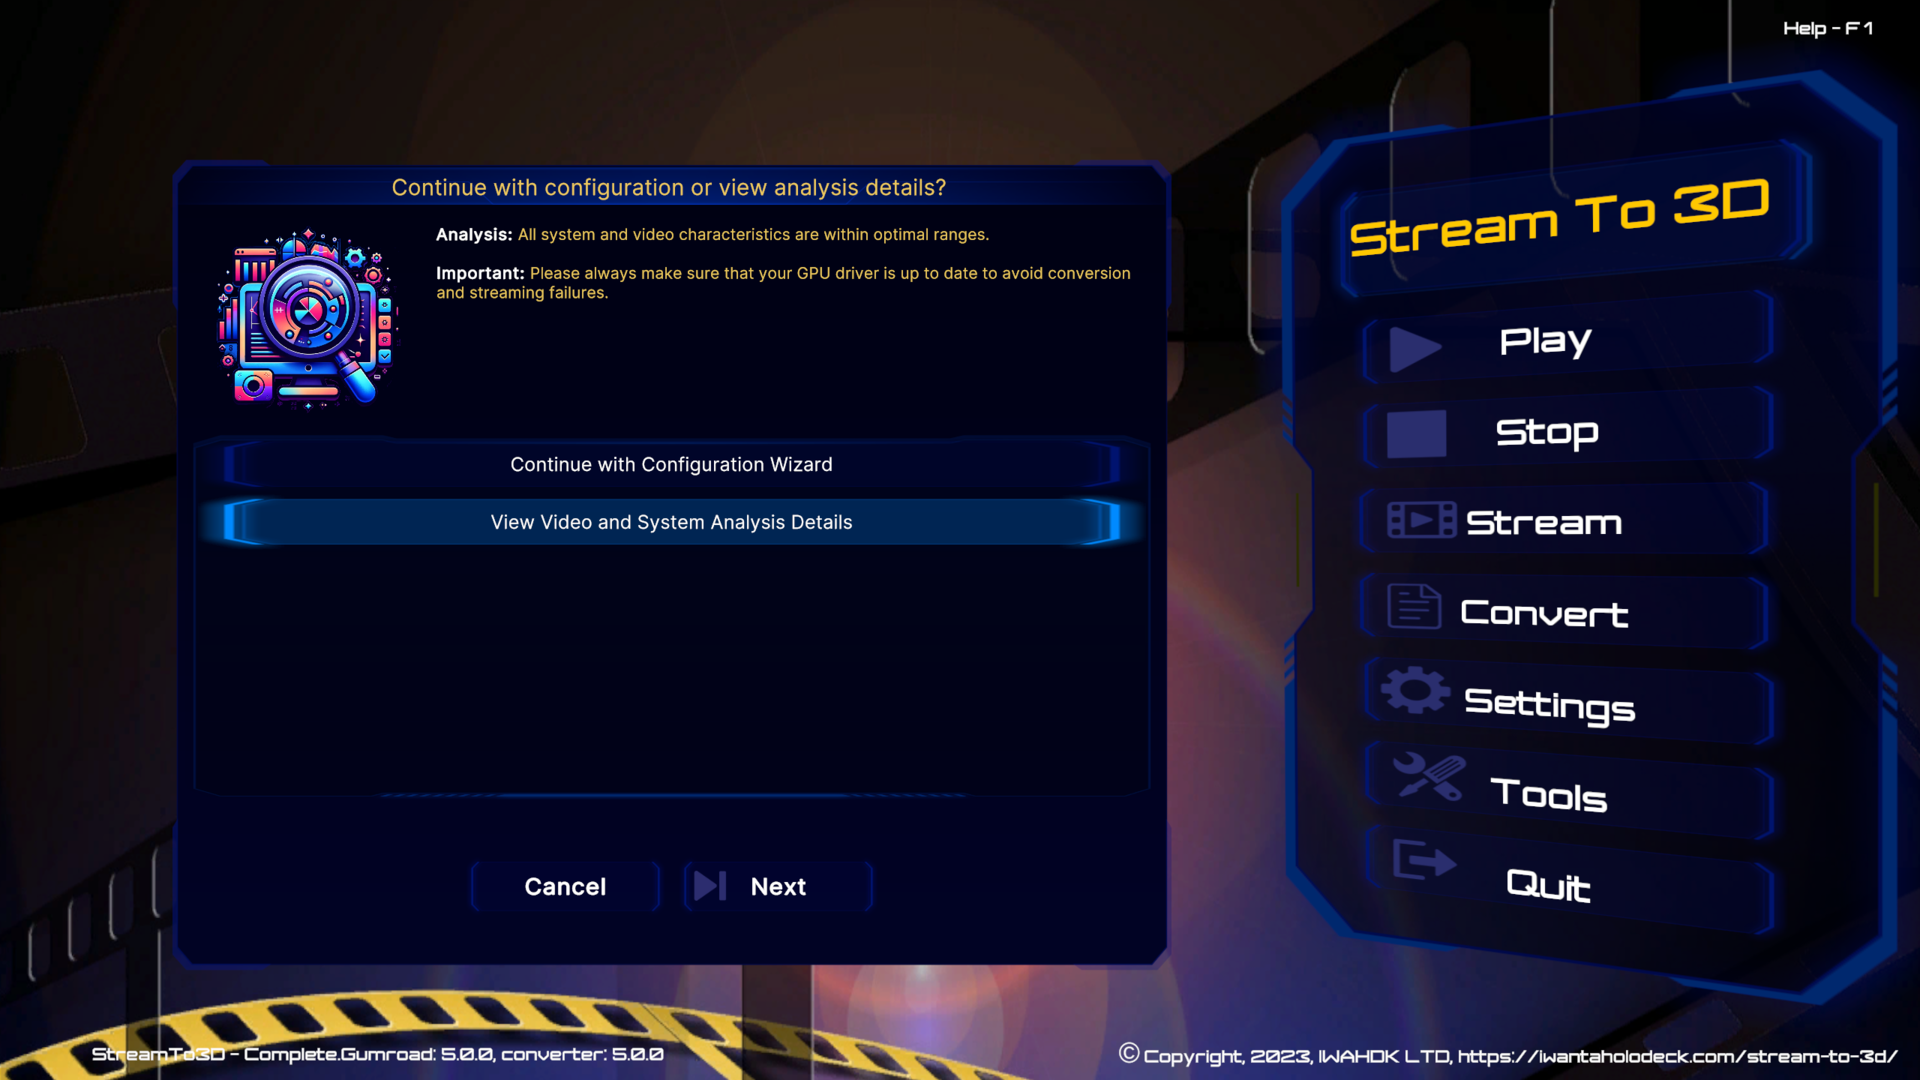
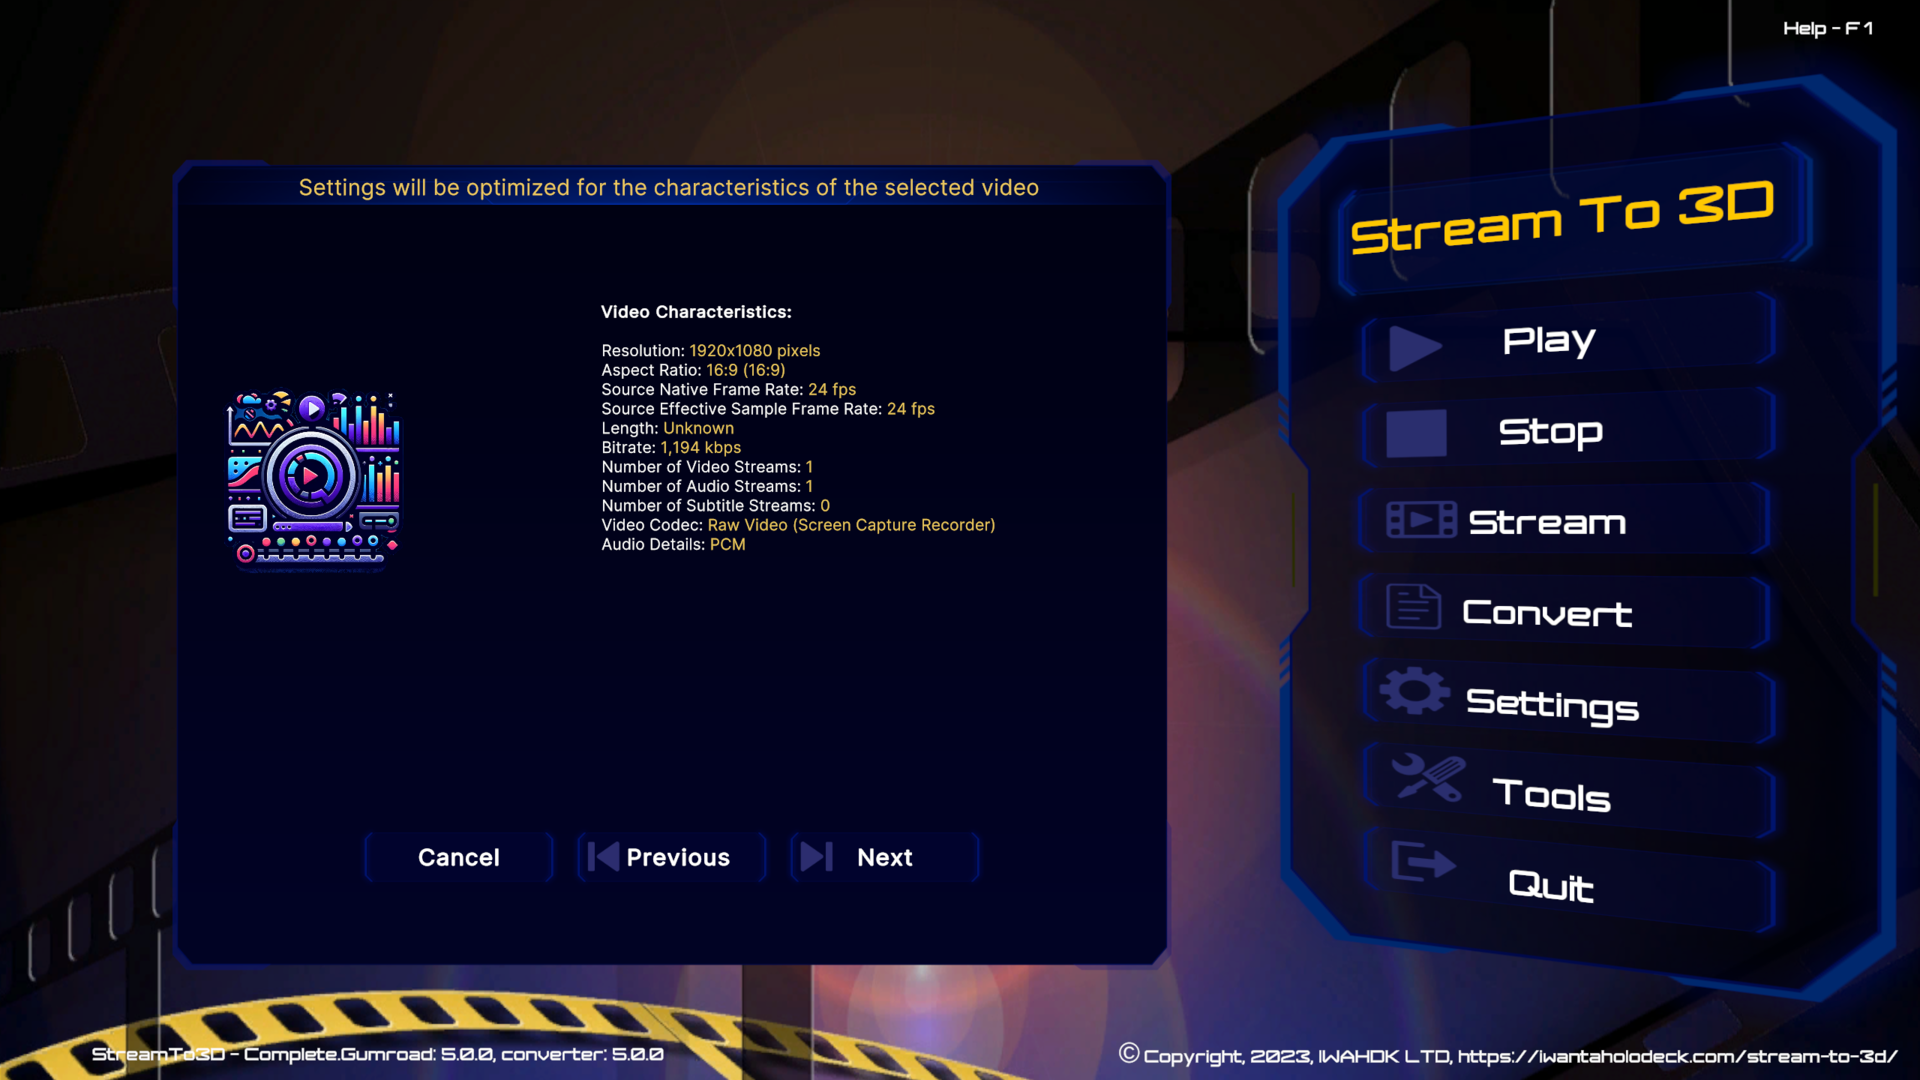
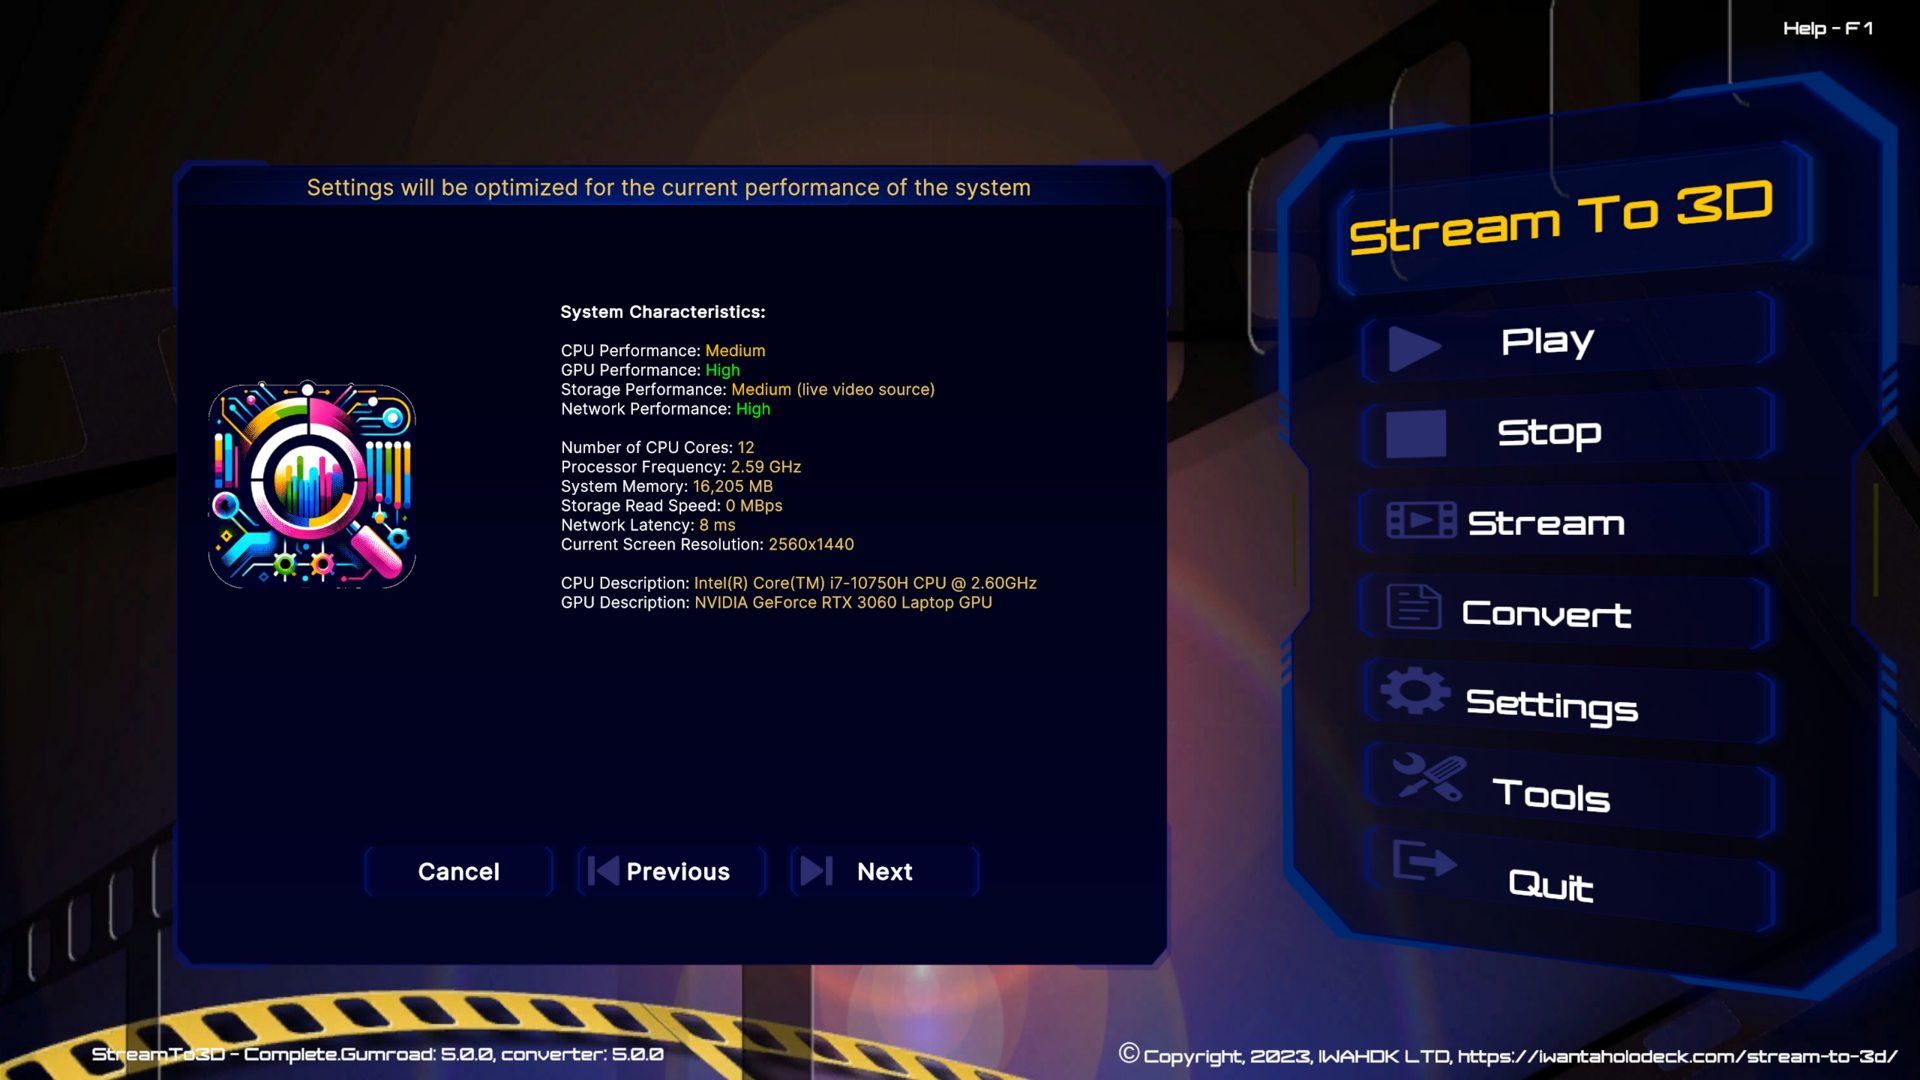
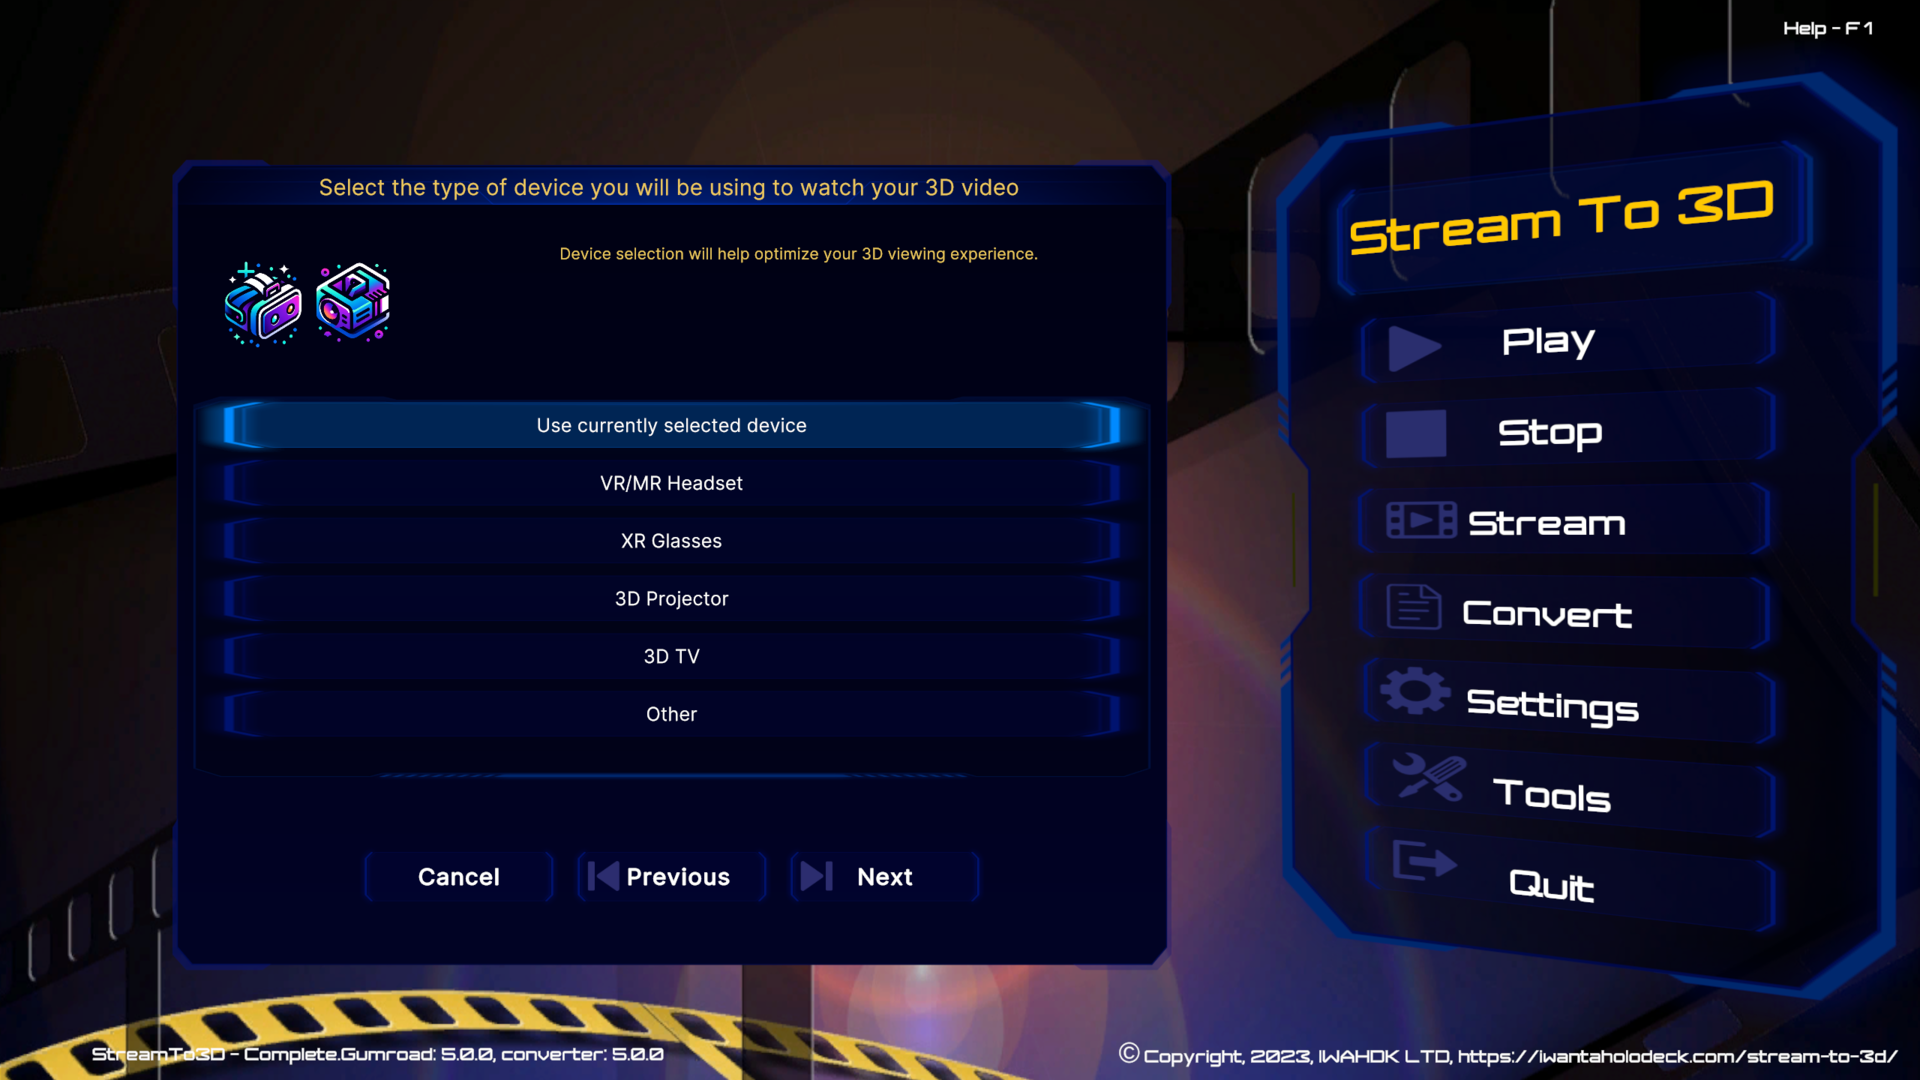
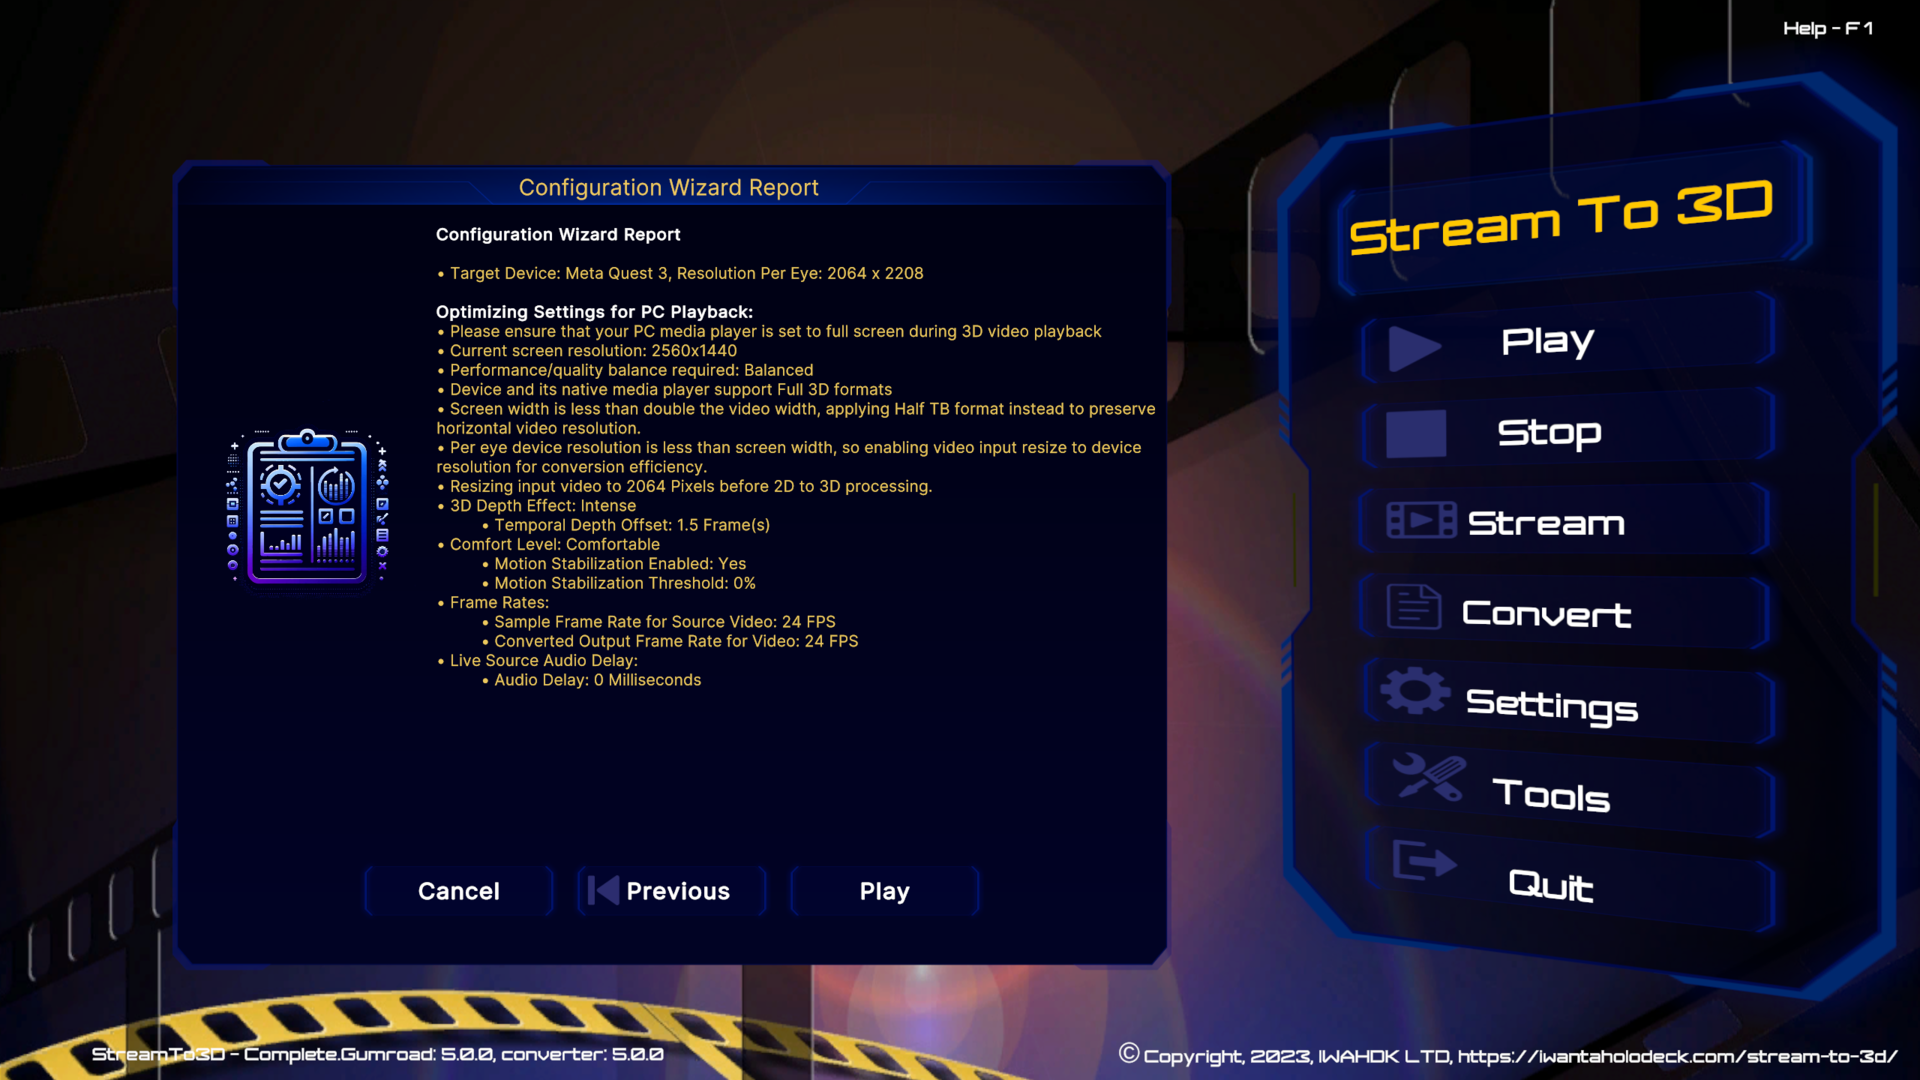
Pressing Play will then take you to the Configuration Wizard (if you have it enabled). In the Wizard, you can next choose to continue configuration or you might want to to view the details of the video capture source first, to verify its characteristics:
Go to full guidance on PC Screen or Live Video Conversion to 3D