Stream to 3D - Installation
Need help? Start with User FAQ & Troubleshooting. For billing/cancellation/refunds, see Billing, Cancellation & Refunds.
If all is well following purchase, then you should see a page similar to the one below, with a download link for your product, as well as installation guidance and support links:
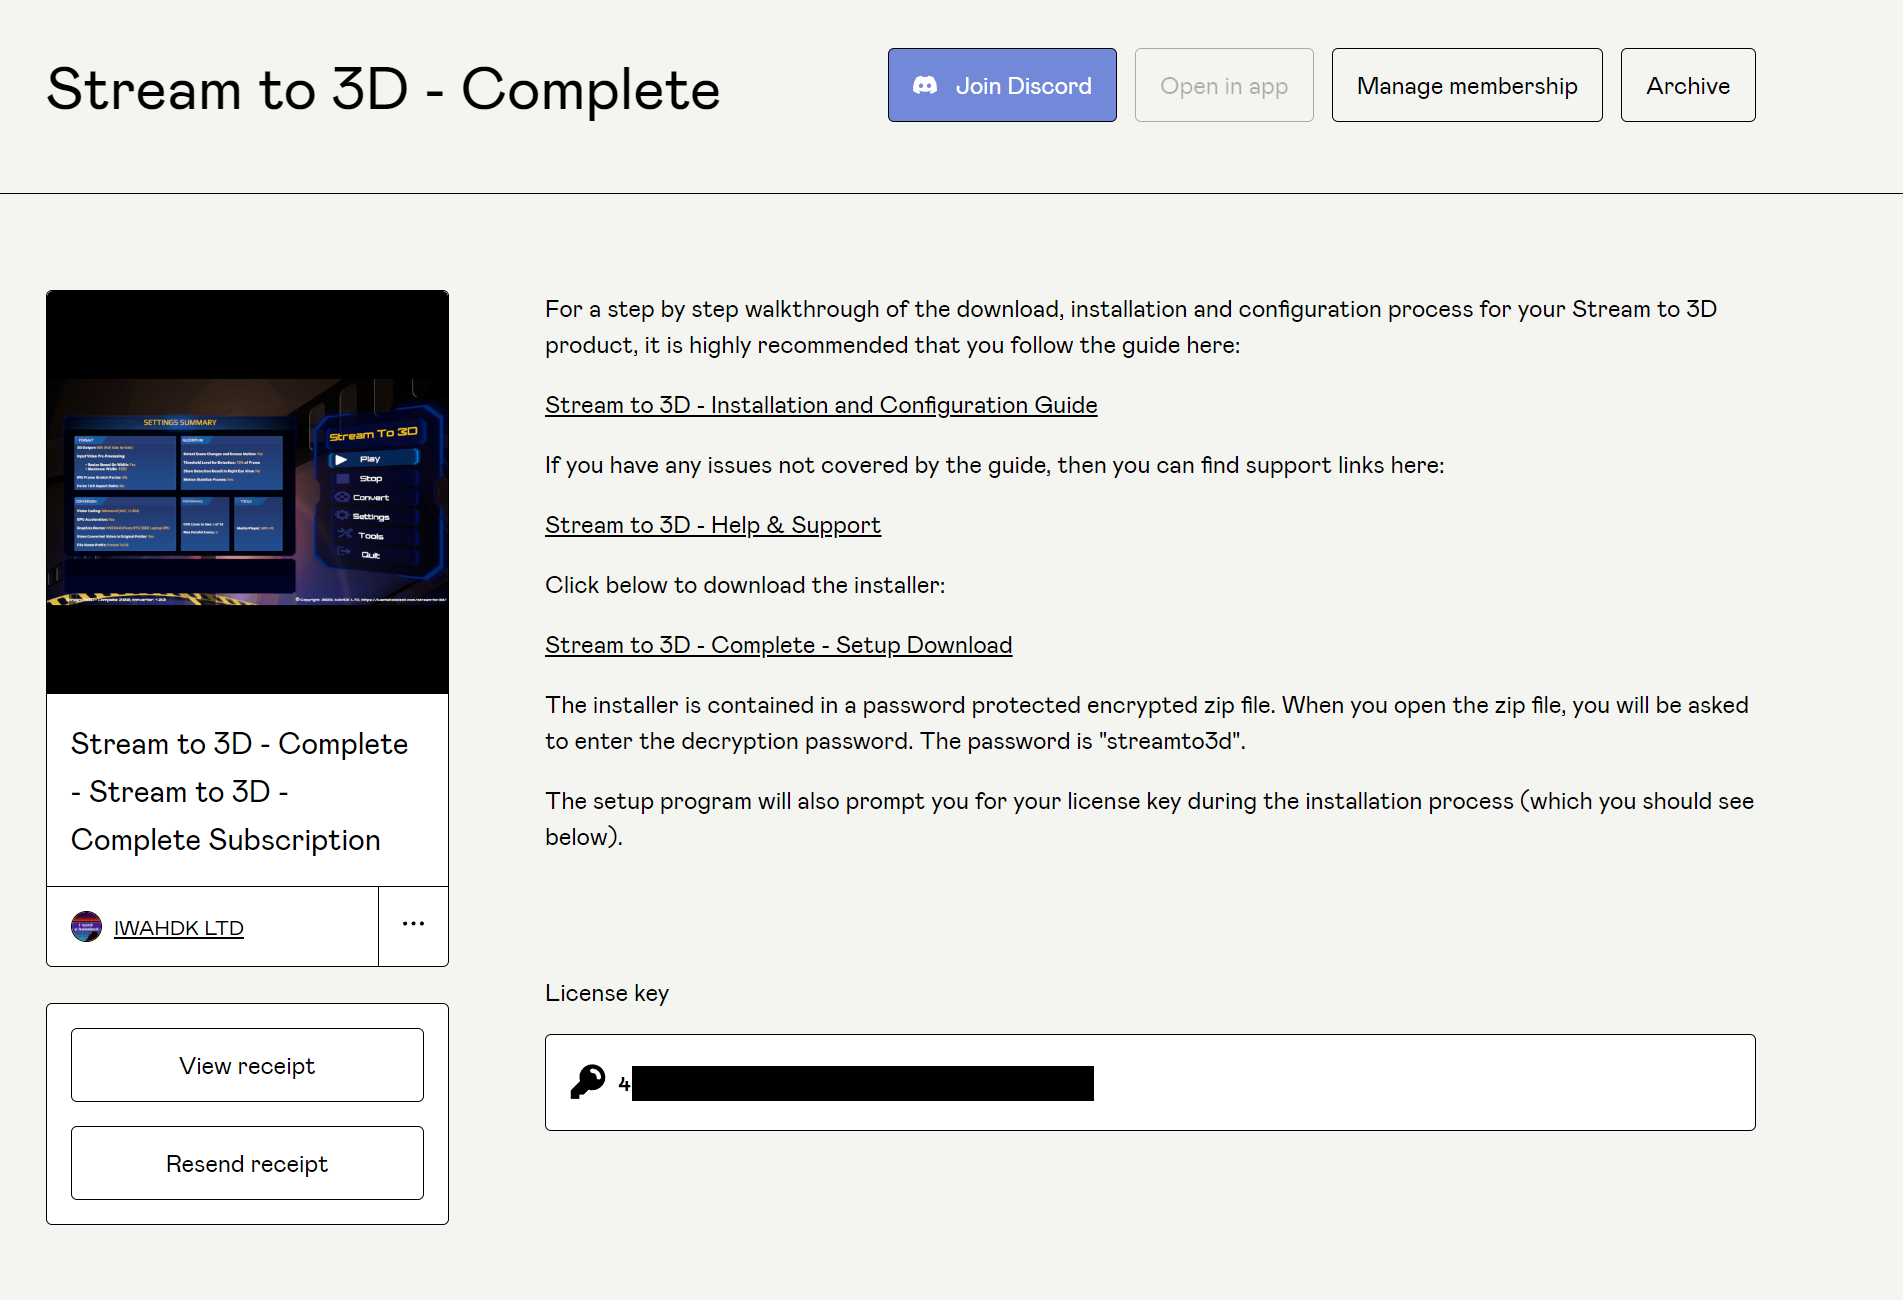
You will also find your licence key on this page (the licence key will also have been emailed to you).
If you have any activation issues (or you see an LVE0xx error code), see Licensing & Activation Troubleshooting and Error Codes. Before contacting support, see Logs & Diagnostics.
You can join the Stream to 3D Discord Server via a "Join Discord" button at the top of the page.
For more support options, see the support page below:
Open the Stream to 3D Support page
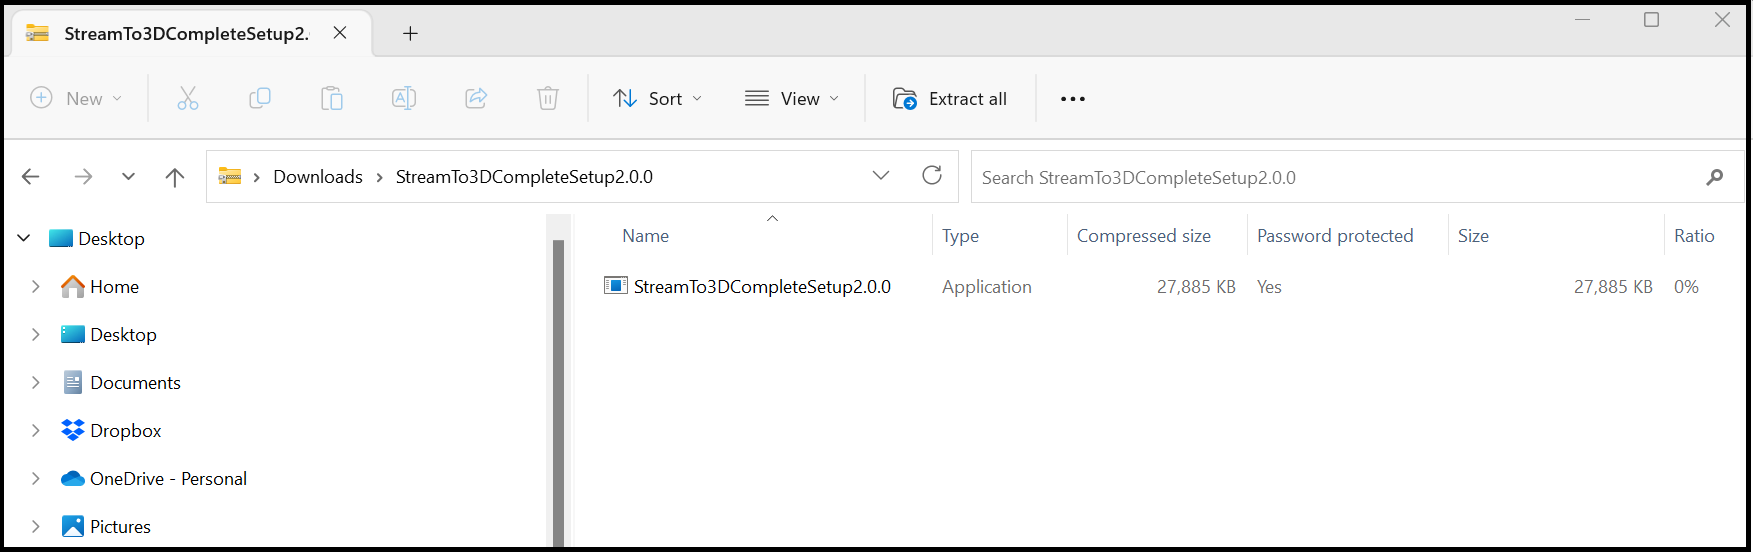
To download your product use the "Stream to 3D - Complete - Setup Download" (or similar) link. This will download a setup zip file and you will be taken to a view of the setup application ".exe" contained in the zip. This screen shot shows the process when downloaded via Chrome, the process with other browsers may look slightly different:
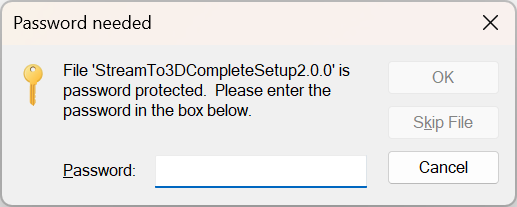
Clicking on the setup program, will prompt for the decryption password. The password is set as "streamto3d". Enter it to continue:
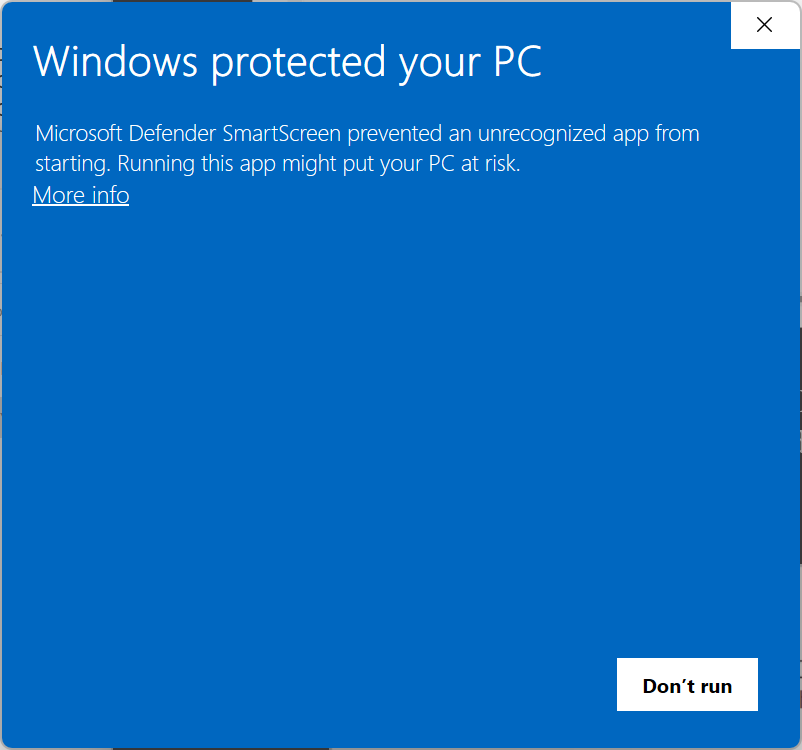
This will both unzip the setup program and run it. It is not a commonly downloaded file, so Windows warns you about executing it. Windows will present the standard Microsoft Defender SmartScreen warning about an unrecognized app. Click "More info" to continue:
You will then see the Window below, click "Run anyway", if you are happy to continue:

You will then get one additional query about User Access Control, asking whether you are happy to run the program, which you should also accept (if happy), before the Stream to 3D Setup installer screen will appear:
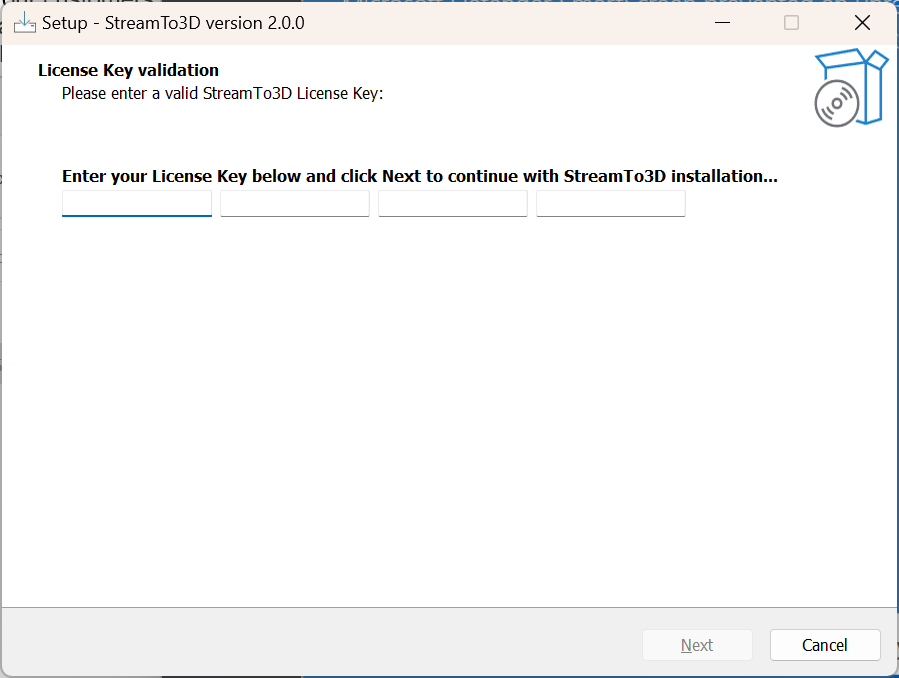
You should enter (or cut and paste) the Stream to 3D license key and click Next.
The installer will confirm your entitlement to install the product with the server and if all is well, the page below will appear. Note that Stream to 3D requires an internet connection:
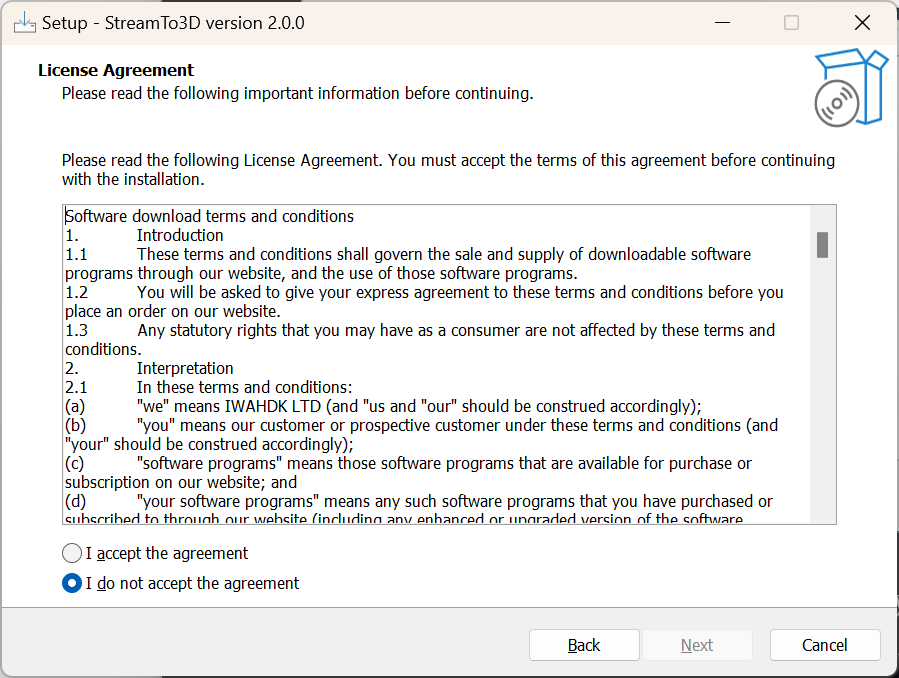
Read through the terms and conditions, and if you are happy, accept them by clicking on the accept radio button, before clicking Next, which will take you to the screen below:
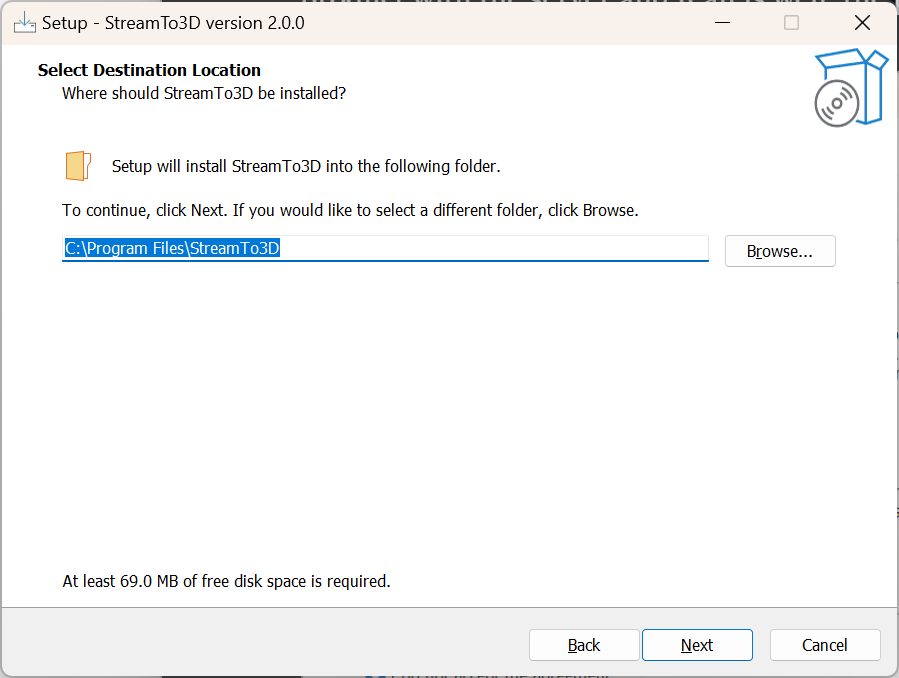
Please remember this install location, particularly if you change it, as the setup program will NOT auto-launch the Stream to 3D application at the end of the install process, to ensure that permissions are correctly set when the application is first launched.
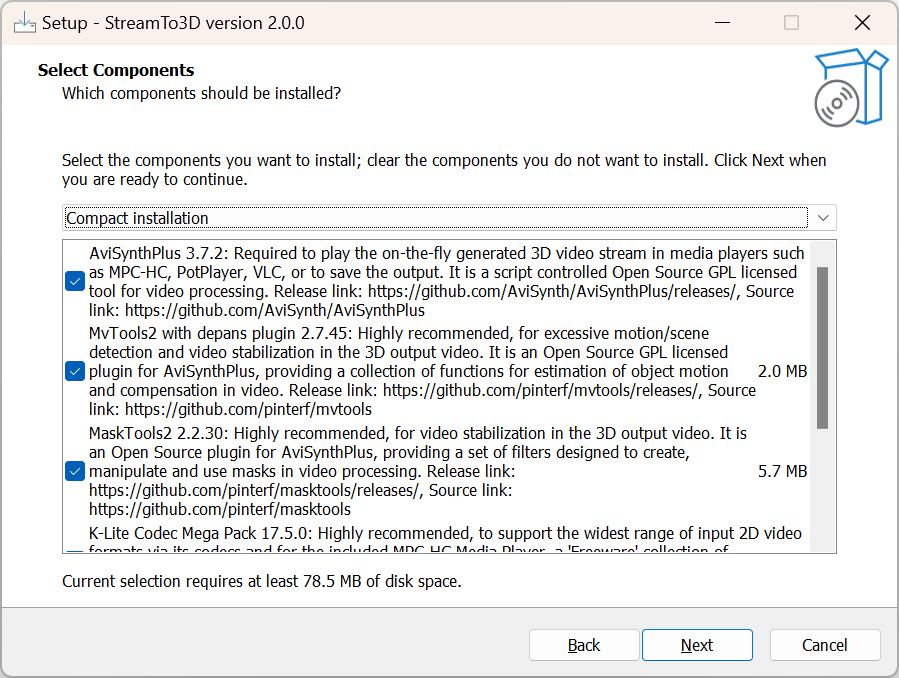
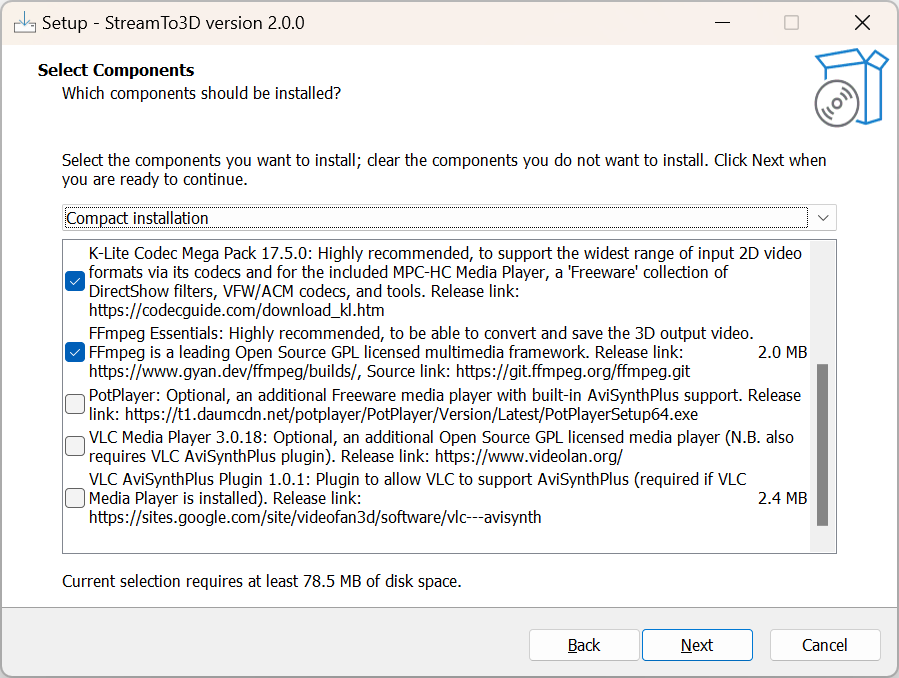
The next page is the component install selection screen. A description of each component is provided.
These components are not part of the Stream to 3D product itself, the intent is to offer convenience links to these downloads as a way of providing a high quality, smooth and consistent experience in your usage of Stream to 3D, by assisting with the installation of these useful additional elements.
The textual description of each component indicates the context in which it might be either required, recommeded or optional. These items include video processing tools and libraries, as well as a number of media players to choose from.
You may well already have some of these tools installed. If so, then you can uncheck the relevant boxes. Stream to 3D will attempt to discover installed components when it starts up. You can also change or configure their install locations yourself later, within the Stream to 3D UI.
The default "Compact installation" installs the components shown as ticked below. This is the option used in the rest of this example. You can also choose from either "Full installation" or "Custom installation" from the drop down:
The next screen simply confirms what will be installed. A separate installer will be launched for each component:
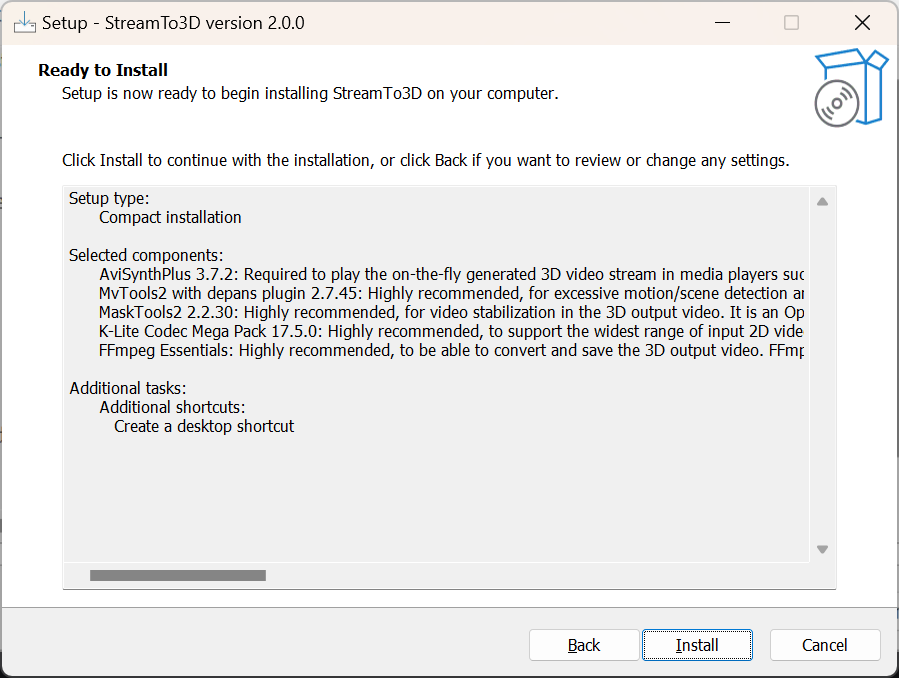
Click "Install" to continue.
The Stream to 3D installer will then download the component specific installers from their respective distributors. Once downloaded, a summary of the installers that will be launched (in turn) is shown:
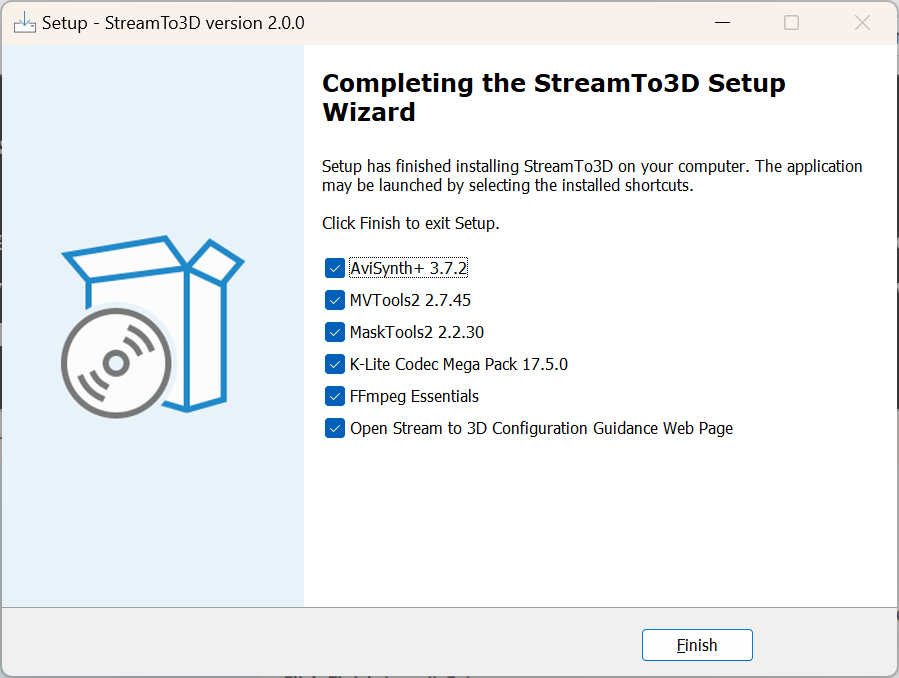
Once these components are installed, you should not have to re-install them unless you have a specific upgrade need. Upgrading Stream to 3D will not automatically require their re-installation.
At the end of the installation process, the setup programme will launch the Stream to 3D Configuration guidance page which will show you how to get the best out of the application in terms of watching your videos in 3D, and also help you check that everything has been setup correctly during installation.
If you accepted the default install location, then the StreamTo3D application can be found at this location:
C:\Program Files\StreamTo3D\StreamTo3D.exe
It is recommended to create a desktop short cut for the application.